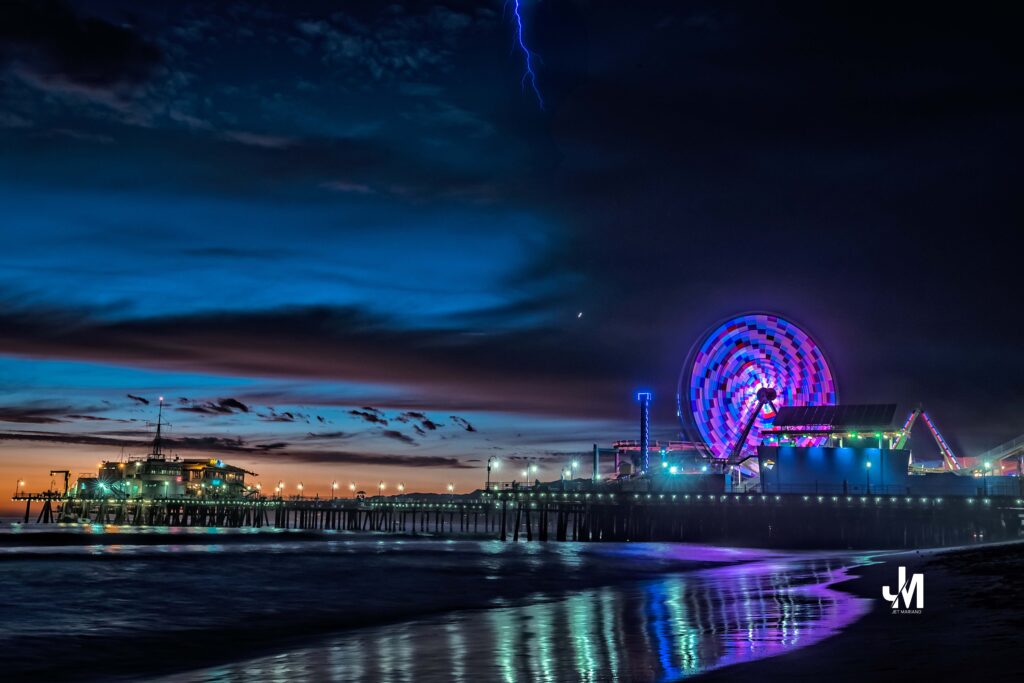
Category: Uncategorized

  • Deploy & Remove Windows Server VM in Azure via RDP

    Automate the full lifecycle of a Windows Server VM in Azure — from deployment to secure RDP access and safe cleanup — using PowerShell.

    Step-by-Step Process:

    1. Azure Login and Subscription Setup
    Connect-AzAccount
    Set-AzContext -SubscriptionId "<your-subscription-id>"
    

    2. Create Resource Group

    New-AzResourceGroup -Name "MyTestRG" -Location "westus"
    

    3. Create Virtual Network and Subnet

    $subnetConfig = New-AzVirtualNetworkSubnetConfig -Name "MySubnet" -AddressPrefix "10.0.1.0/24"
    $vnet = New-AzVirtualNetwork -Name "MyVNet" -ResourceGroupName "MyTestRG" -Location "westus" -AddressPrefix "10.0.0.0/16" -Subnet $subnetConfig
    

    4. Create Network Security Group with RDP Access

    $rdpRule = New-AzNetworkSecurityRuleConfig -Name "Allow-RDP" -Protocol "Tcp" -Direction "Inbound" -Priority 1000 -SourceAddressPrefix "*" -SourcePortRange "*" -DestinationAddressPrefix "*" -DestinationPortRange 3389 -Access "Allow"
    $nsg = New-AzNetworkSecurityGroup -Name "MyNSG" -ResourceGroupName "MyTestRG" -Location "westus" -SecurityRules $rdpRule
    

    5. Create Public IP Address

    $publicIp = New-AzPublicIpAddress -Name "MyPublicIP" -ResourceGroupName "MyTestRG" -Location "westus" -AllocationMethod Static -Sku Basic
    

    6. Create Network Interface

    $subnet = Get-AzVirtualNetworkSubnetConfig -Name "MySubnet" -VirtualNetwork $vnet
    $nic = New-AzNetworkInterface -Name "MyNIC" -ResourceGroupName "MyTestRG" -Location "westus" -SubnetId $subnet.Id -NetworkSecurityGroupId $nsg.Id -PublicIpAddress $publicIp
    

    7. Enter Credentials

    $cred = Get-Credential  # Use a simple username like 'azureadmin'
    

    8. Configure the Server VM

    $vmConfig = New-AzVMConfig -VMName "MyServerVM" -VMSize "Standard_B1s"
    $vmConfig = Set-AzVMOperatingSystem -VM $vmConfig -Windows -ComputerName "MyServerVM" -Credential $cred
    $vmConfig = Set-AzVMSourceImage -VM $vmConfig -PublisherName "MicrosoftWindowsServer" -Offer "WindowsServer" -Skus "2019-Datacenter" -Version "latest"
    $vmConfig = Add-AzVMNetworkInterface -VM $vmConfig -Id $nic.Id
    

    9. Deploy the Server VM

    New-AzVM -ResourceGroupName "MyTestRG" -Location "westus" -VM $vmConfig
    

    10. Connect via Remote Desktop

    1. Launch Remote Desktop (RDP)
    2. Enter the Public IP of your VM
    3. Click “More choices” > “Use a different account”
    4. Log in with:
      • Username: azureadmin
      • Password: the one you specified
    5. Accept the certificate prompt

    ✅ You’re connected!

    Clean Up: Delete Azure Windows Server VM and Resources to Avoid Charges

    To prevent ongoing charges after testing, it’s important to delete all associated resources, including:

    • The Virtual Machine (MyServerVM)
    • Public IP Address
    • Network Interface (MyNIC)
    • Network Security Group (MyNSG)
    • Virtual Network and Subnet (MyVNet, MySubnet)
    • Managed Disk
    • And any other resource under the resource group

    You can remove all of these at once using the following command:

    Remove-AzResourceGroup -Name "MyTestRG" -Force -AsJob
    

    🔗View on GitHub

    © 2012–2025 Jet Mariano. All rights reserved.

    For usage terms, please see the Legal Disclaimer.

  • PowerCLI: Cloning and Deleting VMs

    In addition to monitoring, managing VMs is a key task for administrators. Below are simple PowerCLI commands for cloning and deleting VMs.

    Cloning a VM

    $sourceVM = Get-VM -Name "template-vm"
    $targetHost = Get-VMHost -Name "esxi-host-01"
    $datastore = Get-Datastore -VMHost $targetHost | Where-Object {$_.Name -like "vsanDatastore"}
    
    New-VM -Name "cloned-vm" `
           -VM $sourceVM `
           -VMHost $targetHost `
           -Datastore $datastore `
           -ResourcePool ($targetHost | Get-ResourcePool)

    Deleting a VM

    Get-VM -Name "cloned-vm" | Remove-VM -DeletePermanently -Confirm:$false

    These commands are especially useful for lab environments or when automating template-based VM provisioning.


    Conclusion Use this PowerShell command as part of your regular cluster health checks. When combined with vCenter’s vSAN resync and health dashboards, it gives you the full picture to maintain optimal performance and avoid storage imbalances.

    Stay tuned for a follow-up post on triggering manual rebalancing using RVC (Ruby vSphere Console).

    © 2012–2025 Jet Mariano. All rights reserved.
    For usage terms, please see the Legal Disclaimer.

  • Monitoring vSAN Host Resource Usage with PowerShell

    Introduction: Keeping your vSAN environment healthy and balanced is critical to maintaining performance and avoiding bottlenecks. One of the best ways to stay ahead of potential issues is by proactively monitoring your ESXi host’s CPU and memory usage using PowerShell and PowerCLI. In this post, we’ll walk through a script that provides a quick overview of resource usage across your vSAN cluster — a valuable step before deciding whether to initiate a manual rebalance.


    PowerShell Script to Monitor vSAN Host Resource Usage

    Get-VMHost | Select Name, `
        @{N="CPU Usage MHz"; E={($_.CpuUsageMhz)}}, `
        @{N="Total CPU MHz"; E={($_.CpuTotalMhz)}}, `
        @{N="Memory Usage GB"; E={[math]::Round($_.MemoryUsageGB, 2)}}, `
        @{N="Total Memory GB"; E={[math]::Round($_.MemoryTotalGB, 2)}}

    Sample Output

    Host NameCPU Usage MHzTotal CPU MHzMemory Usage GBTotal Memory GB
    esxi-host-016,405115,168151.94511.71
    esxi-host-027,148115,168199.02511.71
    esxi-host-032,089115,168124.49511.71

    What This Tells You

    • CPU Load: In the sample output, CPU usage is consistently low (<10%), meaning the compute load is healthy.
    • Memory Load: Memory usage ranges from ~24% to ~39%, suggesting room for optimization or upcoming load balancing.

    When to Rebalance

    If you see disproportionate usage — for example, one host consistently nearing 80%+ memory while others are underutilized — it may be time to initiate a vSAN rebalance.

    This script gives you the confidence to proceed with rebalance safely during production hours, especially when CPU usage is low and no resync activities are ongoing.


    Conclusion Use this PowerShell command as part of your regular cluster health checks. When combined with vCenter’s vSAN resync and health dashboards, it gives you the full picture to maintain optimal performance and avoid storage imbalances.

    Stay tuned for a follow-up post on triggering manual rebalancing using RVC (Ruby vSphere Console).

    © 2012–2025 Jet Mariano. All rights reserved.
    For usage terms, please see the Legal Disclaimer.

  • The Importance of SIEM, APM, and Privileged Access Management in Modern IT Security

    Introduction

    In today’s digital landscape, cybersecurity is more than just antivirus software and firewalls—it’s about layered security across endpoints, networks, identities, and applications. With cyber threats evolving daily, businesses must adopt proactive monitoring and defense mechanisms. This is where Security Information and Event Management (SIEM), Application Performance Monitoring (APM), and Privileged Access Management (PAM) come into play.

    This guide will cover the importance of these tools, best practices, and how to integrate them with enterprise-grade security solutions like Cisco MX, Cisco Umbrella, CyberArk, and DUO.


    1. Security Information and Event Management (SIEM)

    SIEM solutions aggregate, analyze, and correlate security data from multiple sources, providing real-time visibility into potential threats.

    Why SIEM Matters:

    • Centralized Log Management: Collects logs from firewalls, servers, endpoints, and applications.
    • Threat Detection: Uses AI and correlation rules to identify anomalies.
    • Incident Response: Sends alerts when suspicious activity is detected.
    • Compliance: Helps meet PCI-DSS, HIPAA, SOX, and Hi-Trust requirements.

    Recommended SIEM Solutions:

    Splunk – Enterprise-level security analytics.
    Microsoft Sentinel – Cloud-native SIEM for Microsoft ecosystems.
    DataDog – Lightweight SIEM with cloud integrations.
    Elastic SIEM – Open-source alternative.


    2. Application Performance Monitoring (APM)

    APM tools monitor application behavior, uptime, and response times to ensure optimal performance and detect security anomalies.

    Why APM Matters:

    • Proactive Threat Identification: Detects application-layer attacks.
    • Performance Optimization: Reduces downtime and enhances user experience.
    • Integration with SIEM: Provides deeper insights into suspicious activity.

    Recommended APM Tools:

    Datadog APM – Cloud monitoring with SIEM integration.
    Dynatrace – AI-powered full-stack monitoring.
    AppDynamics – Deep visibility into application health.
    SolarWinds APM – Cost-effective solution for IT teams.


    3. Privileged Access Management (PAM) & Multi-Factor Authentication (MFA)

    Privileged accounts are the biggest attack targets. Implementing PAM with MFA ensures that admin accounts are secure.

    Why PAM & MFA Matter:

    • Least Privilege Enforcement: Restricts admin access to critical systems.
    • Prevents Credential Theft: Limits exposure to compromised passwords.
    • Logs & Audits: Tracks administrative actions for compliance.

    Best Practices:

    ✅ Use CyberArk for managing privileged accounts.
    Require MFA (DUO, Microsoft Authenticator, YubiKey).
    Separate Personal & Admin Accounts:

    • Personal Account → No admin rights.
    • Admin Account → Requires 15-min auto MFA renewal (best practice in enterprises like PIMCO & CNB).

    4. Endpoint Protection with XDR

    Extended Detection & Response (XDR) provides real-time protection across endpoints, emails, and cloud workloads.

    Why XDR Matters:

    • AI-powered Threat Detection: Blocks malware, ransomware, and phishing attempts.
    • Zero Trust Security: Ensures only verified endpoints can access corporate networks.
    • SIEM Integration: Sends endpoint logs for analysis.

    Recommended XDR Solutions:

    Microsoft Defender XDR – Built-in for Microsoft environments.
    CrowdStrike Falcon – AI-driven endpoint security.
    SentinelOne XDR – Autonomous threat response.


    5. Network Perimeter Security: Cisco MX & Cisco Umbrella

    Firewalls alone are not enough. Organizations need cloud-based DNS security & perimeter defense.

    Why Cisco MX & Umbrella Matter:

    • Protects Against DNS-layer Attacks (e.g., phishing & malware sites).
    • Prevents Data Exfiltration (blocks malicious domains before connections happen).
    • Works with SIEM & XDR (for full security visibility).

    Best Practices:

    Deploy Cisco MX for firewall + SD-WAN security.
    Use Cisco Umbrella to block malicious internet traffic.
    Segment Networks to isolate critical resources.


    Conclusion: Security Requires Layered Defense

    Cybersecurity isn’t just about one tool—it’s about a layered approach:

    1. SIEM for centralized monitoring.
    2. APM for app performance & security insights.
    3. PAM & MFA for privileged access control.
    4. XDR for endpoint protection.
    5. Cisco MX & Umbrella for perimeter security.

    Implementing these tools reduces risk, improves compliance, and protects IT infrastructure from modern threats.


    Next Steps:

    ✅ Read our Step-by-Step Guides for each tool (coming soon).
    ✅ Explore PowerShell automation for security hardening.
    ✅ Contact us for enterprise security consulting (if applicable).

    🔗 Stay tuned for more guides on securing your IT infrastructure!


    © 2012–2025 Jet Mariano. All rights reserved.
    For usage terms, please see the Legal Disclaimer.

  • The Importance of SIEM and Best Practices in Enterprise Security

    Introduction

    In today’s cybersecurity landscape, Security Information and Event Management (SIEM) plays a crucial role in protecting organizations from threats. A robust SIEM system centralizes security monitoring, aggregates logs, detects anomalies, and helps security teams respond to incidents in real time. However, SIEM is only one piece of a comprehensive security framework. To maximize its effectiveness, it should be integrated with other advanced security solutions such as APM tools, privileged access management (CyberArk), multi-factor authentication (Duo), and endpoint detection and response (XDR).

    The Role of SIEM in Security

    A SIEM system provides the following key functions:

    • Centralized Log Management: Aggregates and normalizes logs from different sources.
    • Real-Time Threat Detection: Uses correlation rules and AI-driven analytics to detect anomalies.
    • Incident Response: Helps security teams investigate alerts and mitigate threats.
    • Compliance & Auditing: Meets regulatory requirements for PCI-DSS, HIPAA, SOX, and Hi-Trust.

    Recommended SIEM Solutions:

    1. Splunk – Market leader in log analysis and threat detection.
    2. IBM QRadar – Integrates well with enterprise IT infrastructure.
    3. Microsoft Sentinel – Cloud-based SIEM with strong integration into Microsoft’s security ecosystem.
    4. LogRhythm – Offers automation and advanced analytics.

    Integrating APM Tools for Security & Performance Monitoring

    APM (Application Performance Monitoring) tools work alongside SIEM to ensure application security and performance. APM tools help in:

    • Detecting performance bottlenecks before they become security vulnerabilities.
    • Correlating security events with application behavior.
    • Enhancing log visibility for forensic analysis.

    Recommended APM Tools:

    1. Datadog – Offers monitoring for applications, logs, and security events.
    2. Dynatrace – AI-powered analytics for anomaly detection.
    3. New Relic – Provides application telemetry and distributed tracing.
    4. AppDynamics – Deep visibility into application performance.
    5. SolarWinds – A cost-effective alternative with performance monitoring capabilities.

    The Importance of CyberArk for Privileged Access Management

    Why Privileged Access Management (PAM) Matters? Privileged accounts are the highest-value targets for cybercriminals. CyberArk provides:

    • Credential Vaulting – Securely stores and rotates privileged credentials.
    • Session Isolation – Prevents direct access to critical systems.
    • Least Privilege Enforcement – Ensures users only have access to what they need.
    • Audit Logging – Records privileged activity for compliance.

    Best Practices: Personal vs. Admin Accounts with Duo MFA

    Many enterprises make the mistake of using a single account for both personal and administrative tasks, increasing security risks. Best practices recommend:

    • Personal Account for Day-to-Day Use:
      • No elevated privileges.
      • Limited access to sensitive data.
      • MFA enforced for login.
    • Admin Account for Privileged Tasks:
      • Protected by Duo MFA with time-based authentication every 15 minutes.
      • Password resets automatically every 15 minutes (e.g., CyberArk enforcement).
      • No direct internet access (restricted browsing and email access).

    Endpoint Protection with XDR

    Endpoints are the most vulnerable attack surface. Extended Detection and Response (XDR) solutions provide:

    • Advanced Threat Detection: AI-driven monitoring for malware, ransomware, and behavioral anomalies.
    • Automated Response: Blocks and isolates compromised endpoints.
    • Integration with SIEM & SOAR: Security teams can automate investigations and threat responses.

    Recommended XDR Solutions:

    1. Microsoft Defender XDR – Natively integrates with Microsoft’s security suite.
    2. CrowdStrike Falcon XDR – Lightweight agent with cloud-native capabilities.
    3. SentinelOne – AI-driven threat hunting.
    4. Palo Alto Cortex XDR – Strong perimeter and endpoint defense.

    Perimeter Security: Cisco MX & Cisco Umbrella

    Perimeter Security & Zero Trust Architecture A properly configured perimeter ensures that malicious traffic is blocked before it reaches endpoints or internal servers.

    • Cisco Meraki MX – Next-generation firewall with content filtering, VPN, and IPS/IDS.
    • Cisco Umbrella – Cloud-delivered security that blocks malicious domains and phishing attempts at the DNS level.

    Conclusion

    An effective security framework requires a layered defense strategy that integrates SIEM, APM, PAM, MFA, XDR, and Perimeter Security.

    By implementing these solutions, organizations ensure: ✔ Proactive threat detection and responseRegulatory compliance (PCI-DSS, HIPAA, SOX, Hi-Trust)Minimized attack surfaceReduced impact of security breaches

    Cybersecurity is not just about having tools—it’s about implementing the right tools, enforcing best practices, and continuously monitoring for evolving threats. The Force is always within you, but having the right technology stack ensures that you are always prepared for battle.

    © 2012–2025 Jet Mariano. All rights reserved.
    For usage terms, please see the Legal Disclaimer.

  • Automating User Offboarding in Microsoft 365 using PowerShell

    When a team member leaves your organization, it’s critical to offboard them securely and efficiently. Here’s a step-by-step PowerShell-based offboarding process that covers:

    ✅ Disabling the user in Local Active Directory
    ✅ Disabling the Azure AD account
    ✅ Removing all licenses
    ✅ Disabling MFA
    ✅ Converting the mailbox to a shared mailbox
    ✅ Granting full mailbox access to the supervisor


    Step 1 – Disable the User in Local Active Directory

    powershellCopyEditDisable-ADAccount -Identity jdoe
    

    Step 2 – Disable Azure AD User Account

    powershellCopyEditConnect-AzAccount
    Set-AzureADUser -ObjectId [email protected] -AccountEnabled $false
    

    Step 3 – Remove Microsoft 365 Licenses

    powershellCopyEditConnect-MgGraph -Scopes "User.ReadWrite.All", "Directory.ReadWrite.All"
    $UserId = (Get-MgUser -UserId [email protected]).Id
    Set-MgUserLicense -UserId $UserId -AddLicenses @() -RemoveLicenses @("tenant:licenseGUID")
    

    📝 Replace tenant:licenseGUID with the appropriate license GUID assigned to your tenant.


    Step 4 – Disable MFA

    powershellCopyEditConnect-MsolService
    Set-MsolUser -UserPrincipalName [email protected] -StrongAuthenticationRequirements @()
    

    Step 5 – Convert Mailbox to Shared

    powershellCopyEditConnect-ExchangeOnline
    Set-Mailbox -Identity [email protected] -Type Shared
    

    Step 6 – Grant Supervisor Full Access to the Shared Mailbox

    powershellCopyEditAdd-MailboxPermission -Identity [email protected] -User [email protected] -AccessRights FullAccess -InheritanceType All
    

    Summary

    Using PowerShell for offboarding saves time and ensures consistency. Always document changes and communicate them to HR or management for final closure.

    © 2012–2025 Jet Mariano. All rights reserved.
    For usage terms, please see the Legal Disclaimer.

  • How to Prevent Windows 10 Updates and Manage Remote Sessions Without Rebooting

    Introduction
    In many enterprise environments, automatic Windows 10 updates can disrupt critical applications. This guide provides step-by-step instructions on preventing updates, forcefully logging off users without rebooting, and managing remote machines efficiently using PowerShell, Command Prompt, and PsExec.


    Step 1: Prevent Windows 10 from Installing Updates

    Option 1: Disable Windows Update Service (Quick & Easy)

    1. Open Run (Win + R), type services.msc, and press Enter.
    2. Locate Windows Update in the list.
    3. Right-click and select Properties.
    4. Set Startup type to Disabled.
    5. Click Stop, then Apply and OK.

    💡 This prevents Windows from automatically downloading and installing updates.

    Option 2: Use Group Policy to Block Updates

    1. Open Run (Win + R), type gpedit.msc, and press Enter.
    2. Navigate to:Computer Configuration → Administrative Templates → Windows Components → Windows Update
    3. Double-click Configure Automatic Updates.
    4. Select Disabled, then click Apply and OK.

    Option 3: Delete Pending Updates Using PowerShell

    If Windows updates are already downloaded and pending installation:

    Stop-Service wuauserv -Force
    Stop-Service bits -Force
    Remove-Item -Path "C:\Windows\SoftwareDistribution\Download\*" -Recurse -Force
    Start-Service wuauserv
    Start-Service bits

    💡 This clears pending updates, preventing them from being installed.


    Step 2: Completely Cancel Pending Updates and Remove Notification

    Option 1: Clear the Update Queue from Windows Update

    If stopping services alone doesn’t remove pending updates, run this in PowerShell:

    Remove-Item -Path "C:\Windows\WinSxS\pending.xml" -Force -ErrorAction SilentlyContinue
    Remove-Item -Path "C:\Windows\SoftwareDistribution\*" -Recurse -Force

    💡 This removes Windows’ record of pending updates.

    Option 2: Flush Update Status from Windows Registry

    If the notification persists, remove any registry traces of pending updates:

    Remove-ItemProperty -Path "HKLM:\SOFTWARE\Microsoft\Windows\CurrentVersion\WindowsUpdate\Auto Update" -Name "RebootRequired" -ErrorAction SilentlyContinue
    Remove-ItemProperty -Path "HKLM:\SOFTWARE\Microsoft\Windows\CurrentVersion\WindowsUpdate\Services\Pending" -ErrorAction SilentlyContinue

    💡 This tells Windows that no updates are waiting for a reboot.

    Option 3: Reset Windows Update Components

    Run the following commands in CMD (Admin):

    net stop wuauserv
    net stop cryptsvc
    net stop bits
    net stop msiserver
    ren C:\Windows\SoftwareDistribution SoftwareDistribution.old
    ren C:\Windows\System32\catroot2 Catroot2.old
    net start wuauserv
    net start cryptsvc
    net start bits
    net start msiserver

    💡 This resets Windows Update components so the system forgets pending updates.

    Force Windows to Acknowledge No Updates Are Pending

    Run:

    wuauclt.exe /resetauthorization /detectnow

    or

    gpupdate /force

    💡 This forces Windows to recheck update policies and clear any pending update flags.

    Reboot Without Installing Updates

    To make sure Windows doesn’t install the update after a reboot, run:

    shutdown /r /t 0

    💡 This reboots without triggering pending updates.


    Step 3: Remotely Log Off a User Without Rebooting

    Option 1: Using PowerShell (Requires Admin Privileges)

    1. Open PowerShell as Administrator.
    2. Run:query user /server:RemotePCName
    3. Identify the Session ID of the user you want to log off.
    4. Log them off with:logoff <SessionID> /server:RemotePCName

    💡 This logs off the user without shutting down the VM.

    Option 2: Using PsExec (If PowerShell Remoting is Blocked)

    1. Download PsExec.
    2. Extract it to C:\PSEXEC.
    3. Open Command Prompt as Administrator.
    4. Navigate to the PsExec folder:cd C:\PSEXEC
    5. Check who is logged in:psexec \RemotePCName -u Administrator -p YourPassword query session
    6. Log off the user:psexec \RemotePCName -u Administrator -p YourPassword logoff <SessionID>

    💡 This method works even if WinRM and RPC are blocked.

    Option 3: Using Command Prompt (WMI-Based Logoff)

    If PsExec fails, try using WMI:

    wmic /node:RemotePCName /user:Administrator /password:YourPassword computersystem where name="RemotePCName" call Win32Shutdown 4

    💡 This forces all logged-in users to log off without rebooting! 🚀


    Step 4: Ensure Remote Management Works for Future Use

    Once you regain access, run this on the remote VM to prevent future lockouts:

    Enable-PSRemoting -Force
    Set-Service -Name RemoteRegistry -StartupType Automatic
    New-NetFirewallRule -DisplayName "Allow RDP and RPC" -Direction Inbound -Protocol TCP -LocalPort 135,3389 -Action Allow

    💡 This allows future remote PowerShell and PsExec commands to execute successfully.


    Conclusion

    By following this guide, you can prevent Windows 10 from automatically updating, remotely log off users without rebooting, and ensure seamless remote access to your systems. This is critical for IT environments where stability is a priority.

    Let me know if you need additional troubleshooting steps!

    © 2012–2025 Jet Mariano. All rights reserved.
    For usage terms, please see the Legal Disclaimer.

  • Mastering AZ-104: Essential Labs, PowerShell, and Tricky Concepts

    Introduction

    Passing the AZ-104: Microsoft Azure Administrator exam requires hands-on experience with Azure services. This guide provides essential labs, PowerShell/CLI commands, and explanations of tricky concepts to help you prepare efficiently.


    1️⃣ Compute (Virtual Machines & Availability)

    Lab: Deploy a VM using PowerShell

    New-AzVM -ResourceGroupName "TestRG" -Name "JetVM" -Location "EastUS" -Size "Standard_B2s" -Credential (Get-Credential)

    Key Concepts:

    • VM Backup & Disaster Recovery → Use Azure Backup Vault.
    • High Availability → Deploy VMs in Availability Zones.

    2️⃣ Networking (VNETs, NSGs, VPNs, Peering)

    Lab: Create a Virtual Network with Subnets and an NSG

    New-AzVirtualNetwork -ResourceGroupName "TestRG" -Name "JetVNet" -Location "EastUS" -AddressPrefix "10.1.0.0/16"

    Key Concepts:

    • VNet Peering vs VPN Gateway:
      • VNet Peering → Low latency, same region.
      • VPN Gateway → Cross-region, IPSec tunnels.

    3️⃣ Storage (Blob, Files, Disks, Backups)

    Lab: Create a Storage Account

    New-AzStorageAccount -ResourceGroupName "TestRG" -Name "jetstorage01" -SkuName "Standard_LRS" -Location "EastUS"

    Key Concepts:

    • Storage Tiers:
      • Hot → Frequent access
      • Cool → Infrequent access
      • Archive → Long-term storage, lowest cost

    4️⃣ Identity & Access Management (IAM, RBAC, MFA)

    Lab: Assign RBAC Role to a User

    New-AzRoleAssignment -SignInName "<user-email>" -RoleDefinitionName "Reader" -Scope "/subscriptions/your-subscription-id"

    Key Concepts:

    • RBAC vs Conditional Access:
      • RBAC → Controls Azure resources.
      • Conditional Access → Controls sign-in policies (MFA, device compliance).

    5️⃣ Monitoring & Security (Azure Monitor, Defender for Cloud)

    Lab: Set Up Alerts for High CPU Usage

    New-AzMetricAlertRule -ResourceGroup "TestRG" -Name "CPUAlert" -TargetResourceId "/subscriptions/your-subscription-id/resourceGroups/TestRG/providers/Microsoft.Compute/virtualMachines/JetVM" -MetricName "Percentage CPU" -Threshold 80 -Operator GreaterThan -WindowSize 5m -EvaluationFrequency 1m

    Key Concepts:

    • Azure Monitor vs Log Analytics:
      • Azure Monitor → Collects logs + metrics.
      • Log Analytics → Queries & analyzes logs.

    🚀 Final Exam Prep Tips

    Hands-on practice in Azure Free Tier + Pluralsight Labs. ✅ Take full-length practice tests (MeasureUp, Tutorials Dojo). ✅ Master PowerShell/CLI for automation scenarios. ✅ Simulate exam conditions (time yourself, no distractions).


    📌 Conclusion

    By following these structured labs and understanding key concepts, you’ll be well-prepared to ace AZ-104. Keep practicing, and best of luck on your certification journey! 🚀

    📝 Want more Azure tips? Follow my blog for more deep dives into Microsoft certifications and cloud solutions!

  • Securing Remote Work: How to Protect Your Computer When Using VPN and RDP

    With the rise of remote work and hybrid environments, many IT professionals access their work machines using VPN and RDP (Remote Desktop Protocol). While this setup provides flexibility, it also presents security risks—especially when working in a cross-domain network or dealing with multiple IT teams.

    As an IT professional with experience in Citrix VDI for banking and enterprise security, I’ve implemented best practices to ensure my remote work setup is secure against unauthorized access. Here’s how you can do the same.


    🔍 Understanding the Security Risks of VPN + RDP

    A typical work-from-home setup involves:
    ✅ Connecting to a corporate VPN (e.g., Cisco AnyConnect, Fortinet, or Palo Alto GlobalProtect)
    ✅ Using RDP (Remote Desktop Protocol) to access your work machine

    However, if not properly secured, this configuration could expose your computer to:
    Unwanted access from other IT personnel within the VPN network
    Brute-force RDP attacks if port 3389 is open
    Drive redirection vulnerabilities, where attackers can view or copy your files
    Misconfigured VPN routes, allowing unauthorized users to connect to your machine

    To prevent these risks, I follow a strict security protocol when using VPN and RDP.


    🛡️ Step-by-Step Guide: How to Secure Your Work Computer When Using VPN + RDP

    1️⃣ Enforce Network Level Authentication (NLA) for RDP

    Network Level Authentication (NLA) ensures that only authenticated users can initiate RDP sessions, blocking unauthorized login attempts.

    How to enable NLA:

    1. Open System Properties (sysdm.cpl)
    2. Go to the Remote tab
    3. Check “Allow connections only from computers running Remote Desktop with Network Level Authentication”
    4. Click Apply > OK

    🔹 Why it matters? Without NLA, an attacker can initiate an RDP connection and attempt brute-force attacks before authentication.


    2️⃣ Restrict RDP Access to VPN-Only IP Ranges

    By default, Windows allows RDP connections from any network. To prevent unauthorized access, restrict RDP connections only to your VPN subnet.

    How to block all external RDP access except your VPN subnet:

    1. Open Windows Defender Firewall
    2. Navigate to Advanced Settings > Inbound Rules
    3. Find Remote Desktop – User Mode (TCP-In)
    4. Right-click > Properties > Scope
    5. Under Remote IP Address, choose These IP addresses
    6. Add only your VPN subnet (e.g., 172.16.104.0/24)
    7. Click Apply > OK

    🔹 Why it matters? Even if someone inside your network tries to RDP into your machine, their connection will be blocked unless they are in the allowed VPN range.


    3️⃣ Disable Drive Redirection in RDP

    RDP allows drive redirection by default, which means that if an attacker gains access, they can browse and copy files from your local machine.

    How to disable RDP drive redirection:

    1. Open Group Policy Editor (gpedit.msc)
    2. Navigate to: pgsqlCopy codeComputer Configuration > Administrative Templates > Windows Components > Remote Desktop Services > Remote Desktop Session Host > Device and Resource Redirection
    3. Find “Do not allow drive redirection”
    4. Set it to Enabled
    5. Click Apply > OK

    🔹 Why it matters? This prevents your local drives from being exposed during RDP sessions.


    4️⃣ Monitor RDP Access Logs for Unauthorized Connections

    Since you’re the only one RDPing into your machine, it’s important to monitor login attempts to detect any suspicious activity.

    How to check RDP login logs in Event Viewer:

    1. Open Event Viewer (eventvwr.msc)
    2. Navigate to: nginxCopy codeWindows Logs > Security
    3. Look for:
      • Event ID 4624 (successful logins)
      • Event ID 4625 (failed logins)

    🔹 Why it matters? If you see failed logins from unknown IPs, someone may be trying to brute-force your RDP connection.


    5️⃣ Disable Remote Access for Unauthorized Users

    IT admins in your network may have elevated privileges, allowing them to remotely manage your system. To block unauthorized admin access, you can disable remote administration tools.

    How to remove unauthorized administrators:

    1. Open PowerShell as Administrator
    2. Run the following command to list local administrators: powershellCopy codenet localgroup Administrators
    3. If you see any unauthorized users, remove them: powershellCopy codenet localgroup Administrators "DOMAIN\Username" /delete

    🔹 Why it matters? Even with VPN access, they won’t be able to take control of your system.


    💡 Alternative: Using Citrix VDI Instead of RDP for Secure Access

    Since I’ve worked with Citrix Virtual Desktop Infrastructure (VDI) for banks, I know that virtual desktops eliminate most RDP risks. Instead of exposing RDP ports, a Citrix setup allows users to access their workstations securely via a web portal.

    Why Citrix VDI is better than RDP over VPN:
    🚀 No direct RDP connection – Reduces attack surface
    🚀 User sessions are isolated – Prevents unauthorized access
    🚀 Secured with multi-factor authentication (MFA) – Extra security

    If your organization supports it, using Citrix or Windows Remote Desktop Web Access (RD Web) is a safer alternative.


    🔎 Final Thoughts

    Working remotely via VPN + RDP is convenient, but it must be properly secured to prevent unauthorized access and IT snooping. By implementing:
    Network Level Authentication (NLA)
    Restricting RDP to VPN-only IP ranges
    Disabling drive redirection
    Monitoring login logs
    Removing unauthorized admin users

    You can ensure that your remote work environment remains private and secure.

    🔹 If you’re managing an enterprise network, consider moving to Citrix VDI or Windows RD Web for an extra layer of security.

    💡 Have questions about securing your remote access? Drop a comment below!

  • Cross-Tenant Sync and Multiple Teams Profiles: Why It Happens & How to Fix It

    In modern IT environments, Cross-Tenant Synchronization (CTS) is essential for organizations managing multiple tenants in Microsoft Entra ID. It simplifies user provisioning, automates updates, and enhances collaboration across different organizations. However, one common challenge in CTS setups is the creation of multiple Microsoft Teams profiles instead of maintaining a single unified identity.

    This issue occurs when organizations sync users between two or more tenants, but instead of retaining one Teams profile, users end up with duplicate profiles—causing confusion and workflow disruptions.


    Why Do Users Get Multiple Teams Profiles?

    There are several reasons why users might experience duplicate Teams profiles in a CTS environment. Below are the most common causes and recommended solutions.


    1. B2B Collaboration vs. B2B Direct Connect

    🔹 B2B Collaboration (traditional guest access) creates separate identities in each tenant, resulting in multiple Teams profiles.

    🔹 B2B Direct Connect, on the other hand, allows seamless collaboration without generating separate guest accounts, helping to unify user identities across tenants.

    Solution: Enable B2B Direct Connect instead of B2B Collaboration to consolidate Teams profiles.

    📌 Reference: B2B Direct Connect Overview


    2. UPN and Email Address Mismatch

    🔹 If a user’s User Principal Name (UPN) and email address don’t match across tenants, Teams may create a duplicate profile instead of linking the user’s existing profile.

    🔹 Microsoft recommends matching UPNs with the primary SMTP address to ensure identity consistency across Entra ID and Teams.

    Solution: Align UPNs and primary email addresses across all tenants to avoid duplicate profiles.

    📌 Reference: Plan and Troubleshoot UPN Changes in Microsoft Entra ID


    3. Guest vs. Member Role in CTS

    🔹 When users are synced into another tenant, they can be assigned as either Members or Guests.

    🔹 If users are created as Guests, Teams may treat them as external users, resulting in a separate Teams profile.

    Solution: Configure Cross-Tenant Sync to assign synced users as Members instead of Guests to ensure a unified profile.

    📌 Reference: Cross-Tenant Synchronization Overview


    4. Microsoft Teams Cache Issues

    🔹 In some cases, duplicate profiles persist due to cached credentials in Microsoft Teams.

    Solution: Clearing the Teams cache can force Teams to refresh user profiles, which may help resolve this issue.

    📌 How to Clear Microsoft Teams Cache:

    1. Windows:
      • Close Microsoft Teams.
      • Open Run (Win + R), type %appdata%\Microsoft\Teams, and hit Enter.
      • Delete all files inside the Teams folder.
      • Restart Teams.
    2. Mac:
      • Quit Teams.
      • Open Finder > Go > Go to Folder and type ~/Library/Application Support/Microsoft/Teams.
      • Delete all contents in the Teams folder.
      • Restart Teams.
    3. Mobile (iOS/Android):
      • Go to Settings > Apps > Microsoft Teams and clear cache/storage.

    Final Thoughts

    The multiple Teams profiles issue in Cross-Tenant Synchronization setups is primarily caused by B2B configuration settings, UPN mismatches, and role assignments.

    By implementing:
    B2B Direct Connect,
    UPN and email address alignment,
    Assigning synced users as Members instead of Guests,
    Clearing Microsoft Teams cache when needed,

    Organizations can reduce duplicate profiles in Microsoft Teams and create a seamless collaboration experience across tenants.

    As Cross-Tenant Sync evolves, IT administrators should proactively monitor user identity behavior across tenants and leverage Microsoft Entra ID best practices to ensure a smooth and unified user experience.

error: Content is protected !!