Weekly blog series featuring real-world IT solutions, cloud security strategies, automation projects, and development tutorials to help professionals build resilient, scalable environments.
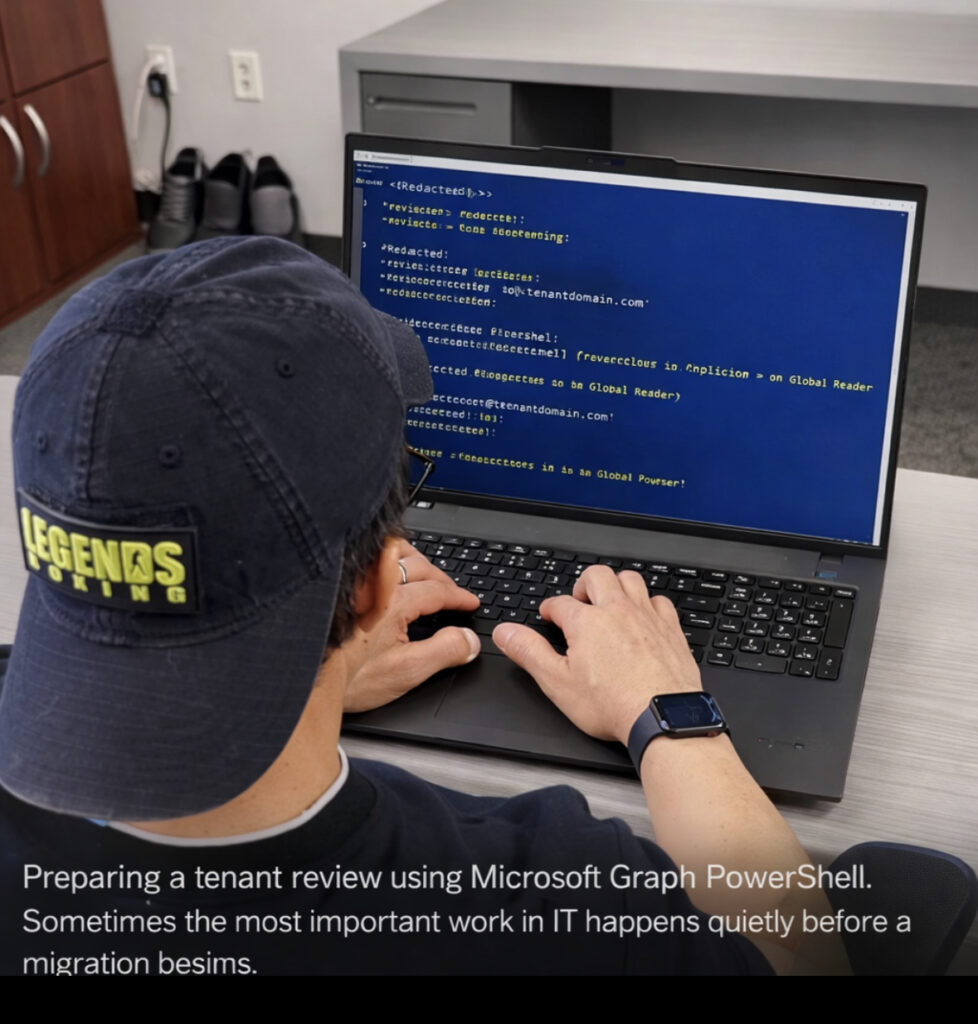
During Microsoft 365 tenant reviews or migration preparation, it is common to create a temporary read-only account so engineers can safely inspect the environment.
Instead of granting administrative permissions, the recommended approach is to assign the Global Reader role. This role provides visibility into configuration, policies, and identity structure while preventing any changes to production resources.
This method is frequently used during tenant consolidation, acquisitions, or domain transitions where a review of the existing environment is required before cutover.
The following PowerShell example demonstrates how to create a temporary user and assign the Global Reader role using Microsoft Graph PowerShell.
1. Create the Entra Account
Creates a temporary user account for tenant inspection.
Providing a temporary Global Reader account allows migration engineers to review the tenant safely. The role grants visibility into identity, security policies, and configuration without allowing any changes.
This approach reduces risk while ensuring the incoming team can properly analyze the environment before migration activities begin.
Since day one of my range training, I’ve applied the same principle: train under pressure, not comfort. Even during Mozambique drills, the objective was never speed alone — it was composure under stress. Control before movement. Precision before power.
Preparation is not adrenaline. It is discipline.
In IT, preparation means documenting before deployment. Testing before migration. Backing up before cutover. Monitoring before failure.
You don’t wait for systems to break before you get serious.
In boxing, preparation means conditioning before sparring. Footwork before combinations. Defense before offense. Breath control before power.
You don’t throw wild punches and hope for the best.
At the range, preparation means stance before speed. Sight alignment before trigger press. Breathing before movement. Repetition before confidence.
Training under controlled pressure builds calm execution.
And photography?
You don’t take photos. You create them.
Creation requires preparation.
I return to the same location again and again. I walk the perimeter. I study the light. I wait for clouds to move. I adjust angles. I look for the right vantage point.
Inspiration is not random. It arrives when preparation meets patience.
Whether it’s Azure migrations, domain merges, sparring rounds, drill work, or landscape photography — the principle never changes:
Calm preparation defeats chaotic reaction.
Most people react to pressure. Few prepare for it.
Preparation is not paranoia. It is responsibility.
Most operational failures are not caused by lack of skill. They are caused by loss of composure.
Whether responding to a production outage, executing a change request, stepping into a boxing round, or running controlled drills with a Ruger PC Carbine, Stag Arms platform, or S&W M&P AR15 556, the principle remains the same: calm execution determines accuracy.
Different platforms. Different recoil patterns. Different weight distribution. Same requirement.
Control before action.
Main Body
In IT, panic compounds incidents. Engineers who rush misread logs, skip validation steps, and introduce secondary failures. The most effective operators slow down first.
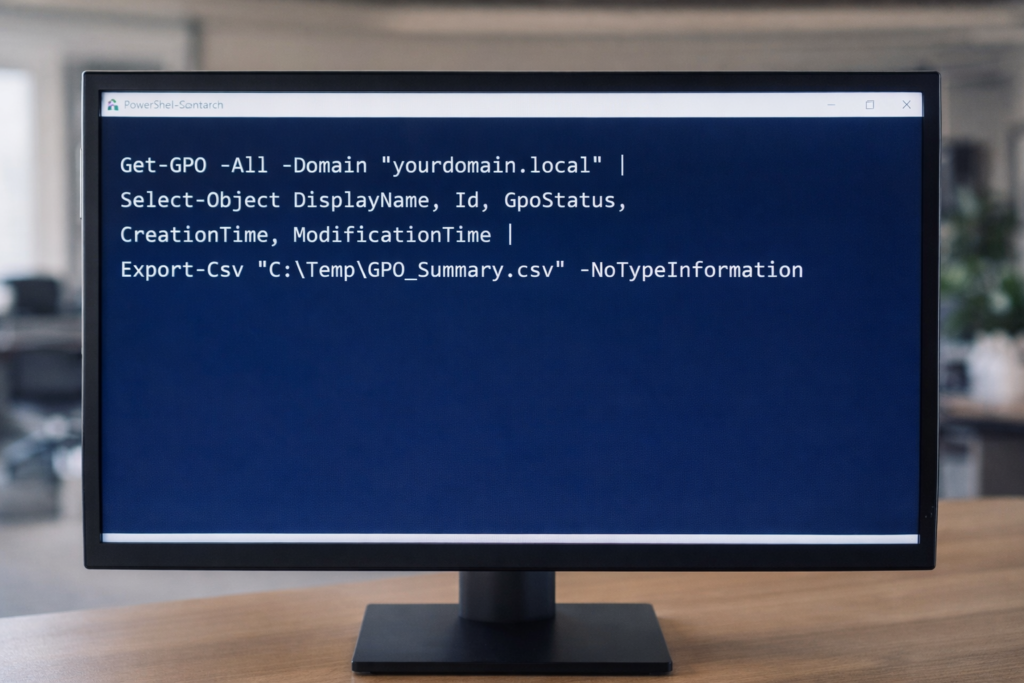
PowerShell export of Active Directory Group Policy Objects using native Get-GPO and Export-Csv commands to establish a baseline inventory before infrastructure changes.
Maintaining visibility into Group Policy Objects (GPOs) is critical before domain consolidation, tenant migration, or infrastructure modernization.
Below are seven native PowerShell commands used to generate a full GPO inventory, validate configurations, and export audit-ready reports.
All commands use built-in GroupPolicy modules — no third-party tools required.
1. Export GPO Summary Inventory
Exports high-level metadata for all GPOs in the domain.
In those airport chairs between flights, life felt like motion without pause. Four states, four plants, frame relay lines, T1 circuits, Exchange servers, and long hotel nights before Y2K. Most weeks were seven days long, and some days stretched 18 hours. Somewhere between Tucson and LAX, U2 played through my headphones — “With or Without You” and “I Still Haven’t Found What I’m Looking For.” I did not know it then, but God was stretching me for something bigger.
Excerpt
“We cannot expect life to be a first-class experience unless we face some first-class challenges.”
“Some suffering comes because we believe and because God loves us.”
— Elder Neal A. Maxwell
Intro
Some challenges come from mistakes. Some come simply because mortality is hard. But some challenges come because God trusts us enough to refine us.
Elder Neal A. Maxwell taught that suffering is not random. It is purposeful. It is measured. It is sometimes the very evidence that God is shaping us for something eternal.
Not all pain means something is wrong. Sometimes pain means something sacred is happening.
Notes from Elder Maxwell
Elder Maxwell described three forms of suffering:
Suffering from sin and poor choices — the consequences of mistakes that teach humility and accountability.
Suffering as part of mortal life — illness, aging, loss, and the ordinary weight of living in a fallen world.
The highest form of suffering — suffering that comes because we believe and because God loves us. This suffering stretches the soul and prepares us for eternal capacity.
He taught that discipleship does not remove difficulty — it often deepens refinement.
Life’s greatest tests may include:
affluence
loss of health
loss of loved ones
loneliness
responsibility
waiting on the Lord
These are not punishments. They are tests of trust.
Perspective
In infrastructure engineering, systems are pushed under controlled stress before deployment. Not to break them — but to prove they can endure.
Spiritual life works the same way.
God does not stretch the soul to destroy it. He stretches it so it can carry more light, more responsibility, and more compassion.
The challenge is not merely surviving hardship.
The challenge is not shrinking during hardship.
Practice (Today, Not Someday)
Name the challenge honestly Instead of asking “Why me?” ask “What is this preparing me for?”
Trust the timing of understanding Some experiences only make sense after endurance.
Hold your ground spiritually Faithfulness during confusion is itself a form of worship.
Final Reflection
Elder Maxwell closed with a reminder about accountability.
He said that while he was accountable for what he taught, we are accountable for what we have heard.
Challenges are not interruptions to discipleship. They are the proving ground of discipleship.
We cannot always control suffering. But we can decide whether we will shrink or stand.
And sometimes, standing is victory enough.
Pocket I’m Keeping
“First-class challenges prepare us for first-class discipleship.”
What I Hear Now
“The highest form of suffering is not punishment — it is preparation.”
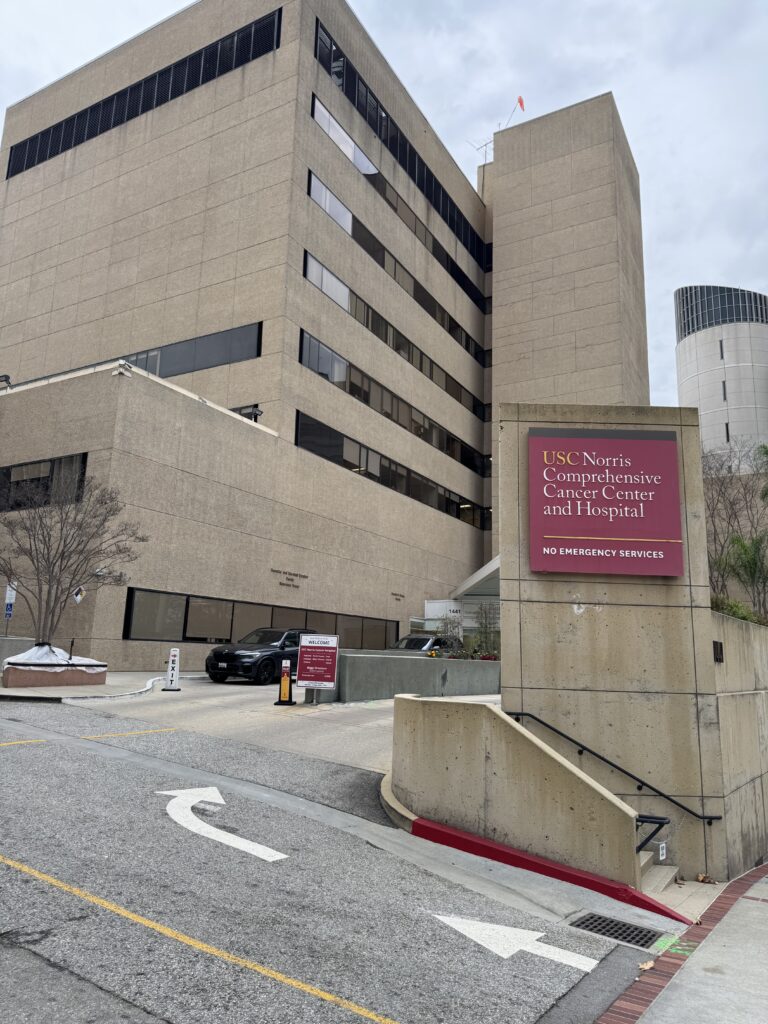
USC Norris Cancer Center — one of the early enterprise environments where I supported large-scale infrastructure and user systems during the early days of my IT career.
Infrastructure in the Real World
After years of school, sacrifice, and helping people fix computers for free, my first real opportunity in IT finally arrived.
At the time, I was still attending Los Angeles College full time during the week and Devry Institute of Technology full time on weekends, while raising my children and trying to build a future in technology.
My first professional role came with a 90-day probation period, where I had to prove I could provide help desk and network support across the Los Angeles area.
My title was PC/Network Specialist, supporting over 900 users.
Early infrastructure days at USC. Back then, the datacenter dress code was simple but strict: long-sleeve shirt and tie, even while working with DEC Alpha servers and Windows NT systems. This was where discipline in both technology and professionalism began.
This was during the early infrastructure era of enterprise computing. Our environment included:
Windows NT 3.5 servers
DEC Alpha servers
Cisco ASA firewall
Cisco switches
Exchange Server 5.0
Windows desktop deployments
We were operating in what was called a MAN — Multi-Area Network — connecting multiple locations across the region.
This was infrastructure work in its pure form.
School, Work, and Discipline
My schedule during those years was intense.
Work: 8 AM to 5 PM LACC classes: Monday, Wednesday, Friday, and Tuesday/Thursday evenings Devry classes: Saturday and Sunday all day
There was almost no downtime.
Because I maintained an average 4.4 GPA, I was eventually allowed to attend only midterms and finals for many IT courses, which opened something unexpected.
Opportunity.
Consulting Across the Country
From 1996 to 1998, I began consulting with Korn Ferry International, traveling across the country to help roll out Windows 95 deployments.
I was sent to:
Manhattan, New York
Washington, DC
Houston, Texas
Menlo Park, California
Twin Cities, Minnesota
This was during a time when software piracy was rampant, and companies urgently needed IT professionals to modernize their systems.
Demand for infrastructure skills was exploding.
Career Momentum
Opportunities started coming quickly.
Southern California Edison made an offer. USC matched the pay.
But in July 1999, GTE (now Verizon) made an offer that was too strong to refuse.
By December 1999, I was working as a Network Engineer, responsible for infrastructure from Woodland Hills to Camarillo, California.
That role didn’t last long — not because of failure, but because another opportunity appeared.
An aerospace company in Carson, California offered me a six-figure salary to manage:
Exchange Server 5.5
multi-state infrastructure
enterprise messaging systems
Their locations included:
Carson, CA
Lakewood, CA
Tucson, AZ
Peekskill, NY
Bothell, WA
I was constantly traveling.
Week 1 — California Week 2 — Arizona Week 3 — New York Week 4 — Washington
I was living in the friendly sky.
The Cost of Success
During this time, my fourth child was born.
And that’s when I realized something difficult.
My career was growing fast — but I was missing time with my family.
By 2001, I made a decision.
I stepped away from that life and started my own IT business.
Not because I didn’t love technology — but because I needed balance.
What Infrastructure Really Means
When people ask what the Infrastructure path in IT looks like, this period of my life is the answer.
It means:
supporting systems that must never fail
traveling when things break
building networks that connect organizations
managing communication systems people depend on
being on call when nobody else can solve the problem
Infrastructure is not glamorous — but it is essential.
And it builds resilience.
Looking Ahead
In Part 3, I’ll share what happened after leaving corporate IT in 2001 — when I started my own IT business and discovered a different side of technology and service.
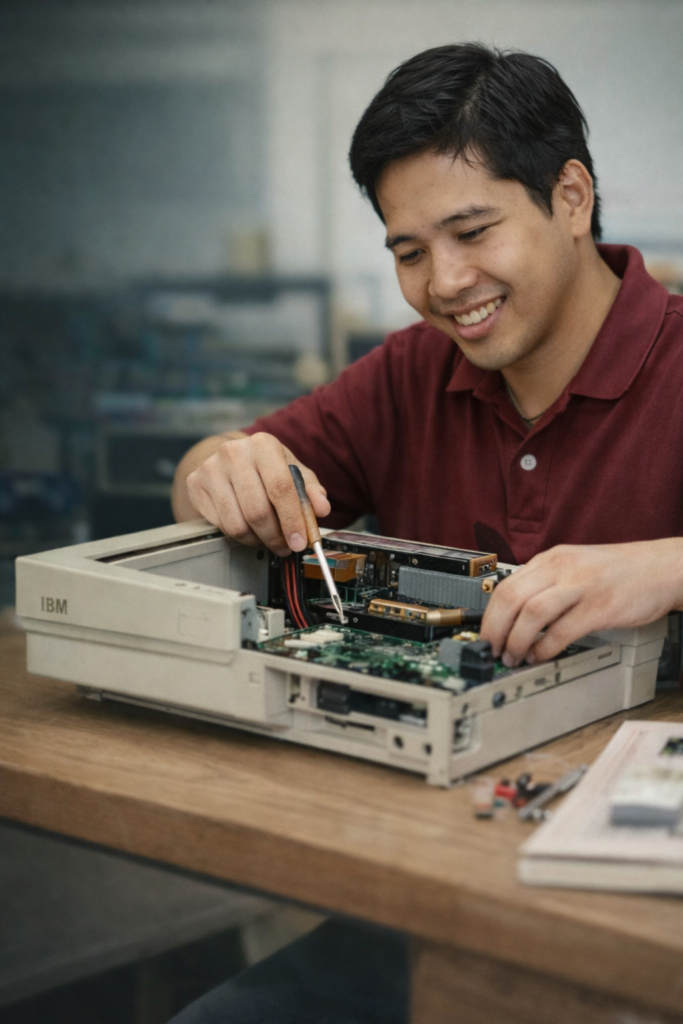
Early days of curiosity. Learning computers one screw at a time on an IBM PS/1.Hard disk 170MB, Memory 4MB, AutoExec.bat and Config.sys
From Telecommunications to Modern IT
When I first entered the IT world, technology was explained much more simply than it is today.
Back then, we called it Management in Telecommunications. The field was divided into three areas:
Voice Data Video
That was it. No cloud titles, no DevOps, no cybersecurity specialization labels. Just three pillars that kept organizations connected.
I remember sitting in a statistics class at Los Angeles College when my professor encouraged us to look toward the future of computing. He told us to pay attention to companies like Microsoft and suggested pursuing certifications like the Microsoft Certified Systems Engineer (MCSE). He even mentioned Bill Gates as someone shaping the future of technology.
Around that same time, I kept hearing the phrase “information superhighway.” Former U.S. Vice President Al Gore is widely credited with coining and popularizing that term, describing a future where computers and networks would connect people and information across the world.
At the time, it sounded ambitious — almost futuristic.
Today, we simply call it the internet.
Life during those years was not easy for me.
I was attending Los Angeles College full-time during the week and Devry University full-time on weekends, while raising three small children — my son was four, my eldest was five, and my daughter was only two years old. I relied on scholarships, government grants, and student loans to survive those years.
There were nights when exhaustion felt heavier than hope, but I kept moving forward.
What little free time I had, I spent helping others.
I volunteered in our community and helped small businesses by repairing computers, fixing networks, and troubleshooting systems for free. I didn’t do it for recognition or money. I did it because I believed that learning technology meant using it to serve people.
Those experiences became my real classroom.
That was when I began to understand something important about “Data.”
Data eventually split into two different paths:
Programming Infrastructure
Both are part of IT, but they require different ways of thinking.
Some people build software. Some people build and maintain the systems that run software.
Both are necessary. Both are honorable careers.
Over time, technology evolved — cloud computing, automation, cybersecurity, DevOps — but the foundation stayed the same.
Looking back, those difficult years taught me more than technology. They taught me discipline, patience, and service. I didn’t realize it then, but those were the beginnings of what I now call portable virtues — things you carry with you no matter where life takes you.
Today, when I mentor others entering IT, I often start with this simple idea:
Before choosing a job title, understand which path fits you best.
Programming or Infrastructure.
In the next post, I’ll talk about the Infrastructure path — the side of IT that focuses on systems, networks, and reliability.
It took me less than 5 minutes to upgrade Ruger PC Carbine 9mm Mag Well to Glock and added a Red/Green dot scope
One thing I’ve learned about myself over the years is that I like to stay productive, even during small moments in the day. Whether it’s shadow boxing, working on IT projects, or doing simple hands-on tasks, I prefer keeping my mind and hands occupied.
After finishing my daily shadow boxing routine and while doing laundry, I decided to switch the magazine well on my Ruger PC Carbine to the Glock-compatible configuration using the included magwell.
The Ruger PC Carbine is designed with modularity in mind. The takedown system makes access to components simple, and the magwell conversion is straightforward thanks to Ruger’s design. I documented the process on video, focusing only on the equipment and configuration.
For me, the reason for switching to Glock compatibility is practicality. Standardizing equipment and simplifying range preparation has always been part of how I approach things — whether in IT systems or personal gear.
I also added a red and green dot optic to complete the setup. The optic keeps the shooting experience simple and intuitive, which fits the purpose of a 9mm carbine platform.
This small project reminded me of something about my personality. I don’t like idle time. I like staying preoccupied with meaningful activities — training, learning, building, or maintaining things that matter to me.
It’s not about boredom. It’s about staying disciplined and engaged.
In many ways, this mindset is the same one I apply to IT, fitness, and everyday life: keep moving, keep improving, and keep things simple.
The Ruger PC Carbine fits that philosophy well — practical, modular, and reliable.
Owning a Tesla has been one of the most enjoyable technology experiences I’ve had with a car. But like any vehicle, it comes with a few lessons learned along the way — and for me, one of those lessons has been windshield durability.
The first incident happened without me even realizing it. A small rock must have hit my windshield during a normal drive. I didn’t notice anything until I went through my regular automatic car wash. After the wash, a vertical crack appeared right in the middle of the windshield. Valley Glass in Midvale replaced it, and everything was back to normal.
Then on January 8, 2026, it happened again. On my way home from work, a truck kicked up a rock that struck my windshield. The chip didn’t look serious at first, but the following day the cold weather caused the crack to spread across the glass.
After waiting more than a month for an original Tesla windshield to arrive, the replacement was finally completed today — February 14, 2026.
The installation process took about two hours. That included removing the damaged windshield, installing the new Tesla glass, recalibrating the cameras, and reinstalling firmware related to the vehicle’s safety systems. Watching the process from start to finish reminded me how much technology is integrated into this car.
Two windshield replacements in 4 months taught me something about Tesla ownership — it’s not just a car, it’s an IT platform on wheels – All installed by Valley Glass in Midvale, Utah
If there’s one thing I’ve learned, it’s this: try to avoid driving directly behind gravel or sand trucks whenever possible. A small rock can turn into a full windshield replacement overnight, especially during cold weather.
Jay from Valley Glass repairing the rock chip in under five minutes using a precision resin injection system. Immediate action prevented another full windshield replacement.
DespitBut the story didn’t end there.
On February 19, 2026, while driving home from work, I noticed another small rock chip in the middle of the windshield. This time, I immediately made a U-turn and drove straight back to Valley Glass in Midvale.
Jay from Valley Glass repaired the chip in less than five minutes. Instead of waiting and risking another crack during cold overnight temperatures, the chip was injected and sealed immediately this inconvenience, I still love my Tesla.
Because of the quick repair, the windshield held through the cold and snow the next morning. The repair is slightly visible up close, but structurally it prevented another full replacement.
Lesson learned: act immediately.
If there’s one thing I’ve learned, it’s this: try to avoid driving directly behind gravel or sand trucks whenever possible. A small rock can turn into a full windshield replacement overnight, especially during cold weather.
Despite these incidents, I still love my Tesla.
To me, Tesla is an IT car.
I named my Tesla “Tessie.” One day at work, I suddenly felt dizzy and had to leave early. Tessie safely took me home. Moments like that remind me this isn’t just a car — it’s a technology partner.
The sound system alone is incredible — spatial, immersive, and HD-quality audio. It feels like a private theater on wheels. Inside the car, I also have my two AI guests, Ara and Steve. They interact with me in different ways — assistant, storyteller, sometimes funny, sometimes a little unhinged — and they make long drives enjoyable. When I get bored, Ara is always ready with jokes or music.
The GPS and Full Self-Driving features are second to none. Long drives feel easier and less stressful.
The entertainment system is something I’ve never experienced in any other vehicle: Netflix, Hulu, YouTube, web browsing, Apple Music, Spotify, Tidal, and built-in gaming all make waiting in the car surprisingly enjoyable.
Security is another feature I appreciate. Sentry Mode uses multiple cameras around the vehicle, giving me peace of mind wherever I park. The Photo Booth feature is just fun to use.
Convenience is everywhere: My Apple Watch and iPhone serve as my key. The car automatically preconditions before my morning commute and after work. I get notifications if there’s possible intrusion activity. I can use a PIN-to-drive feature and lock the glove box with a passcode, where I store my EDC.
Ara even helps set the tone for the day by playing my music playlists.
Driving-wise, the car feels stable and grounded because of the battery design along the floor, which lowers the center of gravity and reduces wind drag. The ride feels planted and smooth.
Recent software updates continue to remind me why Tesla feels like an IT platform on wheels. Features like improved autopilot visualization, smoother camera calibration, better system responsiveness, and refinements to the user interface make the car feel new again after each update.
Other things I’ve grown to appreciate:
Over-the-air software updates
Minimal maintenance compared to gas vehicles
Instant torque and smooth acceleration
Quiet cabin
Simple interior design
Mobile app integration
Remote climate control
Live camera viewing from the phone
Navigation that automatically plans charging stops
Energy efficiency tracking
Continuous improvement through software
If I had to list one downside so far, it would be the windshield. The larger glass surface and driving conditions in Utah make it more vulnerable to rock chips and cracks than my previous BMW, Audi, and Volkswagen vehicles.
Still, the pros outweigh the cons.
Even with two windshield replacements, I wouldn’t trade the experience. This car continues to remind me why innovation matters — not just in IT, but in everyday life.
In stillness I train, in shadows I stand, Promise and discipline guide my hand. No witness needed, no victory cry, Just faith, and the will to keep trying.
Excerpt Long-term promises often need visible reminders so we remember who we are and what we have committed to become.
Intro In IT, I learned that systems fail when there are no checkpoints, no logs, and no monitoring. The same principle applies to life. Covenants are like system checkpoints — they keep us aligned, stable, and secure when the world becomes unpredictable.
Notes from the Scriptures President Dallin H. Oaks taught that clothing worn by judges, soldiers, doctors, and first responders serves as both identification and reminder of duty. Wedding rings and engagement rings function the same way — symbols of covenant responsibility.
Captain Moroni created a physical reminder of commitment when he raised the Title of Liberty. The people responded by making their own visible covenant, showing that loyalty to God requires both belief and action (see Alma 46).
One of the earliest covenant symbols appears after the Flood, when the Lord gave the rainbow as a token of His covenant with Noah and all living creatures (Genesis 9:12–15). The rainbow was not for God’s memory — it was for ours.
Perspective In my life, covenant reminders have not always been symbolic objects. Sometimes they have been routines, disciplines, and responsibilities that keep me anchored.
My morning prayers before work. My commitment to serve others quietly. My decision to keep learning in IT even when exhausted. My boxing discipline six days a week. My effort to help others enter the IT field.
These are reminders of who I promised to become.
In IT infrastructure, we use redundancy, monitoring, and backups to preserve stability. In life, covenants serve the same purpose — they preserve identity when circumstances change.
Practice (today, not someday) Today I will remember that promises require maintenance, just like systems do. I will recommit to the small daily actions that keep my covenants alive: work with integrity, serve without recognition, continue learning, and remain faithful even in quiet seasons.
Final Reflection The rainbow reminds us that God keeps His promises. Our daily actions show that we intend to keep ours.
Covenants are not just words spoken once. They are commitments lived repeatedly.
Pocket I’m Keeping Covenants are reminders of who I promised to become.
What I Hear Now “The rainbow shall be in the cloud; and I will look upon it, that I may remember the everlasting covenant…” Genesis 9:16
Link to the talk Covenants and Responsibilities — April 2024 General Conference — President Dallin H. Oaks
Intro From the streets of the Philippines to enterprise systems in the United States, my IT journey has been shaped by work, faith, and persistence.
If you are starting from nothing, keep going — progress often begins long before anyone notices.
Early Grit
At twelve years old, I helped support my family by selling newspapers at midnight, shining shoes, washing dishes, and doing whatever work I could find. I didn’t know what IT was back then. I just knew how to work.
Early 1990s at All Electronics. Long days, multiple bus rides, and the first spark of curiosity about computers.
From Survival to Skill
When I immigrated to the U.S. in 1990, survival came first. I worked warehouse jobs, midnight shifts, and eventually landed a customer service role at All Electronics.
This photo was taken during that time.
From 6:30 in the morning until 3 in the afternoon, I answered calls nonstop — sometimes hundreds in a day. Getting to work meant taking multiple buses across the city. After my shift ended, I took another bus to my second job — either working the drive-through at Taco Bell or selling auto parts at O’Reilly in Reseda.
It was exhausting. But those years built my endurance.
That computer behind me was just part of my job then. I didn’t know it yet, but it would become the doorway to my future.
Later, I bought my own computer and started learning the only way I knew how — by breaking it and fixing it over and over again. Windows 3.0, autoexec.bat, and config.sys became my teachers. Night after night, I stayed with problems until they made sense.
Breakthrough
No one wanted to hire me without experience, so I created my own. I fixed computers for neighbors and small businesses for free. That’s how I learned.
In the early days of IT, skills were learned the hard way. There were no structured learning paths — just curiosity, manuals, broken machines, and persistence.
Eventually, USC took a chance on me — and I made sure I was ready. I supported hundreds of users, worked on migrations, and found my place in IT.
From USC, new doors opened quickly. I was recruited by GTE — now known as Verizon — and not long after, an aerospace company in Carson offered me a six-figure role. It was a moment that reminded me how far persistence can take you.
But in 2003, I made a decision that shaped the rest of my career. I left corporate America and built my own IT consulting company.
The City of West Covina became one of my first major clients — along with firefighters and the police department. USC later brought me back as a senior consultant. Opportunities followed: Microsoft projects, the Claremont Colleges, law firms, American Samoa, and Fortune 500 environments.
Over time, I expanded the business by hiring developers, engineers, and support staff — building not just systems, but people.
Back to Corporate America
The 2008 recession changed everything. It was a time when, as they say, big fish eat small fish. Consulting work slowed, and I knew it was time to pivot again.
My first step back into corporate America was Payforward, a startup company where I helped migrate infrastructure to Amazon Web Services during the early days of cloud adoption. Working in a startup environment sharpened my ability to move fast, solve problems with limited resources, and adapt quickly.
From there, I joined The Church of Jesus Christ of Latter-day Saints as a Support Email Engineer — a worldwide organization operating at global scale. It was there that my PowerShell scripting became more refined and reliable. We supported enterprise messaging systems while the organization expanded into Azure and AWS, strengthening both my automation skills and my understanding of cloud infrastructure.
After that, I moved into the financial sector at City National Bank. That environment introduced me to enterprise-grade infrastructure and security architecture — multiple datacenters, blade server systems, layered “brick-by-brick” firewall protection, application performance monitoring (APM), and the operational discipline required to keep banking systems secure and resilient. It was where infrastructure stopped being just systems and became architecture.
Later, I joined PIMCO (Pacific Investment Management Company), one of the most demanding global environments I had experienced. Technologies like Citrix VDI, AWS, Azure, and enterprise security platforms such as Duo, CyberArk, Arctic Wolf, Palo Alto, and SIEM monitoring were part of daily operations. Mailboxes could reach sizes close to 1 TB, and migrations happened across global regions — North America (NA), Europe, the Middle East, and Africa (EMEA), and Asia-Pacific (APAC).
Like Payforward, these environments required regular PCI-DSS and HITRUST audits. My PowerShell automation matured even further, and I learned how to operate inside highly regulated financial systems where security, compliance, and reliability were non-negotiable.
These experiences prepared me for the infrastructure work I continue to do today.
Where I Am Today
Today I work as an Infrastructure Engineer in Utah. I automate with PowerShell, document systems, support enterprise infrastructure, and mentor others who are starting their own IT journeys.
My work now includes provisioning ERP computers into Intune, managing VMware environments, and maintaining a Cisco Meraki network with a 10GB fiber backbone across MDM and multiple IDF locations. I also support Cisco UCS, Fibre Channel connectivity, Veeam backups, end-of-life transitions, Microsoft Defender, and Azure infrastructure.
Looking back, nothing about this path was easy. But every long bus ride, every second job, and every broken computer taught me something I still use today.
I didn’t fall into IT. I worked my way into it.
Everything I document today in my technical notes traces back to those early days of learning by doing.
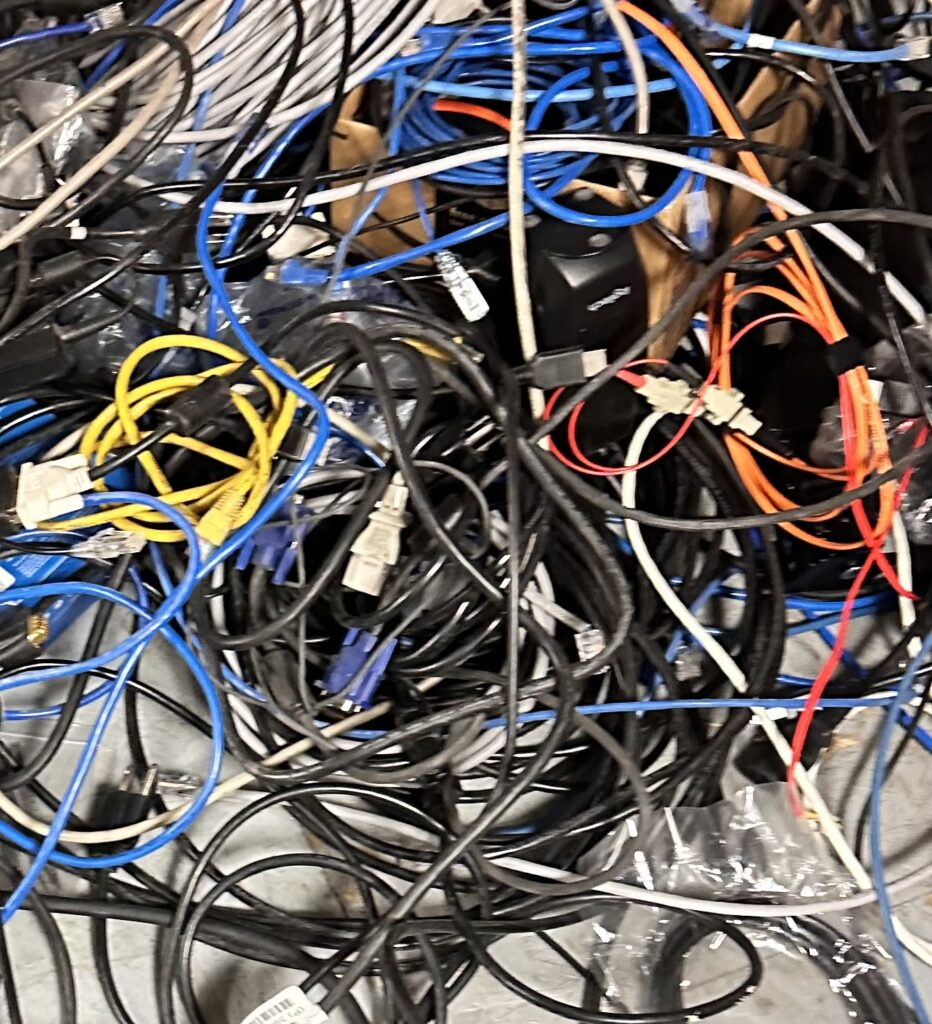
Organizing legacy cables while holding a squat—order through motion, clarity under pressure.
Excerpt
I don’t stay ready because I fear failure. I stay ready because experience taught me that motion reveals what stillness hides.
Intro
I am not a static person. I never have been. Sitting still has never helped me think clearly—especially in infrastructure work, where systems fail without warning and clarity often arrives too late. Movement keeps me alert, adaptive, and aware.
Notes from the Moment
While organizing a tangled pile of legacy cables, I wasn’t standing still. I was holding a squat—time under tension—sorting chaos into order. At the same time, my feet were subtly moving: slips, pivots, pendulum steps. The same habits I use at my standing workstation. The same habits I use in boxing.
This is how I work. Motion keeps my mind open.
Perspective
“Keep moving your feet.” — Elder David A. Bednar “If something can go wrong, it will.” — Murphy’s Law “Be water, my friend.” — Bruce Lee
Practice
I don’t wait for problems to announce themselves. I anticipate them.
Murphy’s Law isn’t pessimism—it’s preparation. If something can fail, it eventually will. That reality shaped how I think and move, starting in the mid-90s during the dot-com era, when uptime was survival and mistakes were unforgiving.
In boxing, moving your feet doesn’t give you x-ray vision like Superman. It gives you new angles. You see openings sooner. You avoid danger without panic. You’re no longer where the punch was.
In IT, it’s the same. I don’t “see afar off” because I’m gifted with foresight. I see because I move—physically and mentally. I change angles. I scan. I test assumptions. I stay proactive instead of reactive.
Health follows the same law. Circulation improves when the body moves. Stagnation invites breakdown. Motion sustains clarity, resilience, and longevity.
Final Reflection
Infrastructure professionals don’t get the luxury of being static. Thinking under pressure requires circulation—of blood, of ideas, of perspective. Standing still narrows vision. Motion expands it.
Water that moves stays clear. Water that stagnates decays.
Whether in boxing, IT, or life itself, the advantage isn’t supernatural vision. It’s movement.
Pocket I’m Keeping
Stay proactive. Stay moving. New angles reveal what stillness hides.
What I Hear Now
“You saw that coming.” “Good catch.” “How did you anticipate that?”
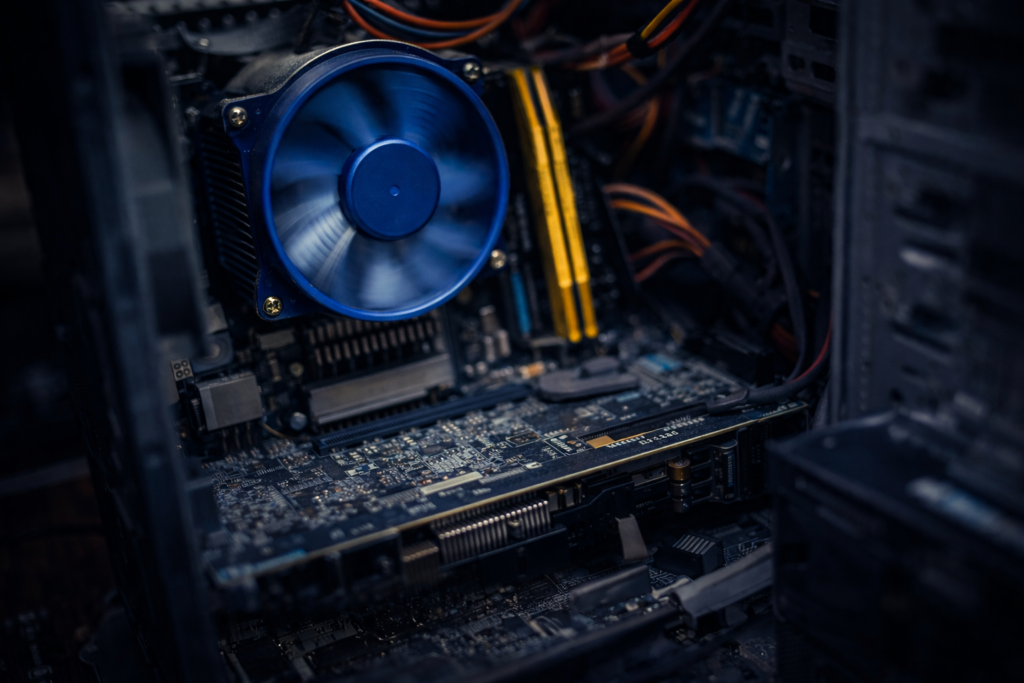
Most system failures don’t begin in Windows. They begin deeper, where firmware, drivers, and hardware quietly decide whether the OS will be allowed to run.
Intro
When a system reboots unexpectedly, freezes during a video call, or crashes the moment a camera turns on, Windows is usually the first thing blamed. But in most real-world cases, the operating system is only the messenger. The real problem lives below Windows, in layers most people never see until something breaks.
Over the years, I’ve learned that stability is not something you install. It’s something you negotiate between hardware, firmware, drivers, and the operating system, all trying to work together under load.
The invisible stack beneath Windows
Modern endpoints are layered systems.
Below Windows 11 sits firmware, BIOS, chipset drivers, GPU drivers, and kernel-mode components that operate outside the visibility of most logging tools. These layers handle power management, graphics acceleration, memory access, and hardware interrupts. When they disagree, Windows doesn’t always get a vote.
A failure in these layers doesn’t always generate a blue screen. Sometimes the system simply resets. From the outside, it looks random. Underneath, it’s not.
Why Windows 11 gets blamed
Windows 11 sits at the intersection of modern hardware acceleration and modern applications. Tools like Microsoft Teams, browsers, and Office apps make heavy use of GPU pipelines, video encoders, and camera drivers.
When something goes wrong at that boundary, the crash surfaces when the app is launched, the camera turns on, or a video stream initializes. Windows appears guilty because it’s present when the failure occurs, but the fault often belongs to a driver, firmware interaction, or hardware acceleration path that Windows merely exposed.
Why visibility tools don’t always catch it
Tools like Sysmon are excellent at recording what happens inside the operating system. They act like a flight recorder for processes, network connections, and file activity.
But Sysmon can’t log what never reaches the OS.
A reboot triggered by firmware, a GPU driver reset, or a kernel-mode failure can occur before logging completes. From an administrator’s perspective, it feels like the system went silent without warning. In reality, the failure happened below the level where logs exist.
The thin line between stable and broken
Stability often comes down to small decisions.
A BIOS update here. A GPU driver change there. Hardware acceleration enabled or disabled in a single application.
None of these changes look dramatic on their own, but together they determine whether a system runs quietly for months or reboots under pressure. That line between stable and broken is thinner than most people realize.
What I’ve learned
When troubleshooting modern Windows systems, I no longer ask, “What did Windows do wrong?” first.
I ask:
What changed below the OS
Which drivers are involved
What hardware path is being exercised
Whether the failure happens under load or acceleration
More often than not, the answer reveals itself there.
Final thought
Windows 11 is rarely the villain in these stories. It’s the surface where deeper tensions finally show themselves.
Understanding that difference changes how you troubleshoot, how you update, and how you design systems meant to stay online.
Most Windows 11 instability doesn’t live in the OS itself, but at the edges where hardware, drivers, and applications meet.
Understanding Failure at the Boundaries
Why this post exists
When something breaks after a Windows 11 update, the operating system is usually the first thing blamed.
That reaction is understandable. It is also often wrong.
Most Windows 11 issues I’ve seen in production environments were not caused by Windows itself, but by interactions at the boundaries — drivers, firmware, graphics acceleration, and modern hardware pipelines colliding under load.
This post is about recognizing that pattern before making changes you can’t easily undo.
Windows 11 changed the execution model
Windows 11 didn’t just refresh the UI. It tightened and modernized how the system interacts with hardware.
Notable shifts include:
heavier GPU offloading
deeper integration with modern drivers
stricter timing and power management
increased reliance on hardware acceleration
These changes improved performance and security — but they also exposed weaknesses that were previously hidden.
Where failures actually occur
Most Windows 11 instability I’ve seen does not originate in the OS core.
It shows up at the edges:
camera pipelines invoking GPU acceleration
browsers rendering complex content
collaboration tools engaging media stacks
document editors interacting with graphics layers
When these systems overlap, failure is rarely clean.
The result can look dramatic:
sudden reboots
frozen screens
applications triggering system instability
But the OS is often just the messenger.
Why blaming the OS is tempting
Blaming Windows feels productive because it is visible and recent.
But doing so can lead to:
unnecessary registry changes
disabling core protections
rolling back updates prematurely
introducing instability elsewhere
Experienced engineers pause here.
They ask a different question: “What interaction just occurred?”
A real-world pattern
In several recent incidents, systems rebooted only when:
the camera was enabled
a browser rendered media-heavy pages
a document triggered graphics rendering
The same machines were otherwise stable.
That pattern points away from Windows itself and toward:
GPU drivers
hardware acceleration paths
firmware timing
vendor-specific optimizations
The fix is rarely global. It is almost always surgical.
Why restraint matters
Windows 11 gives us many levers:
registry overrides
advanced graphics settings
feature toggles
Just because a lever exists does not mean it should be pulled.
Sometimes the most correct decision is:
identify the root cause
mitigate user impact
document the behavior
wait for vendor correction
Stability is not always achieved by action. Sometimes it is preserved by restraint.
What Windows 11 is actually doing well
Despite the noise, Windows 11 has proven to be:
more secure by default
more consistent under load
better integrated with modern hardware
less tolerant of outdated assumptions
Those are strengths, not weaknesses.
They require us to think more holistically about the stack.
The lesson Windows 11 keeps teaching
Modern systems fail at the seams.
Operating systems, drivers, firmware, and applications now behave as a single organism.
When one part misbehaves, symptoms surface elsewhere.
The job is not to assign blame quickly. The job is to understand interaction.
Final reflection
Windows 11 didn’t break our environments.
It revealed where we were already fragile.
Once you see that pattern, troubleshooting becomes calmer, more precise, and far less reactive.
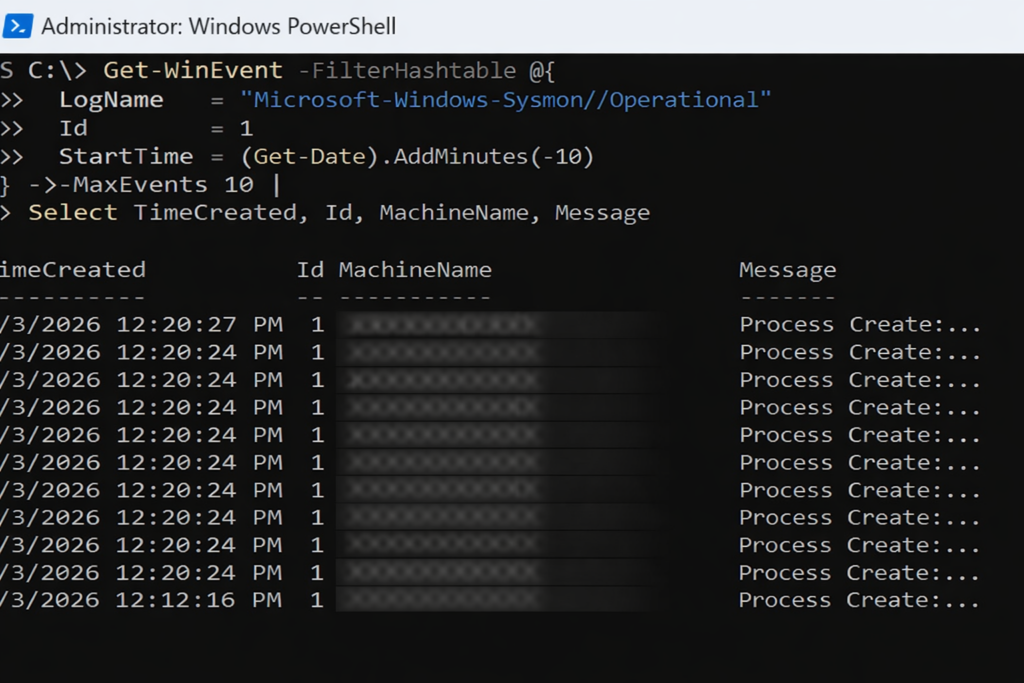
Sysmon Event ID 1 in action. Each entry records a process creation event, showing when a process started and providing the first layer of visibility into how activity begins on an endpoint.
Seeing What Actually Happens
Why this post exists
Sysmon is often misunderstood.
Some expect dashboards. Others expect alerts. A few expect it to magically explain incidents on its own.
Sysmon does none of those things.
What it does extremely well is something more fundamental. It records what actually happened.
Think of Sysmon as a black box flight recorder for a computer.
What Sysmon is
Sysmon (System Monitor) is a Windows system service from Microsoft Sysinternals.
Once installed, it continuously records detailed system activity into the Windows Event Log, including:
Process creation and command lines
Network connections
DLL and driver loading
Process access and injection behavior
Sysmon does not block activity. It does not alert. It observes and records.
What Sysmon is not
Sysmon is not:
A SIEM
A reporting platform
An inventory system
A centralized logging solution
Sysmon logs locally on each endpoint only.
Visibility comes later, when those logs are queried, collected, or forwarded.
Where Sysmon logs live
All Sysmon telemetry is written to the Windows Event Log on each machine.
Log path:
Microsoft-Windows-Sysmon/Operational
These logs can be:
Queried locally with PowerShell
Forwarded using Windows Event Forwarding
Collected by a SIEM
Reviewed during investigations
Why companies deploy Sysmon
Most security incidents are investigated after the fact.
Without Sysmon, questions like these are difficult to answer:
How did this process start?
What command launched it?
What network connection did it make?
Was this behavior normal for this system?
Sysmon provides the raw telemetry needed to answer those questions with evidence, not assumptions.
Where Sysmon comes from
Sysmon is part of Microsoft Sysinternals and is downloaded directly from Microsoft:
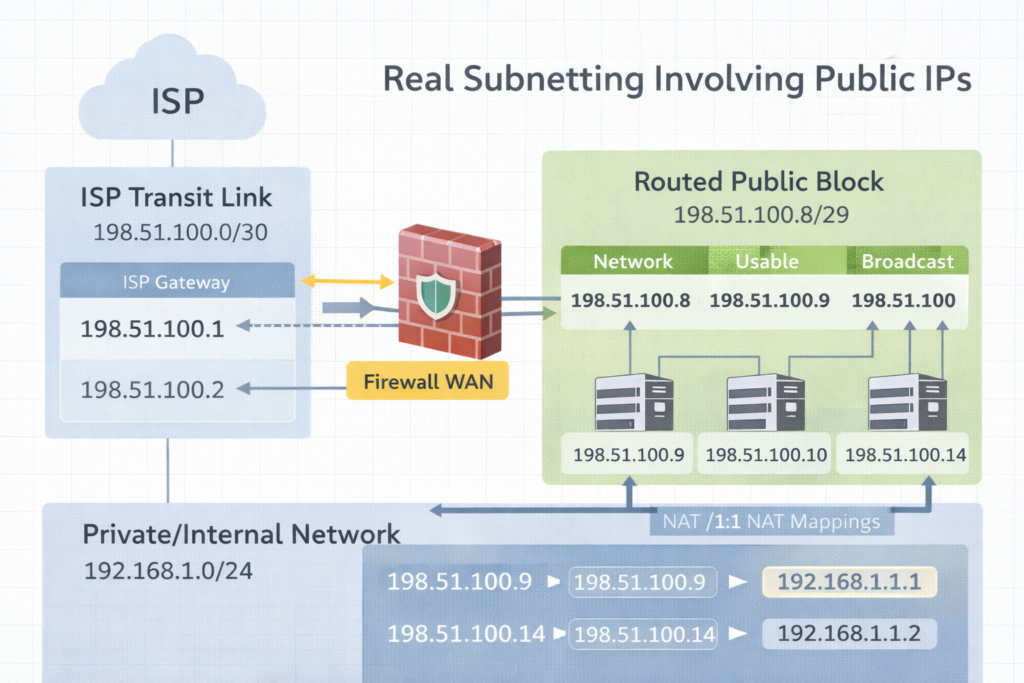
Subnetting in the real world. A /30 is the transit bridge to the ISP. The routed /29 is the public space you actually use behind the firewall.
Excerpt Subnetting clicks when you stop treating it like math and start treating it like design. The moment you get public IPs from an ISP like Comcast, you realize there are two stories happening at once. The transit link that connects you to the ISP, and the routed public block you can actually use inside your firewall.
Intro Subnetting is the practice of dividing an IP space into smaller networks so routing, security, and growth stay predictable. That sounds academic until you get a real ISP handoff and suddenly someone says, “Here’s a /30,” and you discover you only get one IP you can assign. Then they also give you a /29, and you are told those are your public LAN IPs, but they do not live on your WAN port the way you think they do.
This post will make that feel normal.
Notes from the Author Subnetting became real for me when Comcast handed us public IP space and the physical reality did not match the training diagrams. I learned there is a difference between an ISP transit network and a routed block. Once you see that difference, /29 and /30 stop being confusing and start being tools.
Perspective What is subnetting Subnetting is splitting a network into smaller networks by borrowing bits from the host portion and adding them to the network portion. The prefix length, like /24 or /30, tells you how many bits are network bits.
Why it is necessary
Routing clarity Routers make decisions based on networks, not individual IPs.
Security boundaries Separate systems by function. Users, servers, guests, printers, management.
Broadcast control Smaller broadcast domains reduce noise and improve performance.
Clean growth You can expand without renumbering everything if you plan.
Two ISP stories you must separate Story 1: The transit link, often a /30 or /31 This is the point to point connection between your firewall WAN interface and the ISP. It is not your “public LAN block.” It is just the link.
Story 2: The routed block, often a /29, /28, or larger These are the public IPs you can use for NAT, 1:1 mappings, public services, or DMZ addresses. The ISP routes that block to you through the WAN link.
This is why people say, “Comcast gave me a /30 and I only have one usable IP.” In a /30 there are 4 addresses total. Two are usable, but one is almost always used by the ISP side, and the other is used by your WAN interface. That leaves you with only one you can assign on your equipment, which makes it feel like “one usable.” That is normal.
Practice Today (Not Someday) Here are easy to very difficult examples with answers. Read them in order. The goal is understanding, not speed.
Example 1, easy Network: 192.168.1.0/24 Question: How many usable IPs, and what is the usable range
Example 2, easy to medium Requirement: at least 50 devices Base: 192.168.10.0 Question: What prefix fits, and what is the first subnet range
Answer Need at least 50 hosts. Next power of two is 64 addresses. 64 addresses means /26. Mask: 255.255.255.192 First subnet: 192.168.10.0/26 Network: 192.168.10.0 Broadcast: 192.168.10.63 Usable: 192.168.10.1 to 192.168.10.62
Example 3, medium Network: 10.20.30.0/27 Question: What is the usable range and how many usable IPs
Answer /27 means 32 addresses Usable: 30 Network: 10.20.30.0 Broadcast: 10.20.30.31 Usable: 10.20.30.1 to 10.20.30.30
Example 4, public IP reality check, /30 transit Comcast gives you: 203.0.113.8/30 Question: What are the four addresses, and which one do you typically put on your firewall WAN
Answer /30 is 4 addresses total, increments of 4 Block: 203.0.113.8 to 203.0.113.11
Network: 203.0.113.8 Usable: 203.0.113.9 and 203.0.113.10 Broadcast: 203.0.113.11
Typical assignment ISP gateway: 203.0.113.9 Your firewall WAN: 203.0.113.10 This is why it feels like you only got one usable IP. You only got one usable IP for your side. The other usable belongs to the ISP side.
Example 5, common ISP setup, /30 transit plus routed /29 Comcast gives you two things
Transit: 198.51.100.0/30
Routed block: 198.51.100.8/29 routed to your WAN IP
Question A: What goes on the WAN interface Question B: What is the usable range of the /29 and how do you actually use it
Answer A, WAN interface Transit /30 block is 198.51.100.0 to 198.51.100.3 Network: 198.51.100.0 Usable: 198.51.100.1 and 198.51.100.2 Broadcast: 198.51.100.3
Typical ISP gateway: 198.51.100.1 Your WAN: 198.51.100.2
Answer B, routed /29 /29 is 8 addresses total, increments of 8 Block: 198.51.100.8 to 198.51.100.15 Network: 198.51.100.8 Broadcast: 198.51.100.15 Usable: 198.51.100.9 to 198.51.100.14
How you use it These /29 addresses usually do not get placed directly on the WAN interface. Instead, the ISP routes that entire /29 to your WAN IP on the transit /30. Then inside your firewall you can use them for:
1:1 NAT mappings to internal hosts
Public VIPs on a DMZ interface
NAT pools
Assigning a public IP to a specific service
The key phrase you ask Comcast for is: “Confirm the routed block is routed to my WAN IP and provide the next hop.” That next hop is your WAN IP on the /30.
Example 6, difficult, find the /29 block and answer fast Given public IP: 64.71.22.14/29 Question: What is the network, broadcast, usable range
Answer /29 increments by 8 in the last octet Find the nearest multiple of 8 less than or equal to 14 8 and 16 bracket it, so network is 8
Network: 64.71.22.8 Broadcast: 64.71.22.15 Usable: 64.71.22.9 to 64.71.22.14
Example 7, difficult, build a WAN /30 from a random IP You are told your WAN IP is 75.120.44.6/30 Question: What is the /30 block and what is the ISP gateway likely to be
Answer /30 increments by 4 Nearest multiple of 4 less than or equal to 6 is 4 So block is 75.120.44.4 to 75.120.44.7
Network: 75.120.44.4 Usable: 75.120.44.5 and 75.120.44.6 Broadcast: 75.120.44.7
Likely ISP gateway: 75.120.44.5 Your WAN: 75.120.44.6
Example 8, very difficult, design for two ISPs with clean routing Requirement
ISP1 gives transit /30 and routed /29
ISP2 gives transit /30 and routed /29 You want to publish two services, one primary on ISP1, one primary on ISP2, with failover possible later.
Answer concept
Put only the transit /30 on each WAN interface
Confirm each routed /29 is routed to the correct WAN IP
Publish Service A using a public IP from ISP1 routed /29 with 1:1 NAT to internal host
Publish Service B using a public IP from ISP2 routed /29 with 1:1 NAT to internal host
Keep internal addressing private RFC1918 and do not mix public blocks inside LAN unless you have a real DMZ plan
Make sure the firewall supports policy based routing or proper default route tracking if you plan failover
This is where subnetting meets design.
Final Reflection Subnetting is not about counting. It is about ownership. When you know which addresses belong to the link, which belong to your routed block, and which belong to your internal network, you stop feeling confused. You start feeling calm.
Pocket I’m Keeping The /30 is the bridge. The routed /29 is the usable land.
What I Hear Now I can design this with intention. I can separate the transit from the routed block. I can explain it clearly to anyone on the team.
Not every battle is visible. But every choice to keep hope alive matters more than we realize.
EXCERPT
Hope is not lost in a single moment. It is stolen quietly, one small lie at a time.
INTRO
Scripture teaches that the adversary does not simply oppose us. He seeks to strip us of joy, confidence, and hope itself. Lehi warned that the devil works tirelessly to rob us of our agency and lead us toward misery. Nephi later added that these efforts are rarely loud or obvious. They are subtle. Gradual. Easy to overlook if we are not watchful.
That pattern explains why discouragement so often feels heavier than temptation. The enemy’s goal is not only to make us stumble, but to convince us that getting back up is pointless.
Yet the scriptures also give us a clear pattern for resistance.
After Moses had seen God and spoken with Him, he found himself suddenly alone and physically weak. In that vulnerable moment, Satan appeared and demanded worship. The timing was no accident. Weakness is when doubt feels loudest.
But Moses was not confused. He did not argue. He did not panic. He anchored himself in truth.
He remembered who he was.
NOTES FROM THE SCRIPTURES
Moses’ encounter with Satan teaches us that temptation often comes after spiritual strength. When the vision ended, Moses was left exhausted. That is when Satan approached him, trying to blur the line between creator and pretender.
But Moses did not measure himself by his weakness. He measured himself by his identity.
He stood on three unshakable principles.
First, he remembered that he was a son of God. Second, he refused to stop resisting when temptation persisted. Third, he relied fully on the power of Jesus Christ.
Each step brought greater strength until Satan’s influence finally broke.
The pattern is clear. Identity anchors us. Persistence strengthens us. The Savior delivers us.
PERSPECTIVE (DIRECT QUOTES)
Scripture
“I have a work for thee, Moses, my son.” Moses 1:6
“Moses, son of man, worship me.” Moses 1:12
“Who art thou? For behold, I am a son of God.” Moses 1:13
“Get thee hence, Satan; deceive me not.” Moses 1:16
“Depart hence, Satan.” Moses 1:18
“In the name of the Only Begotten, depart hence, Satan.” Moses 1:21
“Satan cried with a loud voice, with weeping, and wailing, and gnashing of teeth; and he departed hence.” Moses 1:22
Sister Tamara W. Runia
“Satan is the thief of hope.”
“Your Repentance Doesn’t Burden Jesus Christ; It Brightens His Joy,” April 2025 General Conference
PRACTICE (TODAY, NOT SOMEDAY)
Today, I will resist temptation by choosing three simple acts of faith.
I will remember who I am. A child of God, not defined by weakness, but by divine heritage.
I will be persistent. I will not give up just because temptation returns. I will stand again, and again, and again.
I will rely on Jesus Christ. Not only in moments of crisis, but in every quiet struggle where hope feels fragile.
FINAL REFLECTION
Satan rarely begins by asking us to abandon faith. He begins by whispering that faith is not working.
He steals hope before he steals obedience. He drains courage before he attacks conviction.
But Moses shows us a better way.
Hope is protected when we know who we are. Strength grows when we keep standing. Victory comes when we trust in the Savior’s power instead of our own.
POCKET I’M KEEPING
Hope is not something I lose. It is something I must protect.
WHAT I HEAR NOW
“Satan is the thief of hope.”
But Jesus Christ is the Giver of strength. And with Him, hope can never truly be stolen.
Snow resting on the Oquirrh Mountain Temple this morning, a quiet reminder that even in the coldest seasons, God is still building something holy in us.
EXCERPT
God does not just see who we are. He sees what we can become — and invites us to help Him get there.
INTRO
Most of us want to feel valued, not just noticed, but trusted. We want to know that our lives matter beyond our own circle, that what we do makes a real difference.
One of the quiet truths of the gospel is that God increases our sense of worth by inviting us to participate in His work. He does not simply affirm who we are. He assigns us something meaningful to do.
When the Lord spoke to Moses, He first declared, “Thou art my son.” Then He added an invitation that changed everything: “I have a work for thee.” In that moment, identity became purpose.
The same pattern appears again and again in scripture. Abraham learned that he had been chosen before he was born. Alma taught that many were prepared from the foundation of the world to help others enter God’s rest. These were not random callings. They were expressions of divine confidence.
Not everyone receives a visible role like Moses or Abraham. Most of us are called in quieter ways. Still, the principle is the same. Whether the work feels large or small, every invitation to serve is God saying, I trust you. I need you. You matter in My plan.
NOTES FROM THE SCRIPTURES
Throughout scripture, God affirms worth and then invites action.
Moses learned he was a son of God before being sent to liberate a nation. Abraham learned he was chosen before being entrusted with leadership. Alma taught that many were prepared long before they were ever called.
The pattern is consistent. Calling follows confidence. Service follows identity.
Even Amulek, who described himself as being “called many times,” shows us that repeated, simple invitations can be just as sacred as dramatic ones.
PERSPECTIVE (DIRECT QUOTES)
Scripture
“I have a work for thee, Moses, my son.” Moses 1:6
“Thou wast chosen before thou wast born.” Abraham 3:23
“They were called and prepared from the foundation of the world.” Alma 13:3
President Spencer W. Kimball
God does notice us, and he watches over us. But it is usually through another person that he meets our needs. Therefore, it is vital that we serve each other in the kingdom. … So often, our acts of service consist of simple encouragement or of giving mundane help with mundane tasks, but what glorious consequences can flow from mundane acts and from small but deliberate deeds!
“Small Acts of Service,” Ensign, December 1974
President Thomas S. Monson
I experienced … as I have many times before, a sense of gratitude that my Heavenly Father had answered another person’s prayer through me.
“The Priesthood—a Sacred Gift,” April 2007 General Conference
PRACTICE (TODAY, NOT SOMEDAY)
Today, I will look for the ways God is calling me to serve.
Not only in the obvious moments, but in the quiet ones. In a kind word. In a listening ear. In a simple act that no one else may notice.
I will recognize these invitations for what they truly are. Not interruptions. Not obligations. But expressions of trust.
Each small call is a reminder that God believes in me. That He sees my potential. That He trusts my ability to bless others right now.
FINAL REFLECTION
Some people are asked to lead nations. Others are asked to lift one soul at a time.
Both are sacred.
God’s work does not move forward only through grand moments. It advances through countless quiet acts of faith, done by ordinary people who accept divine invitations.
To be given work in God’s kingdom is not a burden. It is a gift. A sign of confidence from heaven.
POCKET I’M KEEPING
When God gives me something to do, He is not testing me. He is trusting me.
WHAT I HEAR NOW
“I have a work for thee.”
Not just for prophets. Not just for leaders. But for me. Today.