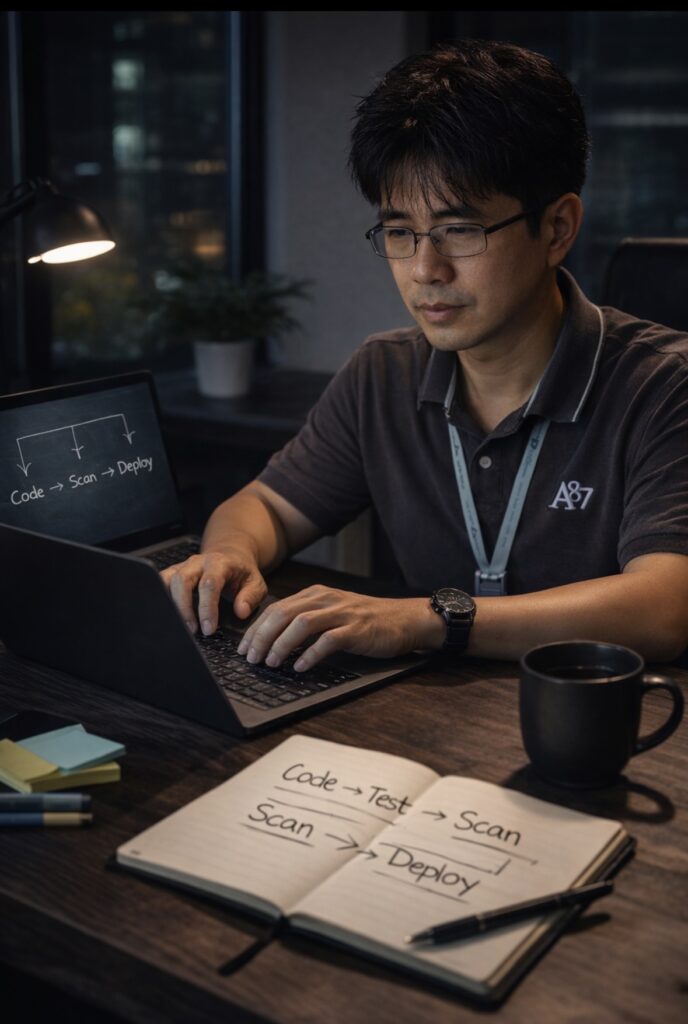
Tag: Automation

  • Hot-cloning a Running Windows 11 VM in vSphere (Forensic, Redacted Runbook)

    This guide covers hot cloning a Windows 11 VM in vSphere with PowerCLI

    Goal. Create a new Windows 11 jump VM (WIN11-Jumpbox-6) by cloning a running source (WIN11-Jumpbox-2) in vCenter—without interrupting the source—and bring the clone up with a fresh identity (Sysprep), correct name, and domain join.

    Applies to. vCenter/vSphere with vSAN (or any datastore), Windows 11 guest, PowerCLI.

    Redaction note: All names below are placeholders. Replace the ALL_CAPS parts with local values.
    vCenter: VCENTER.FQDN
    Source VM: WIN11-Jumpbox-2
    New VM: WIN11-Jumpbox-6
    Target ESXi host: esxi-03.example.local
    Datastore: vsanDatastore
    Domain (optional): corp.local
    Join account: corp.local\joinaccount


    Constraints & safety

    • No source outage. Clone while the source is powered on (vCenter snapshots and clones from it).
    • Fresh identity. Use guest customization (Sysprep) so the clone receives a new SID and hostname.
    • Parameter sets. When cloning with -VM, avoid -NetworkName/-NumCPU/-MemoryGB in the same New-VM call; set those after the clone boots.
    • VMware Tools must be running in the guest for customization to apply.

    Pre-flight checks (30–60 seconds)

    # Connect
    Connect-VIServer VCENTER.FQDN
    
    # Capacity snapshot (optional)
    Get-VMHost | Select Name,
     @{N="CPU MHz Used";E={$_.CpuUsageMhz}},
     @{N="CPU MHz Total";E={$_.CpuTotalMhz}},
     @{N="Mem GB Used";E={[math]::Round($_.MemoryUsageGB,2)}},
     @{N="Mem GB Total";E={[math]::Round($_.MemoryTotalGB,2)}}
    
    Get-Datastore -Name "vsanDatastore" | Select Name,Type,State,
     @{N="CapacityGB";E={[math]::Round($_.CapacityGB,2)}},
     @{N="FreeGB";E={[math]::Round($_.FreeSpaceGB,2)}},
     @{N="Free%";E={[math]::Round(($_.FreeSpaceGB/$_.CapacityGB)*100,2)}}
    

    Rule of thumb: keep vSAN Free% ≥ 20–25% to avoid slack-space pressure during resync/rebuild.


    Method A — Clone with one-time guest customization (recommended)

    This path Syspreps the clone, renames it, and (optionally) joins the domain. It also avoids the PowerShell reserved variable $host (use $targetHost).

    # -------- Vars --------
    $srcName        = "WIN11-Jumpbox-2"
    $newName        = "WIN11-Jumpbox-6"
    $targetHostName = "esxi-03.example.local"
    $dsName         = "vsanDatastore"
    $domainFqdn     = "corp.local"                 # leave blank if no domain join
    $joinUser       = "corp.local\joinaccount"     # account allowed to join computers
    
    # -------- Objects --------
    $src        = Get-VM -Name $srcName -ErrorAction Stop
    $targetHost = Get-VMHost -Name $targetHostName -ErrorAction Stop
    $ds         = Get-Datastore -Name $dsName -ErrorAction Stop
    $pg         = ($src | Get-NetworkAdapter | Select-Object -First 1).NetworkName
    
    # -------- One-time Windows customization spec (NonPersistent) --------
    $specName = "TMP-Join-Redacted"
    $existing = Get-OSCustomizationSpec -Name $specName -ErrorAction SilentlyContinue
    if ($existing) { Remove-OSCustomizationSpec -OSCustomizationSpec $existing -Confirm:$false }
    
    # If domain join is desired
    $spec = if ($domainFqdn) {
      $joinCred = Get-Credential -UserName $joinUser -Message "Password for $joinUser"
      New-OSCustomizationSpec -Name $specName -Type NonPersistent `
        -OSType Windows -NamingScheme VMName -FullName "IT" -OrgName "Redacted" `
        -Domain $domainFqdn -DomainCredentials $joinCred
    }
    else {
      New-OSCustomizationSpec -Name $specName -Type NonPersistent `
        -OSType Windows -NamingScheme VMName -FullName "IT" -OrgName "Redacted"
    }
    
    # NIC(s) -> DHCP (switch to static if needed)
    Get-OSCustomizationNicMapping -OSCustomizationSpec $spec |
      ForEach-Object { Set-OSCustomizationNicMapping -OSCustomizationNicMapping $_ -IpMode UseDhcp | Out-Null }
    
    # -------- Clone (do NOT pass -NetworkName/-NumCPU/-MemoryGB here) --------
    $newVM = New-VM -Name $newName -VM $src -VMHost $targetHost -Datastore $ds -OSCustomizationSpec $spec
    
    Start-VM $newVM
    $newVM | Wait-Tools -TimeoutSeconds 900
    
    # -------- Post-boot tuning --------
    Set-VM -VM $newVM -NumCPU 4 -MemoryGB 8 -Confirm:$false
    Get-NetworkAdapter -VM $newVM | Set-NetworkAdapter -NetworkName $pg -Connected:$true -Confirm:$false
    

    Why this works (and common pitfalls)

    • Reserved variable. Cannot overwrite variable Host… appears when assigning to $host (PowerShell reserved). Use $targetHost.
    • Missing spec. Get-OSCustomizationSpec … ObjectNotFound indicates the named spec didn’t exist. The runbook creates a NonPersistent spec on the fly.
    • Ambiguous parameter set. New-VM : Parameter set cannot be resolved… occurs when mixing clone parameter -VM with -NetworkName/-NumCPU/-MemoryGB. Clone first, then adjust CPU/RAM/NIC after boot.

    Method B — Fallback: clone now, join inside the guest

    If guest customization is blocked (e.g., Tools not running, limited join rights), clone without customization, then rename/join inside the guest.

    # Clone without customization
    $src        = Get-VM -Name "WIN11-Jumpbox-2"
    $targetHost = Get-VMHost -Name "esxi-03.example.local"
    $ds         = Get-Datastore -Name "vsanDatastore"
    $newName    = "WIN11-Jumpbox-6"
    
    $newVM = New-VM -Name $newName -VM $src -VMHost $targetHost -Datastore $ds
    Start-VM $newVM
    $newVM | Wait-Tools -TimeoutSeconds 900
    
    # Rename to match VM name (inside guest)
    $localAdminCred = Get-Credential -Message "Local Administrator on the cloned VM"
    Invoke-VMScript -VM $newVM -GuestCredential $localAdminCred -ScriptType Powershell -ScriptText `
     'Rename-Computer -NewName "WIN11-Jumpbox-6" -Force; Restart-Computer -Force'
    
    $newVM | Wait-Tools -TimeoutSeconds 900
    
    # Optional domain join (inside guest)
    $joinCred = Get-Credential -UserName "corp.local\joinaccount"
    Invoke-VMScript -VM $newVM -GuestCredential $localAdminCred -ScriptType Powershell -ScriptText `
     'Add-Computer -DomainName "corp.local" -Credential (New-Object System.Management.Automation.PSCredential("corp.local\joinaccount",(Read-Host -AsSecureString))) -Force -Restart'
    

    Verification (quick, non-invasive)

    # Where did it land? (host, datastore, portgroup)
    Get-VM -Name "WIN11-Jumpbox-6" | Select Name,PowerState,
     @{N="Host";E={$_.VMHost.Name}},
     @{N="Datastore(s)";E={($_ | Get-Datastore).Name -join ", "}},
     @{N="PortGroup";E={(Get-NetworkAdapter -VM $_ | Select -First 1).NetworkName}}
    
    # Optional: ensure VM files are on the intended datastore
    Get-VM -Name "WIN11-Jumpbox-6" | Get-HardDisk | Select Parent,Name,FileName
    

    Post-build hygiene

    • RDP enabled; restricted to an AD group.
    • Endpoint agents (AV/EDR/RMM) register as a new device (fresh identity).
    • Patching applied; baseline GPO/Intune policies targeted; backup/monitoring added.

    Forensic addendum: errors & remediation

    • Cannot overwrite variable Host…
      Cause: attempted $host = Get-VMHost … (PowerShell reserved).
      Fix: rename the variable to $targetHost.
    • Get-OSCustomizationSpec … ObjectNotFound
      Cause: referenced a non-existent customization spec.
      Fix: create a NonPersistent spec in-line.
    • New-VM … Parameter set cannot be resolved…
      Cause: mixed -VM (clone) with create-new switches.
      Fix: keep New-VM to the clone parameter set; tune CPU/RAM/NIC after boot.

    Security & privacy guardrails

    • No real hostnames, domains, IPs, or identifying screenshots in public artifacts.
    • Least-privilege join accounts or pre-staged computer objects in AD.
    • When publishing logs, hash or redact VM names and datastore paths.

    Summary

    Hot-cloning a Windows 11 VM in vSphere is reliable for a jump host when the process (1) allows vCenter to snapshot and clone a powered-on source, (2) applies Sysprep guest customization for a clean identity, and (3) keeps New-VM to a single parameter set. The runbook above is deterministic, quiet, and free of sensitive fingerprints.

    © 2012–2025 Jet Mariano. All rights reserved.
    For usage terms, please see the Legal Disclaimer.

  • 🌥️ The Cloud Above Us

    PIMCO (Newport Beach HQ, CA) 🌍 — Global financial services supporting regions in NA, EMEA, APAC.
    Church (Riverton Office Building, UT) ⛪ — Worldwide infrastructure with 200k employees and over 80k missionaries.
    Monster Energy (Corona HQ, CA) ⚡ — Global enterprise IT operations across NA, EMEA, APAC.
    City National Bank (Downtown LA, CA) 🏙️ — U.S. banking systems at scale.

    A journey across scales: national (CNB), global (PIMCO & Monster Energy), and worldwide (The Church).


    Every IT career tells a story, and mine has moved through three different scales of impact:

    Company-Level Foundations → At PayForward, I migrated an entire OnPrem environment into AWS. That meant setting up VPCs, building HA Exchange clusters with load balancers, and proving the power of cloud for a fast-moving startup.

    Regional / Global Scale → At Monster Energy and PIMCO, the work stretched across North America, EMEA, and APAC. The systems never slept. VMware clusters and M365 tenants had to function as one, even though users were scattered across time zones and continents.

    Worldwide Reach → At the Church, the scale expanded beyond regions. Over 200,000 employees and over 80,000 missionaries, connected by systems that had to reach every corner of the globe, demanded both technical precision and spiritual responsibility.

    This journey shows that the “cloud above us” isn’t just AWS, Azure, or GCP — it’s the ability to design, secure, and sustain systems at every possible scale.

    A colleague once told me: “Automate, or eliminate.” In IT, that isn’t just a clever saying — it’s survival. At the scale of hundreds or even thousands of VMs, EC2 instances, or mailboxes, doing things manually is not just unrealistic — it’s risky. What automation can finish in under 10 minutes might take days or weeks by hand, and even then would be prone to errors.

    That’s why Python, PowerShell, Bash, and automation frameworks became part of my daily toolkit. Not to flaunt, but because without automation, no single engineer could handle the demands of environments as large as PIMCO, Monster Energy, or the Church.


    Snippet 1: AWS (My PayForward Days)

    import boto3
    
    # Connect to AWS S3
    s3 = boto3.client('s3')
    
    # List buckets
    buckets = s3.list_buckets()
    print("Your AWS buckets:")
    for bucket in buckets['Buckets']:
        print(f"  {bucket['Name']}")
    

    From racks of servers to a few lines of Python—that’s the power of AWS.

    Snippet 2: PowerShell + Azure (My Church Years, CNB)

    Connect-AzAccount
    Get-AzResourceGroup | Select ResourceGroupName, Location
    

    One line, and you can see every Azure resource group spread across the world. A task that once required data center visits and clipboards is now just a command away.

    Snippet 3: PHP + GCP (Expanding Horizons)

    use Google\Cloud\Storage\StorageClient;
    
    $storage = new StorageClient([
        'keyFilePath' => 'my-service-account.json'
    ]);
    
    $buckets = $storage->buckets();
    
    foreach ($buckets as $bucket) {
        echo $bucket->name() . PHP_EOL;
    }
    

    Snippet 4: VMware + M365 (Monster Energy, PIMCO, and Beyond)

    # Connect to vCenter and list VMs across data centers
    Connect-VIServer -Server vcenter.global.company.com -User admin -Password pass
    Get-VM | Select Name, PowerState, VMHost, Folder
    
    # Quick check of licensed users in M365 (global tenants)
    Connect-MgGraph -Scopes "User.Read.All"
    Get-MgUser -All -Property DisplayName, UserPrincipalName, UsageLocation |
        Group-Object UsageLocation |
        Select Name, Count
    

    One script, and suddenly you’re seeing footprints of users spread across the globe — NA, EMEA, APAC, or even worldwide. That’s the reality of modern IT infrastructure.


    The “cloud above us” is both a literal technology — AWS, Azure, and GCP that I’ve worked across — and a metaphor. It represents resilience, scalability, and unseen support. Just as automation carries workloads we could never handle by hand, life has storms we cannot carry alone.

    From startups making their first move to the cloud, to global financial institutions, to worldwide organizations with hundreds of thousands of users, the lesson is the same: we are not meant to fight every battle manually.

    We are given tools, teammates, and even unseen strength from above to keep moving forward. The same way a script can manage thousands of servers or accounts without error, trust and preparation help us navigate the storms of life with less fear.

    ☁️ Above every storm, there’s always a cloud carrying potential. And above that cloud, always light waiting to break through.

    Before my cloud journey, I also spent nine years in forensic IT supporting law enforcement — a grounding reminder that technology isn’t only about systems and scale, but about accountability and truth.

    © 2012–2025 Jet Mariano. All rights reserved.
    For usage terms, please see the Legal Disclaimer.

  • Secure Automation with PowerShell SecretManagement: Simplifying Credential Management for IT Pros

    Introduction:
    In enterprise environments, automation is only as secure as the credentials it uses. Hardcoding passwords into scripts is a security disaster waiting to happen. Enter PowerShell SecretManagement — a cross-platform module that allows IT professionals to store, retrieve, and manage credentials securely while keeping scripts clean, compliant, and automation-ready.

    Description & Guide:

    1. What is SecretManagement?
      The SecretManagement module provides a unified way to work with secrets across different vaults like Windows Credential Manager, Azure Key Vault, KeePass, or HashiCorp Vault — without locking you into a single storage provider.
    2. Installing the Modules
    Install-Module Microsoft.PowerShell.SecretManagement
    Install-Module Microsoft.PowerShell.SecretStore
    

    3. Registering a Vault
    For a local secure store:

    Register-SecretVault -Name LocalVault -ModuleName Microsoft.PowerShell.SecretStore -DefaultVault
    

    4. Adding a Secret

    Set-Secret -Name MySQLAdmin -Secret (Get-Credential)
    

    5. Retrieving a Secret in Scripts

    $cred = Get-Secret -Name MySQLAdmin -AsCredential
    Invoke-Sqlcmd -ServerInstance "SQL01" -Username $cred.UserName -Password $cred.GetNetworkCredential().Password
    

    6. Why This Matters

    • Eliminates plaintext passwords in scripts
    • Centralizes secret management for easier updates
    • Works seamlessly with CI/CD pipelines and scheduled tasks

    Conclusion:
    Security and automation don’t have to be enemies. With PowerShell SecretManagement, you can protect sensitive credentials without sacrificing automation speed or flexibility. For IT pros managing hybrid environments, this module is a must-have in your PowerShell toolbox.

    If you’d like to go beyond this post and see what Microsoft officially recommends, here are my go-to resources:

    Microsoft Docs – SecretManagement Overview

    Microsoft Docs – SecretStore vault extension

    © 2012–2025 Jet Mariano. All rights reserved.
    For usage terms, please see the Legal Disclaimer.

  • Migrating Azure AD Scripts to Microsoft Graph PowerShell: A Practical Guide for IT Administrators

    Introduction
    The AzureAD PowerShell module has served IT administrators for years, but it’s now officially deprecated in favor of the Microsoft Graph PowerShell SDK. While the change may feel like another “cloud shuffle,” migrating your scripts is not just a compliance move — it’s your ticket to a more powerful, secure, and future-proof automation toolkit. In this post, I’ll walk you through the essentials of converting your Azure AD scripts to Microsoft Graph, with clear side-by-side examples.

    Why Migrate?

    • Future Support: Microsoft Graph is actively developed; AzureAD is on life support.
    • Unified Endpoint: Graph covers Azure AD, Intune, Exchange Online, Teams, and more in one API.
    • Security: Better authentication methods, including secure app registrations and least-privilege scopes.

    Step 1 – Install Microsoft Graph PowerShell

    # Install the module
    Install-Module Microsoft.Graph -Scope CurrentUser
    
    # Update if already installed
    Update-Module Microsoft.Graph
    
    # Connect with interactive sign-in
    Connect-MgGraph -Scopes "User.Read.All", "Group.ReadWrite.All"
    
    # Confirm connection
    Get-MgContext
    

    Step 2 – Side-by-Side Script Conversion

    Example: Get all Azure AD users
    AzureAD Module:

    Connect-AzureAD
    Get-AzureADUser -All $true
    

    Microsoft Graph:

    Connect-MgGraph -Scopes "User.Read.All"
    Get-MgUser -All
    

    Example: Get members of a group
    AzureAD Module:

    $groupId = (Get-AzureADGroup -SearchString "Sales Team").ObjectId
    Get-AzureADGroupMember -ObjectId $groupId
    

    Microsoft Graph:

    $groupId = (Get-MgGroup -Filter "displayName eq 'Sales Team'").Id
    Get-MgGroupMember -GroupId $groupId
    

    Example: Create a new group
    AzureAD Module:

    New-AzureADGroup -DisplayName "Project A Team" -MailEnabled $false -SecurityEnabled $true -MailNickname "ProjectATeam"
    

    Microsoft Graph:

    New-MgGroup -DisplayName "Project A Team" `
        -MailEnabled:$false `
        -SecurityEnabled `
        -MailNickname "ProjectATeam"
    

    Step 3 – Updating Authentication
    With Microsoft Graph, you can fine-tune permissions at sign-in instead of granting broad directory access:

    Connect-MgGraph -Scopes "User.ReadWrite.All", "Group.ReadWrite.All"
    

    Only request the scopes you actually need — this aligns with least privilege best practices.

    Step 4 – Testing and Verification
    Before replacing scripts in production, run them in a test tenant or a non-production environment. Compare outputs from AzureAD and Graph to ensure parity.

    Conclusion
    Migrating from AzureAD to Microsoft Graph PowerShell is more than just a rewrite — it’s a forward-looking investment. Once you adapt, you’ll unlock richer APIs, cross-service automation, and security benefits that AzureAD simply can’t match. My advice? Start small: pick one script, convert it, and test until you’re confident. Once you see the gains, the rest will follow naturally.

    For official guidance and best practices from Microsoft, check out these resources:

    © 2012–2025 Jet Mariano. All rights reserved.
    For usage terms, please see the Legal Disclaimer.

error: Content is protected !!