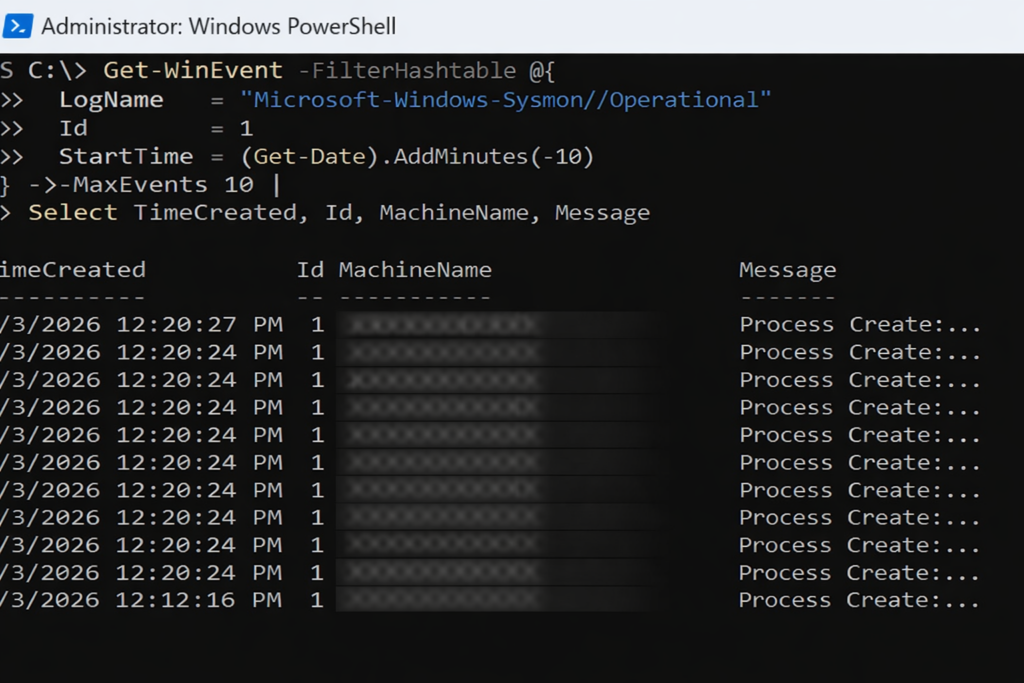
Each entry records a process creation event, showing when a process started and providing the first layer of visibility into how activity begins on an endpoint.
Seeing What Actually Happens
Why this post exists
Sysmon is often misunderstood.
Some expect dashboards.
Others expect alerts.
A few expect it to magically explain incidents on its own.
Sysmon does none of those things.
What it does extremely well is something more fundamental.
It records what actually happened.
Think of Sysmon as a black box flight recorder for a computer.
What Sysmon is
Sysmon (System Monitor) is a Windows system service from Microsoft Sysinternals.
Once installed, it continuously records detailed system activity into the Windows Event Log, including:
- Process creation and command lines
- Network connections
- DLL and driver loading
- Process access and injection behavior
Sysmon does not block activity.
It does not alert.
It observes and records.
What Sysmon is not
Sysmon is not:
- A SIEM
- A reporting platform
- An inventory system
- A centralized logging solution
Sysmon logs locally on each endpoint only.
Visibility comes later, when those logs are queried, collected, or forwarded.
Where Sysmon logs live
All Sysmon telemetry is written to the Windows Event Log on each machine.
Log path:
Microsoft-Windows-Sysmon/Operational
These logs can be:
- Queried locally with PowerShell
- Forwarded using Windows Event Forwarding
- Collected by a SIEM
- Reviewed during investigations
Why companies deploy Sysmon
Most security incidents are investigated after the fact.
Without Sysmon, questions like these are difficult to answer:
- How did this process start?
- What command launched it?
- What network connection did it make?
- Was this behavior normal for this system?
Sysmon provides the raw telemetry needed to answer those questions with evidence, not assumptions.
Where Sysmon comes from
Sysmon is part of Microsoft Sysinternals and is downloaded directly from Microsoft:
https://learn.microsoft.com/sysinternals/downloads/sysmon
It is free and does not require licensing.
Why Sysmon requires configuration
Out of the box, Sysmon logs too much.
A configuration file is required to:
- Reduce noise
- Focus on meaningful security events
- Avoid unnecessary performance impact
Most mature configurations are based on known attacker behaviors, not generic logging.
This is where MITRE ATT&CK and Atomic Red Team come in.
Sysmon, MITRE ATT&CK, and Atomic Red Team
MITRE ATT&CK documents how attackers behave, not just which tools they use.
Atomic Red Team provides small, controlled tests that simulate those behaviors.
Sysmon supplies the telemetry that proves whether those behaviors are visible.
Together, they form a feedback loop:
- ATT&CK defines behaviors
- Atomic Red Team tests them
- Sysmon records them
Key Sysmon Event IDs (1–10)
Event ID 1
Process Create
Records process start, parent process, and command line.
Event ID 2
File Creation Time Changed
Indicates possible timestamp manipulation.
Event ID 3
Network Connection
Records outbound network connections per process.
Event ID 4
Sysmon Service State Changed
Shows Sysmon startup or shutdown.
Event ID 5
Process Terminated
Records process exit.
Event ID 6
Driver Loaded
Useful for detecting suspicious or unsigned drivers.
Event ID 7
Image Loaded
Shows DLLs loaded by a process.
Event ID 8
CreateRemoteThread
Often associated with injection techniques.
Event ID 9
RawAccessRead
Can indicate disk or credential access attempts.
Event ID 10
Process Access
Records when one process accesses another.
Installing Sysmon
Sysmon is installed from an elevated PowerShell session.
Example:
sysmon64.exe -accepteula -i sysmonconfig.xml
This installs Sysmon using a predefined configuration file.
Rollout considerations
Sysmon performs deep system inspection during installation.
In some environments, this can cause:
- Extended login times
- Temporary sluggishness
- The appearance that the system is unresponsive
Because of this, many organizations choose manual or staged deployment instead of broad GPO rollout.
Confirming Sysmon is installed
Sysmon does not report inventory centrally.
Coverage is confirmed by querying endpoints.
Check for the Sysmon service:
Get-Service -Name Sysmon64
If present, Sysmon is installed.
Confirming Sysmon logging
Check that the Sysmon event log exists:
Get-WinEvent -ListLog "Microsoft-Windows-Sysmon/Operational"
If the log exists, Sysmon is logging locally.
Viewing Sysmon telemetry (examples)
Show recent process creation events (Event ID 1):
Get-WinEvent -FilterHashtable @{
  LogName   = "Microsoft-Windows-Sysmon/Operational"
  Id        = 1
  StartTime = (Get-Date).AddMinutes(-10)
} -MaxEvents 10 |
Select TimeCreated, Id, MachineName, Message
Show recent network connection events (Event ID 3):
Get-WinEvent -FilterHashtable @{
  LogName   = "Microsoft-Windows-Sysmon/Operational"
  Id        = 3
  StartTime = (Get-Date).AddMinutes(-10)
} -MaxEvents 10 |
Select TimeCreated, Id, MachineName, Message
Show driver load events (Event ID 6):
Get-WinEvent -FilterHashtable @{
  LogName   = "Microsoft-Windows-Sysmon/Operational"
  Id        = 6
  StartTime = (Get-Date).AddMinutes(-30)
} -MaxEvents 5 |
Select TimeCreated, Id, MachineName, Message
Show process access events (Event ID 10):
Get-WinEvent -FilterHashtable @{
  LogName   = "Microsoft-Windows-Sysmon/Operational"
  Id        = 10
  StartTime = (Get-Date).AddMinutes(-30)
} -MaxEvents 5 |
Select TimeCreated, Id, MachineName, Message
Plain-language summary
Sysmon records activity.
Windows stores the records.
PowerShell reads the records.
Other tools collect the records.
Sysmon is the recorder, not the reporter.
Why this matters
Security improves when decisions are based on evidence.
Sysmon does not replace other tools.
It reinforces them by preserving the truth of what happened.
That alone makes it worth deploying thoughtfully.
© 2012–2026 Jet Mariano. All rights reserved.
For usage terms, please see the Legal Disclaimer.