Tag: Infrastructure

  • How to Export and Audit Active Directory GPOs Using Native PowerShell (Step-by-Step)

    PowerShell export of Active Directory Group Policy Objects using native Get-GPO and Export-Csv commands to establish a baseline inventory before infrastructure changes.

    Maintaining visibility into Group Policy Objects (GPOs) is critical before domain consolidation, tenant migration, or infrastructure modernization.

    Below are seven native PowerShell commands used to generate a full GPO inventory, validate configurations, and export audit-ready reports.

    All commands use built-in GroupPolicy modules — no third-party tools required.


    1. Export GPO Summary Inventory

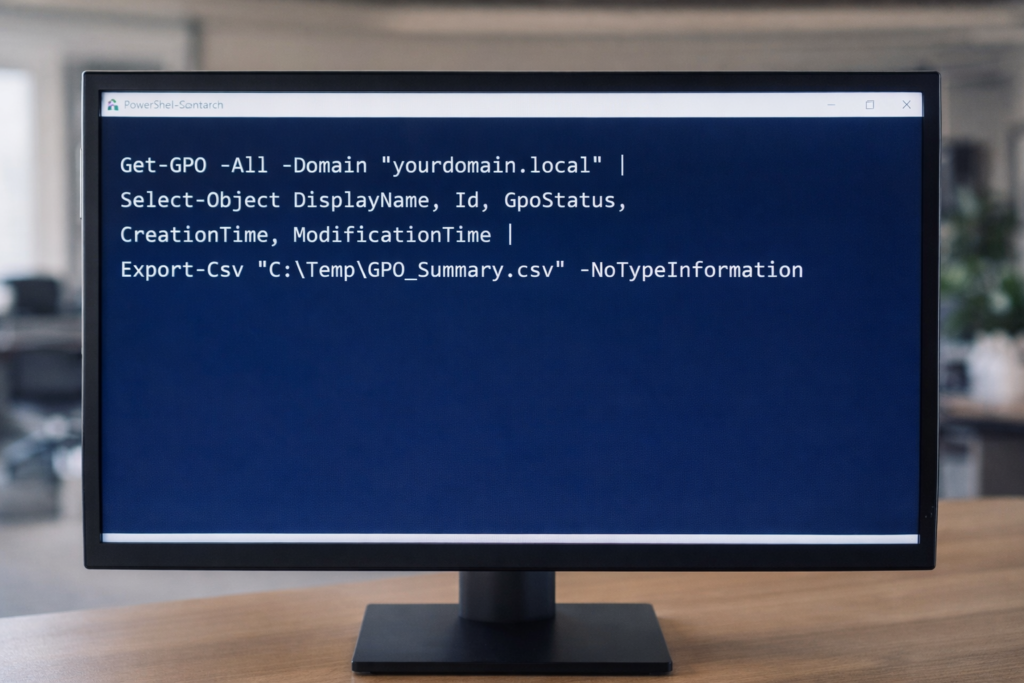
    Exports high-level metadata for all GPOs in the domain.

    Get-GPO -All -Domain "yourdomain.local" |
    Select-Object DisplayName, Id, GpoStatus, CreationTime, ModificationTime |
    Export-Csv "C:\Temp\GPO_Summary.csv" -NoTypeInformation


    This provides:
    • GPO Name
    • GUID
    • Status (Enabled/Disabled)
    • Creation Date
    • Last Modified Date


    2. Generate Full XML Reports for All GPOs

    Creates detailed configuration exports for forensic or migration analysis.

    New-Item -ItemType Directory -Path "C:\Temp\GPOReports" -Force
    
    Get-GPO -All -Domain "yourdomain.local" |
    ForEach-Object {
        Get-GPOReport -Guid $_.Id -ReportType XML -Path "C:\Temp\GPOReports\$($_.DisplayName).xml"
    }


    XML reports include:
    • Security settings
    • Registry policies
    • Administrative templates
    • Computer/User configuration details


    3. Generate Executive-Readable HTML Report

    Get-GPOReport -All -Domain "yourdomain.local" -ReportType HTML -Path "C:\Temp\All_GPOs_Report.html"


    Useful for:
    • Leadership review
    • Change control documentation
    • Audit preparation


    4. Identify Fully Disabled GPOs

    Get-GPO -All -Domain "yourdomain.local" |
    Where-Object {$_.GpoStatus -eq "AllSettingsDisabled"} |
    Select DisplayName, Id, GpoStatus |
    Export-Csv "C:\Temp\Disabled_GPOs.csv" -NoTypeInformation


    Helps identify cleanup opportunities before migration.


    5. Validate a Specific GPO (Live Proof Command)

    Get-GPO -Name "Default Domain Policy" -Domain "yourdomain.local"


    Useful for:
    • Live validation
    • Troubleshooting
    • Demonstrating configuration integrity


    6. Export WMI Filters

    Get-GPWmiFilter -Domain "yourdomain.local" |
    Select Name, Description |
    Export-Csv "C:\Temp\WMI_Filters.csv" -NoTypeInformation


    Important when:
    • GPOs are scoped using OS filters
    • Planning domain consolidation


    7. Create a Baseline Snapshot Before Major Change

    Get-GPO -All -Domain "yourdomain.local" |
    ForEach-Object {
        Get-GPOReport -Guid $_.Id -ReportType HTML -Path "C:\Temp\Baseline\$($_.DisplayName).html"
    }


    This creates a point-in-time snapshot for rollback or comparison.


    Why This Matters

    Before:

    • Domain merge
    • Tenant consolidation
    • Intune migration
    • Security hardening
    • Infrastructure cleanup

    You need visibility.

    PowerShell provides:
    • Repeatability
    • Transparency
    • Audit defensibility
    • No dependency on external tooling

    © 2012–2026 Jet Mariano. All rights reserved.
    For usage terms, please see the Legal Disclaimer.

  • Understanding IT Career Paths — Part 2

    USC Norris Cancer Center — one of the early enterprise environments where I supported large-scale infrastructure and user systems during the early days of my IT career.

    Infrastructure in the Real World


    After years of school, sacrifice, and helping people fix computers for free, my first real opportunity in IT finally arrived.

    At the time, I was still attending Los Angeles College full time during the week and Devry Institute of Technology full time on weekends, while raising my children and trying to build a future in technology.

    My first professional role came with a 90-day probation period, where I had to prove I could provide help desk and network support across the Los Angeles area.

    My title was PC/Network Specialist, supporting over 900 users.

    Early infrastructure days at USC. Back then, the datacenter dress code was simple but strict: long-sleeve shirt and tie, even while working with DEC Alpha servers and Windows NT systems. This was where discipline in both technology and professionalism began.

    This was during the early infrastructure era of enterprise computing. Our environment included:

    • Windows NT 3.5 servers
    • DEC Alpha servers
    • Cisco ASA firewall
    • Cisco switches
    • Exchange Server 5.0
    • Windows desktop deployments

    We were operating in what was called a MAN — Multi-Area Network — connecting multiple locations across the region.

    This was infrastructure work in its pure form.


    School, Work, and Discipline

    My schedule during those years was intense.

    Work: 8 AM to 5 PM
    LACC classes: Monday, Wednesday, Friday, and Tuesday/Thursday evenings
    Devry classes: Saturday and Sunday all day

    There was almost no downtime.

    Because I maintained an average 4.4 GPA, I was eventually allowed to attend only midterms and finals for many IT courses, which opened something unexpected.

    Opportunity.


    Consulting Across the Country

    From 1996 to 1998, I began consulting with Korn Ferry International, traveling across the country to help roll out Windows 95 deployments.

    I was sent to:

    • Manhattan, New York
    • Washington, DC
    • Houston, Texas
    • Menlo Park, California
    • Twin Cities, Minnesota

    This was during a time when software piracy was rampant, and companies urgently needed IT professionals to modernize their systems.

    Demand for infrastructure skills was exploding.


    Career Momentum

    Opportunities started coming quickly.

    Southern California Edison made an offer.
    USC matched the pay.

    But in July 1999, GTE (now Verizon) made an offer that was too strong to refuse.

    By December 1999, I was working as a Network Engineer, responsible for infrastructure from Woodland Hills to Camarillo, California.

    That role didn’t last long — not because of failure, but because another opportunity appeared.

    An aerospace company in Carson, California offered me a six-figure salary to manage:

    • Exchange Server 5.5
    • multi-state infrastructure
    • enterprise messaging systems

    Their locations included:

    • Carson, CA
    • Lakewood, CA
    • Tucson, AZ
    • Peekskill, NY
    • Bothell, WA

    I was constantly traveling.

    Week 1 — California
    Week 2 — Arizona
    Week 3 — New York
    Week 4 — Washington

    I was living in the friendly sky.


    The Cost of Success

    During this time, my fourth child was born.

    And that’s when I realized something difficult.

    My career was growing fast — but I was missing time with my family.

    By 2001, I made a decision.

    I stepped away from that life and started my own IT business.

    Not because I didn’t love technology — but because I needed balance.


    What Infrastructure Really Means

    When people ask what the Infrastructure path in IT looks like, this period of my life is the answer.

    It means:

    • supporting systems that must never fail
    • traveling when things break
    • building networks that connect organizations
    • managing communication systems people depend on
    • being on call when nobody else can solve the problem

    Infrastructure is not glamorous — but it is essential.

    And it builds resilience.


    Looking Ahead

    In Part 3, I’ll share what happened after leaving corporate IT in 2001 — when I started my own IT business and discovered a different side of technology and service.

    © 2012–2026 Jet Mariano. All rights reserved.
    For usage terms, please see the Legal Disclaimer.

  • How to Implement High-Availability Engineering (Step-by-Step)

    In the world of Infrastructure Engineering, we often say that “Complexity is the enemy of reliability.” Whether we are managing an M365 environment or a distributed network of remote nodes, the goal is always the same: High Availability (HA).

    As a Senior Engineer, I view system resilience through three specific forensic lenses. Here is how we ensure “Uptime” when the environment becomes unpredictable.

    1. The Heartbeat Protocol: Real-Time Telemetry

    In a distributed system, you cannot manage what you cannot see. Implementing a “Heartbeat” or real-time location sharing for remote assets is the difference between proactive recovery and forensic failure analysis.

    A consistent heartbeat ensures that the central controller knows exactly where the data (or the asset) is at all times. If a node goes silent—especially during a critical window like a 3:00 AM deployment—the system shouldn’t have to wait for a user to report a “down” status; the heartbeat failure should trigger the “Rescue Protocol” automatically.

    2. Edge Hardening: Preparing for Environmental Extremes

    We often focus on the software, but the physical “Base Layer” is where many systems fail. In engineering, we call this Environmental Hardening. Just as we provide thermal protection for outdoor hardware to prevent “cold-start” failures, we must ensure our digital assets have the proper “insulation.” In an enterprise context, this means:

    • Redundant Power: Ensuring “thermodynamic” stability for remote nodes.
    • Physical Security: Using high-fidelity interfaces to maintain signal integrity in noisy environments.

    3. Resource Pooling: Eliminating Single Points of Failure

    The most resilient systems utilize Resource Pooling. By creating a “Joint Account” of resources (storage, compute, or capital), we ensure that the system has immediate access to what it needs, even if one “administrator” is offline.

    Moving from a single-owner architecture to a shared-resource model reduces latency and ensures that the mission (the application) continues to run without interruption. It is the ultimate safeguard against the “Government Thieves” of data—bottlenecks and probate-like locks.

    Forensic Conclusion: True engineering isn’t about building a system that never fails; it’s about building a system that is sensible enough to recover when it does. As the late Bruce Lee said, “The stiffest tree is most easily cracked, while the bamboo or willow survives by bending with the wind.”

    © 2012–2025 Jet Mariano. All rights reserved.
    For usage terms, please see the Legal Disclaimer.

  • Hot-cloning a Running Windows 11 VM in vSphere (Forensic, Redacted Runbook)

    This guide covers hot cloning a Windows 11 VM in vSphere with PowerCLI

    Goal. Create a new Windows 11 jump VM (WIN11-Jumpbox-6) by cloning a running source (WIN11-Jumpbox-2) in vCenter—without interrupting the source—and bring the clone up with a fresh identity (Sysprep), correct name, and domain join.

    Applies to. vCenter/vSphere with vSAN (or any datastore), Windows 11 guest, PowerCLI.

    Redaction note: All names below are placeholders. Replace the ALL_CAPS parts with local values.
    vCenter: VCENTER.FQDN
    Source VM: WIN11-Jumpbox-2
    New VM: WIN11-Jumpbox-6
    Target ESXi host: esxi-03.example.local
    Datastore: vsanDatastore
    Domain (optional): corp.local
    Join account: corp.local\joinaccount


    Constraints & safety

    • No source outage. Clone while the source is powered on (vCenter snapshots and clones from it).
    • Fresh identity. Use guest customization (Sysprep) so the clone receives a new SID and hostname.
    • Parameter sets. When cloning with -VM, avoid -NetworkName/-NumCPU/-MemoryGB in the same New-VM call; set those after the clone boots.
    • VMware Tools must be running in the guest for customization to apply.

    Pre-flight checks (30–60 seconds)

    # Connect
    Connect-VIServer VCENTER.FQDN
    
    # Capacity snapshot (optional)
    Get-VMHost | Select Name,
     @{N="CPU MHz Used";E={$_.CpuUsageMhz}},
     @{N="CPU MHz Total";E={$_.CpuTotalMhz}},
     @{N="Mem GB Used";E={[math]::Round($_.MemoryUsageGB,2)}},
     @{N="Mem GB Total";E={[math]::Round($_.MemoryTotalGB,2)}}
    
    Get-Datastore -Name "vsanDatastore" | Select Name,Type,State,
     @{N="CapacityGB";E={[math]::Round($_.CapacityGB,2)}},
     @{N="FreeGB";E={[math]::Round($_.FreeSpaceGB,2)}},
     @{N="Free%";E={[math]::Round(($_.FreeSpaceGB/$_.CapacityGB)*100,2)}}
    

    Rule of thumb: keep vSAN Free% ≥ 20–25% to avoid slack-space pressure during resync/rebuild.


    Method A — Clone with one-time guest customization (recommended)

    This path Syspreps the clone, renames it, and (optionally) joins the domain. It also avoids the PowerShell reserved variable $host (use $targetHost).

    # -------- Vars --------
    $srcName        = "WIN11-Jumpbox-2"
    $newName        = "WIN11-Jumpbox-6"
    $targetHostName = "esxi-03.example.local"
    $dsName         = "vsanDatastore"
    $domainFqdn     = "corp.local"                 # leave blank if no domain join
    $joinUser       = "corp.local\joinaccount"     # account allowed to join computers
    
    # -------- Objects --------
    $src        = Get-VM -Name $srcName -ErrorAction Stop
    $targetHost = Get-VMHost -Name $targetHostName -ErrorAction Stop
    $ds         = Get-Datastore -Name $dsName -ErrorAction Stop
    $pg         = ($src | Get-NetworkAdapter | Select-Object -First 1).NetworkName
    
    # -------- One-time Windows customization spec (NonPersistent) --------
    $specName = "TMP-Join-Redacted"
    $existing = Get-OSCustomizationSpec -Name $specName -ErrorAction SilentlyContinue
    if ($existing) { Remove-OSCustomizationSpec -OSCustomizationSpec $existing -Confirm:$false }
    
    # If domain join is desired
    $spec = if ($domainFqdn) {
      $joinCred = Get-Credential -UserName $joinUser -Message "Password for $joinUser"
      New-OSCustomizationSpec -Name $specName -Type NonPersistent `
        -OSType Windows -NamingScheme VMName -FullName "IT" -OrgName "Redacted" `
        -Domain $domainFqdn -DomainCredentials $joinCred
    }
    else {
      New-OSCustomizationSpec -Name $specName -Type NonPersistent `
        -OSType Windows -NamingScheme VMName -FullName "IT" -OrgName "Redacted"
    }
    
    # NIC(s) -> DHCP (switch to static if needed)
    Get-OSCustomizationNicMapping -OSCustomizationSpec $spec |
      ForEach-Object { Set-OSCustomizationNicMapping -OSCustomizationNicMapping $_ -IpMode UseDhcp | Out-Null }
    
    # -------- Clone (do NOT pass -NetworkName/-NumCPU/-MemoryGB here) --------
    $newVM = New-VM -Name $newName -VM $src -VMHost $targetHost -Datastore $ds -OSCustomizationSpec $spec
    
    Start-VM $newVM
    $newVM | Wait-Tools -TimeoutSeconds 900
    
    # -------- Post-boot tuning --------
    Set-VM -VM $newVM -NumCPU 4 -MemoryGB 8 -Confirm:$false
    Get-NetworkAdapter -VM $newVM | Set-NetworkAdapter -NetworkName $pg -Connected:$true -Confirm:$false
    

    Why this works (and common pitfalls)

    • Reserved variable. Cannot overwrite variable Host… appears when assigning to $host (PowerShell reserved). Use $targetHost.
    • Missing spec. Get-OSCustomizationSpec … ObjectNotFound indicates the named spec didn’t exist. The runbook creates a NonPersistent spec on the fly.
    • Ambiguous parameter set. New-VM : Parameter set cannot be resolved… occurs when mixing clone parameter -VM with -NetworkName/-NumCPU/-MemoryGB. Clone first, then adjust CPU/RAM/NIC after boot.

    Method B — Fallback: clone now, join inside the guest

    If guest customization is blocked (e.g., Tools not running, limited join rights), clone without customization, then rename/join inside the guest.

    # Clone without customization
    $src        = Get-VM -Name "WIN11-Jumpbox-2"
    $targetHost = Get-VMHost -Name "esxi-03.example.local"
    $ds         = Get-Datastore -Name "vsanDatastore"
    $newName    = "WIN11-Jumpbox-6"
    
    $newVM = New-VM -Name $newName -VM $src -VMHost $targetHost -Datastore $ds
    Start-VM $newVM
    $newVM | Wait-Tools -TimeoutSeconds 900
    
    # Rename to match VM name (inside guest)
    $localAdminCred = Get-Credential -Message "Local Administrator on the cloned VM"
    Invoke-VMScript -VM $newVM -GuestCredential $localAdminCred -ScriptType Powershell -ScriptText `
     'Rename-Computer -NewName "WIN11-Jumpbox-6" -Force; Restart-Computer -Force'
    
    $newVM | Wait-Tools -TimeoutSeconds 900
    
    # Optional domain join (inside guest)
    $joinCred = Get-Credential -UserName "corp.local\joinaccount"
    Invoke-VMScript -VM $newVM -GuestCredential $localAdminCred -ScriptType Powershell -ScriptText `
     'Add-Computer -DomainName "corp.local" -Credential (New-Object System.Management.Automation.PSCredential("corp.local\joinaccount",(Read-Host -AsSecureString))) -Force -Restart'
    

    Verification (quick, non-invasive)

    # Where did it land? (host, datastore, portgroup)
    Get-VM -Name "WIN11-Jumpbox-6" | Select Name,PowerState,
     @{N="Host";E={$_.VMHost.Name}},
     @{N="Datastore(s)";E={($_ | Get-Datastore).Name -join ", "}},
     @{N="PortGroup";E={(Get-NetworkAdapter -VM $_ | Select -First 1).NetworkName}}
    
    # Optional: ensure VM files are on the intended datastore
    Get-VM -Name "WIN11-Jumpbox-6" | Get-HardDisk | Select Parent,Name,FileName
    

    Post-build hygiene

    • RDP enabled; restricted to an AD group.
    • Endpoint agents (AV/EDR/RMM) register as a new device (fresh identity).
    • Patching applied; baseline GPO/Intune policies targeted; backup/monitoring added.

    Forensic addendum: errors & remediation

    • Cannot overwrite variable Host…
      Cause: attempted $host = Get-VMHost … (PowerShell reserved).
      Fix: rename the variable to $targetHost.
    • Get-OSCustomizationSpec … ObjectNotFound
      Cause: referenced a non-existent customization spec.
      Fix: create a NonPersistent spec in-line.
    • New-VM … Parameter set cannot be resolved…
      Cause: mixed -VM (clone) with create-new switches.
      Fix: keep New-VM to the clone parameter set; tune CPU/RAM/NIC after boot.

    Security & privacy guardrails

    • No real hostnames, domains, IPs, or identifying screenshots in public artifacts.
    • Least-privilege join accounts or pre-staged computer objects in AD.
    • When publishing logs, hash or redact VM names and datastore paths.

    Summary

    Hot-cloning a Windows 11 VM in vSphere is reliable for a jump host when the process (1) allows vCenter to snapshot and clone a powered-on source, (2) applies Sysprep guest customization for a clean identity, and (3) keeps New-VM to a single parameter set. The runbook above is deterministic, quiet, and free of sensitive fingerprints.

    © 2012–2025 Jet Mariano. All rights reserved.
    For usage terms, please see the Legal Disclaimer.

error: Content is protected !!