Author: jetnmariano

  • Building Strength for Any Opportunity: Five Pillars to Prepare Yourself

    In today’s fast-moving world, opportunities can appear when we least expect them.
    Whether it’s a job opening, a new project, or a chance to lead, how we prepare determines how we rise.

    Here are five key pillars to help anyone stay ready, resilient, and confident:


    🧠 1. Build a Clear Self-Story

    When opportunities come, be ready to introduce yourself with calm clarity.

    Focus on:

    • Who you are
    • What you specialize in
    • What unique value you bring
    • Why you’re passionate about growing and contributing

    Knowing your story strengthens your voice — and your direction.


    🛡️ 2. Think in Pillars, Not Panic

    When facing challenges (whether designing a system, a business, or a solution), anchor yourself on these five pillars:

    • Scalability — Can this grow without breaking?
    • Security — Is it protected from threats?
    • Availability — Will it stay reliable under pressure?
    • Monitoring — Can I see when things go wrong?
    • Recovery — Can I bring it back if disaster strikes?

    No matter the project or problem, thinking in pillars brings focus and confidence.


    🛠️ 3. Automate and Secure What You Build

    Whatever you create — systems, habits, workflows — build them with automation and security in mind.

    • Script and standardize repeatable steps.
    • Protect secrets and sensitive information.
    • Monitor what you’ve built so it stays healthy.

    Success isn’t just about starting strong — it’s about sustaining strength through discipline.


    ✍️ 4. Turn Mistakes into Upgrades

    Mistakes aren’t failures — they’re training.

    When things go wrong:

    • Stay calm.
    • Own the problem.
    • Fix it thoughtfully.
    • Strengthen the system so it doesn’t happen again.

    Each mistake, if treated right, becomes a foundation stone for bigger resilience.


    🔥 5. Lead with Calm Power

    Before stepping into any new opportunity, remind yourself:

    “I’m not seeking approval.
    I’m offering protection, innovation, and stability to the right people.”

    Confidence isn’t noise — it’s calm clarity.
    You don’t need to push yourself forward — your strength will naturally pull the right opportunities to you.


    🌟 Final Thought:

    Opportunity doesn’t knock when we beg for it.
    It finds those who are quietly building, strengthening, and preparing every day.

    Stay ready. Stay strong. Stay you. 🛡️

    Written by Jet Mariano
    Systems Engineer | Cloud Security Specialist | Creator of jetmariano.us

    © 2012–2025 Jet Mariano. All rights reserved.
    For usage terms, please see the Legal Disclaimer.

  • Cross-Tenant Synchronization (CTS) Setup Using PowerShell: Secure Collaboration Made Easy

    Introduction

    Cross-Tenant Synchronization (CTS) enables organizations to securely synchronize user identities between Azure Active Directory (Entra ID) tenants. While CTS can be configured through the Azure Portal, leveraging PowerShell allows for faster, repeatable, and error-free deployments.

    In this guide, you’ll learn how to set up CTS entirely through PowerShell, ensuring efficient collaboration across multiple cloud environments.


    Why Use PowerShell for CTS?

    • ✅ Automate configuration steps and reduce human error.
    • ✅ Create templates for rapid onboarding of future partner tenants.
    • ✅ Maintain an audit trail of your cross-tenant setup actions.

    Whether you’re managing a single trusted partner or multiple tenants in a complex hybrid environment, PowerShell provides unmatched precision and speed.


    Prerequisites

    • Global Administrator or Directory Administrator permissions in your tenant.
    • Microsoft Graph PowerShell SDK installed (Install-Module Microsoft.Graph -Scope CurrentUser)
    • Appropriate Graph API permissions:
      • Directory.ReadWrite.All
      • Policy.ReadWrite.CrossTenantAccess
      • User.ReadWrite.All

    Step 1: Connect to Microsoft Graph

    Connect-MgGraph -Scopes "Directory.ReadWrite.All", "User.ReadWrite.All", "Policy.ReadWrite.CrossTenantAccess"

    Step 2: Add the External Organization to Cross-Tenant Access Policy

    New-MgCrossTenantAccessPolicyConfigurationPartner `
      -TenantId "<External-Tenant-ID>" `
      -InboundAccess @{ B2bCollaborationInbound = @{ IsEnabled = $true; Policy = @{ CollaborationRestrictions = "AllowAll" }}} `
      -OutboundAccess @{ B2bCollaborationOutbound = @{ IsEnabled = $true; Policy = @{ CollaborationRestrictions = "AllowAll" }}} `
      -InboundTrust @{ IsMfaAccepted = $true; IsCompliantDeviceAccepted = $false; IsHybridAzureADJoinedDeviceAccepted = $false }

    Important: MFA must be cloud-based (Authenticator App, FIDO keys). Phone/SMS MFA will cause provisioning failures.


    Step 3: Create Cross-Tenant Synchronization Configuration

    New-MgCrossTenantSynchronizationConfiguration `
      -DisplayName "CTS External Tenant Sync" `
      -TenantId "<External-Tenant-ID>" `
      -SynchronizationJob @{
          SynchronizationRules = @(
              @{
                  SourceObjectType = "User"
                  TargetObjectType = "User"
                  Scope = @{ Query = "userType eq 'Member'" }
                  Actions = @(
                      @{ ActionType = "Create" },
                      @{ ActionType = "Update" }
                  )
              }
          )
      }

    Step 4: (Optional) Trigger Provisioning on Demand

    Invoke-MgCrossTenantSynchronizationUserProvisioning `
      -PartnerTenantId "<External-Tenant-ID>" `
      -UserId "<User-Object-ID>"

    This step is helpful for immediate validation after setting up CTS policies.


    Best Practices

    • Validate MFA methods before starting provisioning.
    • Use Conditional Access policies to protect external identities.
    • Start with a small test user group before bulk synchronization.
    • Regularly audit synchronization logs.

    Conclusion

    PowerShell unlocks the full potential of Cross-Tenant Synchronization by making deployments faster, scalable, and easier to audit. By following this approach, you ensure that trusted collaboration between organizations remains secure, compliant, and future-ready.

    Implement CTS with confidence — and take control of your hybrid collaboration strategy.


    Next Step:
    If you’re new to Cross-Tenant Synchronization, start here first: Cross-Tenant Synchronization (CTS) Explained

    © 2012–2025 Jet Mariano. All rights reserved.
    For usage terms, please see the Legal Disclaimer.

  • Cross-Tenant Synchronization (CTS) with Azure B2B Collaboration and PowerShell

    Introduction

    Cross-Tenant Synchronization (CTS) allows organizations to securely sync users across Azure Active Directory (Azure AD) tenants for seamless B2B collaboration. Instead of manually managing external identities, CTS automates identity sharing, reduces administrative burden, and strengthens security.

    In this guide, we’ll cover what CTS is, why it matters, and how you can configure it using real-world PowerShell examples.


    What is Cross-Tenant Synchronization (CTS)?

    CTS enables organizations to automatically create and manage B2B collaboration users across tenants, ensuring updated identities and permissions without manual intervention. It facilitates external collaboration without compromising compliance or security.


    Why Use CTS for B2B Collaboration?

    • Secure Identity Sharing: Automates user onboarding and offboarding between organizations.
    • Unified Collaboration: Enables external users to access Teams, SharePoint, and other Microsoft 365 services.
    • Simplified Management: Reduces manual directory maintenance and ensures identities stay updated.
    • Compliance: Supports MFA and Conditional Access for external users.

    High-Level Setup Steps for CTS

    1. Establish a trust relationship between the source and target Azure AD tenants.
    2. Define synchronization rules for user attributes.
    3. Configure B2B Collaboration settings.
    4. Automate and manage policies with PowerShell.

    PowerShell Sample: Setting Up B2B Trust

    # Step 1: Connect to Azure AD
    Connect-AzureAD
    
    # Step 2: Create a basic B2B Invitation Policy
    New-AzureADPolicy \
      -Definition @('{"B2BInvitation": {"Enabled": true}}') \
      -DisplayName "CTS B2B Collaboration Policy" \
      -Type "B2BInvitationPolicy"
    
    # Step 3: Set Cross-Tenant Access Policy for External Collaboration
    Connect-MgGraph -Scopes "Policy.ReadWrite.CrossTenantAccess"
    
    $policy = @{
        inboundTrust = @{ isMfaAccepted = $true; isCompliantDeviceAccepted = $true }
        outboundTrust = @{ isMfaAccepted = $true; isCompliantDeviceAccepted = $true }
    }
    
    Update-MgPolicyCrossTenantAccessPolicy -BodyParameter $policy

    Best Practices for Cross-Tenant Synchronization

    • Enforce MFA: Require multi-factor authentication for all external users.
    • Use Conditional Access: Protect sensitive apps and data.
    • Attribute Filtering: Only sync necessary user attributes.
    • Separation of Admin Rights: Do not grant external users privileged roles.
    • Audit and Monitor: Regularly review cross-tenant policies and access logs.

    Conclusion

    Cross-Tenant Synchronization (CTS) streamlines external collaboration without sacrificing security. Whether you’re preparing for mergers, managing strategic partnerships, or extending services to external clients, automating CTS setup using PowerShell ensures scalability, consistency, and security.

    Implement CTS today and strengthen your organization’s B2B collaboration foundation.


    Related: See my PowerShell Toolbox for essential automation scripts.

    © 2012–2025 Jet Mariano. All rights reserved.
    For usage terms, please see the Legal Disclaimer.

  • Best Infrastructure as Code (IaaC) Samples with Real-World Explanations

    Introduction

    Infrastructure as Code (IaaC) has transformed how organizations deploy, configure, and manage their environments.
    Instead of manual configurations, IaaC enables repeatable, secure, and scalable deployment processes — using code.

    In this post, I share real-world IaaC examples that professionals can apply across cloud and on-premises environments.


    1. Azure Virtual Machine Deployment using PowerShell (ARM Templates Alternative)

    Scenario:
    Spin up a virtual machine (VM) on Azure with custom settings — OS type, disk size, networking — in a repeatable, automated way.

    Sample Command:

    powershellCopyEditNew-AzVM `
      -ResourceGroupName "ProductionRG" `
      -Name "WebServer01" `
      -Location "EastUS" `
      -VirtualNetworkName "ProdVNET" `
      -SubnetName "WebSubnet" `
      -SecurityGroupName "WebSG" `
      -PublicIpAddressName "WebPublicIP" `
      -Image "Win2022Datacenter"
    

    Explanation:
    Instead of manually clicking through Azure Portal, this script launches a new production-ready VM within seconds.
    This reduces human error and ensures configuration consistency.


    2. On-Premises VMware VM Deployment via PowerCLI

    Scenario:
    Provision a Windows Server virtual machine in a vSphere datacenter using PowerShell.

    Sample Command:

    powershellCopyEditNew-VM -Name "SQLServer02" `
      -ResourcePool "ProductionPool" `
      -Datastore "Datastore01" `
      -Template "Win2022Template" `
      -VMHost "esxi01.mydomain.local"
    

    Explanation:
    This PowerCLI script clones a preconfigured template, attaches storage, and places the VM into a production cluster — all in one shot.
    Perfect for disaster recovery planning or rapid server scaling.


    3. Microsoft 365 User Creation with PowerShell

    Scenario:
    Automate user onboarding in Azure Active Directory + Microsoft 365.

    Sample Command:

    powershellCopyEditNew-MsolUser `
      -UserPrincipalName "[email protected]" `
      -DisplayName "New User" `
      -FirstName "New" `
      -LastName "User" `
      -LicenseAssignment "company:ENTERPRISEPACK"
    

    Explanation:
    Instead of manually adding users through the Microsoft 365 Admin Center, this IaaC approach ensures users are created consistently — with proper licensing attached — even in bulk.


    4. Azure Resource Group + Storage Deployment with Bicep

    Scenario:
    Provision an entire Resource Group with a Storage Account using Bicep (Azure’s new declarative IaaC language).

    Sample Bicep Code:

    bicepCopyEditresource storage 'Microsoft.Storage/storageAccounts@2022-05-01' = {
      name: 'appstorage${uniqueString(resourceGroup().id)}'
      location: resourceGroup().location
      sku: {
        name: 'Standard_LRS'
      }
      kind: 'StorageV2'
    }
    

    Explanation:
    Bicep simplifies complex Azure deployments.
    You can version-control your cloud architecture like you would application code.


    5. Automating Cisco Meraki Network Device Configuration

    Scenario:
    Automate bulk configuration of Meraki MX Firewalls or APs across multiple branches.

    Sample API Call (Python):

    pythonCopyEditimport meraki
    
    dashboard = meraki.DashboardAPI(api_key='YOUR_API_KEY')
    
    response = dashboard.devices.updateDevice(
        serial='Q2XX-XXXX-XXXX',
        name='Branch1-Security-Appliance',
        tags=['branch', 'security'],
        address='123 Main St, City, State'
    )
    

    Explanation:
    Using APIs, infrastructure configuration is no longer limited to traditional servers.
    Networking devices — switches, firewalls, access points — are now part of your automated deployments.


    ✨ Conclusion

    Infrastructure as Code isn’t just for large enterprises — it’s for any IT professional who wants to:

    • Eliminate manual errors
    • Speed up deployments
    • Strengthen disaster recovery
    • Make infrastructure truly agile

    Starting small — with a few PowerShell scripts, Bicep templates, or API automations — leads to major efficiencies over time.

    © 2012–2025 Jet Mariano. All rights reserved.
    For usage terms, please see the Legal Disclaimer.

  • Infrastructure as Code (IaaC): Automate Your Cloud

    Title:
    Infrastructure as Code (IaaC): Building Cloud Systems at Scale

    Post Content:

    Infrastructure as Code (IaaC) revolutionizes how IT professionals deploy, configure, and manage infrastructure. Instead of manual setup, we automate cloud deployments using code — making environments consistent, scalable, and easily repeatable.

    Why IaaC Matters:
    🔹 Eliminates manual errors and configuration drift
    🔹 Accelerates deployment speed across environments
    🔹 Enables disaster recovery through codified infrastructure templates

    Common IaaC Tools and My Use Cases:

    • Azure Bicep: Streamlined Azure resource deployments (VMs, Storage, VNets)
    • Terraform: Multi-cloud infrastructure (Azure, AWS, GCP) with modular design
    • PowerShell + ARM Templates: Quick deployment of M365, networking, and security resources
    • GitHub Actions: IaaC pipelines for automated build and deployment

    My Approach:
    I apply IaaC principles to automate cloud foundation buildouts, strengthen disaster recovery plans, and accelerate proof-of-concept (POC) rollouts for critical projects.

    🔗 See Best Infrastructure as Code (IaaC) Samples

    🔗 Related: See my PowerShell Toolbox for essential automation scripts and CTS Collaboration Guide.

    © 2012–2025 Jet Mariano. All rights reserved.
    For usage terms, please see the Legal Disclaimer.

  • Cross-Tenant Sync (CTS): How to Securely Share Resources Across Azure Tenants

    Title:
    Learn how Cross-Tenant Synchronization (CTS) works in Azure AD to enable secure user sharing, collaboration, and productivity across organizations.

    Post Content:

    In today’s hybrid environments, collaboration often extends beyond a single organization. Cross-Tenant Synchronization (CTS) enables seamless sharing of users, groups, and resources across multiple Microsoft 365 tenants without compromising security.

    Why CTS Matters:
    🔹 Supports hybrid mergers, acquisitions, and strategic partnerships
    🔹 Reduces manual duplication of users and permissions
    🔹 Enhances Microsoft Teams B2B collaboration without exposing internal directories

    How CTS Works:
    ➔ Synchronizes selected users/groups from one tenant to another (one-way or bidirectional)
    ➔ Integrates with Azure AD B2B Collaboration and Conditional Access policies
    ➔ Helps manage guest access more securely and systematically

    My Experience with CTS:
    I’ve implemented CTS workflows to securely connect environments during M&A transitions, partner onboarding, and hybrid workforce expansion. It strengthened collaboration while maintaining strict identity governance policies.

    🔗 Related: Learn more about B2B Collaboration and Infrastructure as Code (IaaC).

    © 2012–2025 Jet Mariano. All rights reserved.
    For usage terms, please see the Legal Disclaimer.

  • April 26, 2025 Blog: What Is SIEM? Why It Matters and How to Implement It

    Why SIEM matters:
    Security Information and Event Management (SIEM) provides centralized visibility into security alerts, system logs, and suspicious activities — helping organizations detect and respond to threats faster.

    What SIEM solves:

    • Detects intrusions and anomalies in real time
    • Helps meet compliance standards like HIPAA, PCI-DSS, and SOX
    • Centralizes event monitoring across hybrid cloud and on-premises environments

    How to Implement SIEM:

    • Deploy Azure Sentinel for cloud-native SIEM integration
    • Integrate Cisco Meraki logs, VMware security logs, and endpoint protection (XDR) tools like Palo Alto
    • Set up detection rules, incident response playbooks, and dashboards
    • Full SIEM Implementation Guide with PowerShell

    © 2012–2025 Jet Mariano. All rights reserved.
    For usage terms, please see the Legal Disclaimer.

  • Technical Notes Written When They Matter

    Technical Notes Written When They Matter

    This is a collection of technical notes written when they matter.

    Some posts come from the server room, others from moments of reflection. They document real decisions, lessons learned, and quiet realizations from years in IT and life.

    There is no fixed schedule here. I write when there is something worth recording.

    Check out my PowerShell Toolbox for essential automation scripts.

    Technical Notes Written When They Matter

    💻Mar 15, 2026 – Two Coats: Obedience, Loss, and New Beginnings in the Life of Joseph

    💻Mar 12, 2026 – Temporary Global Reader Account for Microsoft 365 Tenant Review

    💻Feb 28, 2026 – Preparation is Power

    💻Feb 24, 2026 – DevSecOps Comeback: A Beginner-Friendly 30-Day Guided Lab

    💻Feb 23, 2026 – How to Export and Audit Active Directory GPOs Using Native PowerShell (Step-by-Step)

    💻Feb 21, 2026 – Calm Before the Break: Composure Across Platforms

    💻Feb 14, 2026 – Tesla Model 3 Windshield Replacement — Twice in 4 months

    💻Feb 10, 2026 – My IT Journey – 2026

    💻Feb 7, 2026 – Built in Motion, Seeing Afar Off

    💻Feb 2, 2026 – Subnetting Makes Sense When You Meet the ISP

    💻Jan 25, 2026 – The Problem Lives Below Windows

    💻Jan 16, 2026 – Windows 11 is Not the Problem

    💻Jan 9, 2026 – Sysmon on Windows

    💻Dec 31, 2025 – DHCP is Boring Until it is Not

    💻Dec 17, 2025 – High-Availability Engineering: Implementing Geo-Redundancy and Real-Time Heartbeats

    💻Dec 10, 2025 – How to Install Sysmon on Windows 11 (Step-by-Step Guide)

    💻Dec 3, 2025 – Advanced Exchange Online Security and Compliance.

    💻 Nov 28, 2025 – My Essential IT Troubleshooting Guide

    💻 Nov 26, 2025 – Terraform made simple

    💻 Nov 25, 2025 CIS for M365 (Hardening & Best Practices)

    💻 Nov 24, 2025 Email Retention in M365 (Best Practices)

    💻 Nov 23, 2025 The Evolution of Microsoft Exchange: From 5.0 to Exchange Online (EXO)

    💻 Nov 22, 2025 DMARC (Domain-based Message Authentication, Reporting & Conformance)

    💻 Nov 21, 2025 Why PowerShell Still Beats Purview for Real Forensics

    💻 Nov 20, 2025 Terraform for M365 & Azure

    💻 Nov 18, 2025 Quick “Reflexes” Using PowerShell to Block Bad Actors

    💻 Nov 17, 2025 Litigation Hold in Microsoft 365

    💻 Nov 15, 2025 DKIM Security: How Signing and Key Rotation Stop Email Spoofing

    💻 Nov 12, 2025 Exchange Online Throttling Policies

    💻 Nov 06, 2025 Why RFC Email Standards Are Not Enough

    💻 Oct 31, 2025 Path to Become a Developer

    💻 Oct 31, 2025 Path to Become an Infrastructure Engineer

    💻 Oct 17, 2025 Email Spoofing Explained

    💻 Oct 12, 2025 How BEC (Business Email Compromise) and EAC (Email Account Compromise)

    💻 Oct 9, 2025 How I Protected VIP Mailboxes in Exchange

    💻 Oct 06, 2025 A 10-Command Playbook to Stop Email Impersonation

    💻 Oct 04, 2025 Pulling M365 Sign-in Locations via AzureADPreview

    💻 Oct 01, 2025 Restoring Delivery Safely: SCL-1 + Tenant Allow/Block List

    💻 Sep 29, 2025 Beat the 99% Wall: Upgrade Windows 10 → 11 the Easy Offline Way (Do This Before Oct 5, 2025)

    💻 Sep 24, 2025Email Offboarding: Forward for 14 Days → Then Retire the Mailbox (No Shared Mailboxes)

    💻 Sep 19, 2025Cloning a VM with PowerShell and VMware PowerCLI

    💻 Sep 14, 2025Fixing a “Sender not allowed” Everyone DL

    💻 Sep 9, 2025Ops Note — Picking the best vSAN host with one PowerCLI check

    💻 Sep 4, 2025Fixing “Sender not allowed” to an internal group (Exchange Online) — a quick forensic + runbook

    💻 Sep 1, 2025Outlook Won’t Send, Can’t Search, or Stuck on “Updating”? A One-Page Fix (for Everyone)

    💻 Aug 31, 2025 When a “Microsoft” alert hijacks your screen after a spoofed Facebook call

    💻 Aug 25, 2025 PC Suddenly Slow? Here’s a 60 seconds triage before calling IT

    💻 Aug 21, 2025 – Secure Azure setup with Entra ID, Bastion, and private VM

    💻 Aug 18, 2025 — Hot-cloning a Running Windows 11 VM in vSphere

    💻 Aug 14, 2025 — The Cloud Above Us AWS, Azure, GCP

    💻 Aug 10, 2025 Blog: Secure Automation with PowerShell SecretManagement: Simplifying Credential Management for IT Pros

    💻 Aug 5, 2025 Blog:Migrating Azure AD Scripts to Microsoft Graph PowerShell: A Practical Guide for IT Administrators

    💻 July 29, 2025 Blog:Fixing Disabled Azure AD Accounts: PowerShell vs Portal

    💻 July 25, 2025 Blog:How to Bypass Spam Filtering for Internal Senders Using PowerShell

    💻 July 20, 2025 Blog:Because I Have Been Given Much, I Too Must Give

    💻 July 16, 2025 Blog:Ransomware: What It Is and How I Survived Multiple Attacks

    💻 July 12, 2025 Blog:From IIS Logs to Iron Discipline: How My Son and I Share the Same Grit in Fitness and IT

    💻 July 8, 2025 Blog: Where I Leave the Past, and Meet Myself Again

    💻 July 4, 2025 Blog:I Am Grateful to Be in the Land of the Free and Home of the Brave

    💻 June 27, 2025 Blog:When the Strong Get Tired: Finding Strength in the Silence

    💻 June 22, 2025 Blog:Please Wait: When the Helper Needs Help

    💻 June 15, 2025 Blog:A Father’s Day Flashback – Pancakes, Peter Pan, and a Heart Full of Memories

    💻 June 8, 2025 Blog:Why I Still Use PowerShell Every Week

    💻 June 1, 2025 Blog: The Ultimate IT Troubleshooting Framework

    💻 May 25, 2025 Blog: 5 Essential Cloud Solutions for IT Admins

    💻 May 18, 2025, 2025 Blog:Strength Is Survival

    💻 May 10, 2025, 2025 Blog:How I Deployed and Cleaned Up a Windows Server VM in Azure with PowerShell

    💻 May 2, 2025, 2025 Blog:The Price of Gaining Respect in the IT World
    💻 April 26, 2025 Blog: What Is SIEM? Why it matters, what it solves, and how to implement it effectively.

    © 2012–2026 Jet Mariano. All rights reserved.
    For usage terms, please see the Legal Disclaimer.

  • Track Domain-Joined Devices by Join Date Using PowerShell

    When you’re managing hundreds of devices in an Active Directory environment, tracking when a machine joins the domain can help in everything from license compliance to forensic investigations.

    Recently, I needed to identify a laptop that joined our domain on a specific date to verify a SolidWorks license assignment — and these two PowerShell commands did the job flawlessly.


    🔹 1. Get the Most Recently Joined Computer

    Use this command to find the latest computer object added to Active Directory:

    powershellCopyEditImport-Module ActiveDirectory
    
    Get-ADComputer -Filter * -Property whenCreated |
    Sort-Object whenCreated -Descending |
    Select-Object Name, whenCreated -First 1
    

    Why this matters:
    This is especially useful when onboarding new machines or auditing join activity after reimaging.


    🔹 2. Find Devices Joined on a Specific Date

    To find any computer joined on a specific day — for example, April 25, 2025 — use:

    powershellCopyEdit$startDate = Get-Date "04/25/2025 00:00:00"
    $endDate = Get-Date "04/26/2025 00:00:00"
    
    Get-ADComputer -Filter * -Property whenCreated |
    Where-Object { $_.whenCreated -ge $startDate -and $_.whenCreated -lt $endDate } |
    Select-Object Name, whenCreated |
    Sort-Object whenCreated
    

    Why this helps:
    Perfect for license verification, asset tracking, or validating compliance windows. You can adapt the date range to capture entire weeks, weekends, or even off-hours join attempts.


    🔐 Final Thought

    Even a simple attribute like whenCreated becomes a powerful audit tool when combined with the right script. These commands now live in my PowerShell toolbox — and they just helped solve a license tracking challenge without any guesswork.


    ✅ Add these to your script collection.
    ✅ Automate the insight.
    ✅ Stay ahead of the curve.

  • PHP + SQL Demo: Simple Form with Database Insert

    Welcome to Projects
    This demo showcases a simple PHP + SQL form that inserts user data into a database. Whether you’re just starting out in development or refreshing your backend skills, this lab will help you understand the fundamentals of handling form data securely and efficiently.

    Let’s dive into the code and see how the magic happens!

    <!-- index.php -->
    <form method="post" action="insert.php">
      <label for="name">Name:</label><br>
      <input type="text" id="name" name="name" required><br><br>
      
      <label for="email">Email:</label><br>
      <input type="email" id="email" name="email" required><br><br>
      
      <input type="submit" value="Submit">
    </form>
    
    <!-- insert.php -->
    <?php
    $servername = "localhost";
    $username = "root"; // change as needed
    $password = ""; // change as needed
    $dbname = "demo_db"; // make sure this DB exists

    // Create connection
    $conn = new mysqli($servername, $username, $password, $dbname);

    // Check connection
    if ($conn->connect_error) {
    die("Connection failed: " . $conn->connect_error);
    }

    // Sanitize inputs
    $name = htmlspecialchars($_POST['name']);
    $email = htmlspecialchars($_POST['email']);

    // Prepare and bind
    $stmt = $conn->prepare("INSERT INTO users (name, email) VALUES (?, ?)");
    $stmt->bind_param("ss", $name, $email);

    if ($stmt->execute()) {
    echo "New record created successfully.";
    } else {
    echo "Error: " . $stmt->error;
    }

    $stmt->close();
    $conn->close();
    ?>


    Stay tuned—next time we’ll connect this form to a hosted SQL database and sanitize inputs using prepared statements. This is just the beginning of your full-stack journey!

    © 2012–2025 Jet Mariano. All rights reserved.
    For usage terms, please see the Legal Disclaimer.

  • PowerCLI: Cloning and Deleting VMs

    In addition to monitoring, managing VMs is a key task for administrators. Below are simple PowerCLI commands for cloning and deleting VMs.

    Cloning a VM

    $sourceVM = Get-VM -Name "template-vm"
    $targetHost = Get-VMHost -Name "esxi-host-01"
    $datastore = Get-Datastore -VMHost $targetHost | Where-Object {$_.Name -like "vsanDatastore"}
    
    New-VM -Name "cloned-vm" `
           -VM $sourceVM `
           -VMHost $targetHost `
           -Datastore $datastore `
           -ResourcePool ($targetHost | Get-ResourcePool)

    Deleting a VM

    Get-VM -Name "cloned-vm" | Remove-VM -DeletePermanently -Confirm:$false

    These commands are especially useful for lab environments or when automating template-based VM provisioning.


    Conclusion Use this PowerShell command as part of your regular cluster health checks. When combined with vCenter’s vSAN resync and health dashboards, it gives you the full picture to maintain optimal performance and avoid storage imbalances.

    Stay tuned for a follow-up post on triggering manual rebalancing using RVC (Ruby vSphere Console).

    © 2012–2025 Jet Mariano. All rights reserved.
    For usage terms, please see the Legal Disclaimer.

  • Monitoring vSAN Host Resource Usage with PowerShell

    Introduction: Keeping your vSAN environment healthy and balanced is critical to maintaining performance and avoiding bottlenecks. One of the best ways to stay ahead of potential issues is by proactively monitoring your ESXi host’s CPU and memory usage using PowerShell and PowerCLI. In this post, we’ll walk through a script that provides a quick overview of resource usage across your vSAN cluster — a valuable step before deciding whether to initiate a manual rebalance.


    PowerShell Script to Monitor vSAN Host Resource Usage

    Get-VMHost | Select Name, `
        @{N="CPU Usage MHz"; E={($_.CpuUsageMhz)}}, `
        @{N="Total CPU MHz"; E={($_.CpuTotalMhz)}}, `
        @{N="Memory Usage GB"; E={[math]::Round($_.MemoryUsageGB, 2)}}, `
        @{N="Total Memory GB"; E={[math]::Round($_.MemoryTotalGB, 2)}}

    Sample Output

    Host NameCPU Usage MHzTotal CPU MHzMemory Usage GBTotal Memory GB
    esxi-host-016,405115,168151.94511.71
    esxi-host-027,148115,168199.02511.71
    esxi-host-032,089115,168124.49511.71

    What This Tells You

    • CPU Load: In the sample output, CPU usage is consistently low (<10%), meaning the compute load is healthy.
    • Memory Load: Memory usage ranges from ~24% to ~39%, suggesting room for optimization or upcoming load balancing.

    When to Rebalance

    If you see disproportionate usage — for example, one host consistently nearing 80%+ memory while others are underutilized — it may be time to initiate a vSAN rebalance.

    This script gives you the confidence to proceed with rebalance safely during production hours, especially when CPU usage is low and no resync activities are ongoing.


    Conclusion Use this PowerShell command as part of your regular cluster health checks. When combined with vCenter’s vSAN resync and health dashboards, it gives you the full picture to maintain optimal performance and avoid storage imbalances.

    Stay tuned for a follow-up post on triggering manual rebalancing using RVC (Ruby vSphere Console).

    © 2012–2025 Jet Mariano. All rights reserved.
    For usage terms, please see the Legal Disclaimer.

  • The Importance of SIEM, APM, and Privileged Access Management in Modern IT Security

    Introduction

    In today’s digital landscape, cybersecurity is more than just antivirus software and firewalls—it’s about layered security across endpoints, networks, identities, and applications. With cyber threats evolving daily, businesses must adopt proactive monitoring and defense mechanisms. This is where Security Information and Event Management (SIEM), Application Performance Monitoring (APM), and Privileged Access Management (PAM) come into play.

    This guide will cover the importance of these tools, best practices, and how to integrate them with enterprise-grade security solutions like Cisco MX, Cisco Umbrella, CyberArk, and DUO.


    1. Security Information and Event Management (SIEM)

    SIEM solutions aggregate, analyze, and correlate security data from multiple sources, providing real-time visibility into potential threats.

    Why SIEM Matters:

    • Centralized Log Management: Collects logs from firewalls, servers, endpoints, and applications.
    • Threat Detection: Uses AI and correlation rules to identify anomalies.
    • Incident Response: Sends alerts when suspicious activity is detected.
    • Compliance: Helps meet PCI-DSS, HIPAA, SOX, and Hi-Trust requirements.

    Recommended SIEM Solutions:

    Splunk – Enterprise-level security analytics.
    Microsoft Sentinel – Cloud-native SIEM for Microsoft ecosystems.
    DataDog – Lightweight SIEM with cloud integrations.
    Elastic SIEM – Open-source alternative.


    2. Application Performance Monitoring (APM)

    APM tools monitor application behavior, uptime, and response times to ensure optimal performance and detect security anomalies.

    Why APM Matters:

    • Proactive Threat Identification: Detects application-layer attacks.
    • Performance Optimization: Reduces downtime and enhances user experience.
    • Integration with SIEM: Provides deeper insights into suspicious activity.

    Recommended APM Tools:

    Datadog APM – Cloud monitoring with SIEM integration.
    Dynatrace – AI-powered full-stack monitoring.
    AppDynamics – Deep visibility into application health.
    SolarWinds APM – Cost-effective solution for IT teams.


    3. Privileged Access Management (PAM) & Multi-Factor Authentication (MFA)

    Privileged accounts are the biggest attack targets. Implementing PAM with MFA ensures that admin accounts are secure.

    Why PAM & MFA Matter:

    • Least Privilege Enforcement: Restricts admin access to critical systems.
    • Prevents Credential Theft: Limits exposure to compromised passwords.
    • Logs & Audits: Tracks administrative actions for compliance.

    Best Practices:

    ✅ Use CyberArk for managing privileged accounts.
    Require MFA (DUO, Microsoft Authenticator, YubiKey).
    Separate Personal & Admin Accounts:

    • Personal Account → No admin rights.
    • Admin Account → Requires 15-min auto MFA renewal (best practice in enterprises like PIMCO & CNB).

    4. Endpoint Protection with XDR

    Extended Detection & Response (XDR) provides real-time protection across endpoints, emails, and cloud workloads.

    Why XDR Matters:

    • AI-powered Threat Detection: Blocks malware, ransomware, and phishing attempts.
    • Zero Trust Security: Ensures only verified endpoints can access corporate networks.
    • SIEM Integration: Sends endpoint logs for analysis.

    Recommended XDR Solutions:

    Microsoft Defender XDR – Built-in for Microsoft environments.
    CrowdStrike Falcon – AI-driven endpoint security.
    SentinelOne XDR – Autonomous threat response.


    5. Network Perimeter Security: Cisco MX & Cisco Umbrella

    Firewalls alone are not enough. Organizations need cloud-based DNS security & perimeter defense.

    Why Cisco MX & Umbrella Matter:

    • Protects Against DNS-layer Attacks (e.g., phishing & malware sites).
    • Prevents Data Exfiltration (blocks malicious domains before connections happen).
    • Works with SIEM & XDR (for full security visibility).

    Best Practices:

    Deploy Cisco MX for firewall + SD-WAN security.
    Use Cisco Umbrella to block malicious internet traffic.
    Segment Networks to isolate critical resources.


    Conclusion: Security Requires Layered Defense

    Cybersecurity isn’t just about one tool—it’s about a layered approach:

    1. SIEM for centralized monitoring.
    2. APM for app performance & security insights.
    3. PAM & MFA for privileged access control.
    4. XDR for endpoint protection.
    5. Cisco MX & Umbrella for perimeter security.

    Implementing these tools reduces risk, improves compliance, and protects IT infrastructure from modern threats.


    Next Steps:

    ✅ Read our Step-by-Step Guides for each tool (coming soon).
    ✅ Explore PowerShell automation for security hardening.
    ✅ Contact us for enterprise security consulting (if applicable).

    🔗 Stay tuned for more guides on securing your IT infrastructure!


    © 2012–2025 Jet Mariano. All rights reserved.
    For usage terms, please see the Legal Disclaimer.

  • The Importance of SIEM and Best Practices in Enterprise Security

    Introduction

    In today’s cybersecurity landscape, Security Information and Event Management (SIEM) plays a crucial role in protecting organizations from threats. A robust SIEM system centralizes security monitoring, aggregates logs, detects anomalies, and helps security teams respond to incidents in real time. However, SIEM is only one piece of a comprehensive security framework. To maximize its effectiveness, it should be integrated with other advanced security solutions such as APM tools, privileged access management (CyberArk), multi-factor authentication (Duo), and endpoint detection and response (XDR).

    The Role of SIEM in Security

    A SIEM system provides the following key functions:

    • Centralized Log Management: Aggregates and normalizes logs from different sources.
    • Real-Time Threat Detection: Uses correlation rules and AI-driven analytics to detect anomalies.
    • Incident Response: Helps security teams investigate alerts and mitigate threats.
    • Compliance & Auditing: Meets regulatory requirements for PCI-DSS, HIPAA, SOX, and Hi-Trust.

    Recommended SIEM Solutions:

    1. Splunk – Market leader in log analysis and threat detection.
    2. IBM QRadar – Integrates well with enterprise IT infrastructure.
    3. Microsoft Sentinel – Cloud-based SIEM with strong integration into Microsoft’s security ecosystem.
    4. LogRhythm – Offers automation and advanced analytics.

    Integrating APM Tools for Security & Performance Monitoring

    APM (Application Performance Monitoring) tools work alongside SIEM to ensure application security and performance. APM tools help in:

    • Detecting performance bottlenecks before they become security vulnerabilities.
    • Correlating security events with application behavior.
    • Enhancing log visibility for forensic analysis.

    Recommended APM Tools:

    1. Datadog – Offers monitoring for applications, logs, and security events.
    2. Dynatrace – AI-powered analytics for anomaly detection.
    3. New Relic – Provides application telemetry and distributed tracing.
    4. AppDynamics – Deep visibility into application performance.
    5. SolarWinds – A cost-effective alternative with performance monitoring capabilities.

    The Importance of CyberArk for Privileged Access Management

    Why Privileged Access Management (PAM) Matters? Privileged accounts are the highest-value targets for cybercriminals. CyberArk provides:

    • Credential Vaulting – Securely stores and rotates privileged credentials.
    • Session Isolation – Prevents direct access to critical systems.
    • Least Privilege Enforcement – Ensures users only have access to what they need.
    • Audit Logging – Records privileged activity for compliance.

    Best Practices: Personal vs. Admin Accounts with Duo MFA

    Many enterprises make the mistake of using a single account for both personal and administrative tasks, increasing security risks. Best practices recommend:

    • Personal Account for Day-to-Day Use:
      • No elevated privileges.
      • Limited access to sensitive data.
      • MFA enforced for login.
    • Admin Account for Privileged Tasks:
      • Protected by Duo MFA with time-based authentication every 15 minutes.
      • Password resets automatically every 15 minutes (e.g., CyberArk enforcement).
      • No direct internet access (restricted browsing and email access).

    Endpoint Protection with XDR

    Endpoints are the most vulnerable attack surface. Extended Detection and Response (XDR) solutions provide:

    • Advanced Threat Detection: AI-driven monitoring for malware, ransomware, and behavioral anomalies.
    • Automated Response: Blocks and isolates compromised endpoints.
    • Integration with SIEM & SOAR: Security teams can automate investigations and threat responses.

    Recommended XDR Solutions:

    1. Microsoft Defender XDR – Natively integrates with Microsoft’s security suite.
    2. CrowdStrike Falcon XDR – Lightweight agent with cloud-native capabilities.
    3. SentinelOne – AI-driven threat hunting.
    4. Palo Alto Cortex XDR – Strong perimeter and endpoint defense.

    Perimeter Security: Cisco MX & Cisco Umbrella

    Perimeter Security & Zero Trust Architecture A properly configured perimeter ensures that malicious traffic is blocked before it reaches endpoints or internal servers.

    • Cisco Meraki MX – Next-generation firewall with content filtering, VPN, and IPS/IDS.
    • Cisco Umbrella – Cloud-delivered security that blocks malicious domains and phishing attempts at the DNS level.

    Conclusion

    An effective security framework requires a layered defense strategy that integrates SIEM, APM, PAM, MFA, XDR, and Perimeter Security.

    By implementing these solutions, organizations ensure: ✔ Proactive threat detection and responseRegulatory compliance (PCI-DSS, HIPAA, SOX, Hi-Trust)Minimized attack surfaceReduced impact of security breaches

    Cybersecurity is not just about having tools—it’s about implementing the right tools, enforcing best practices, and continuously monitoring for evolving threats. The Force is always within you, but having the right technology stack ensures that you are always prepared for battle.

    © 2012–2025 Jet Mariano. All rights reserved.
    For usage terms, please see the Legal Disclaimer.

  • PowerShell Script: Managing Shared Mailbox Access

    Overview

    This guide provides PowerShell commands to remove user access from shared mailboxes and verify access removal in Microsoft Exchange Online.

    Prerequisites

    • Administrator privileges in Exchange Online.
    • PowerShell module for Exchange Online installed.
    • Proper authentication to Exchange Online.

    Step 1: Connect to Exchange Online

    Connect-ExchangeOnline -UserPrincipalName [email protected]

    Step 2: Remove User Access from Shared Mailboxes

    $User = "[email protected]"
    $SharedMailboxes = @("[email protected]", "[email protected]")
    
    foreach ($Mailbox in $SharedMailboxes) {
        Remove-MailboxPermission -Identity $Mailbox -User $User -AccessRights FullAccess -Confirm:$false
        Remove-RecipientPermission -Identity $Mailbox -Trustee $User -AccessRights SendAs -Confirm:$false
    }

    Step 3: Verify Access Removal

    foreach ($Mailbox in $SharedMailboxes) {
        Get-MailboxPermission -Identity $Mailbox | Where-Object { $_.User -like "$User" }
        Get-RecipientPermission -Identity $Mailbox | Where-Object { $_.Trustee -like "$User" }
    }

    If no results are returned, the user no longer has access.

    Step 4: Disconnect from Exchange Online

    Disconnect-ExchangeOnline -Confirm:$false

    Notes

    Additional Considerations

    • If users report still having access, check cached credentials or ensure changes have propagated.
    • If access needs to be reinstated, use Add-MailboxPermission and Add-RecipientPermission commands.

    This script helps maintain security and manage mailbox access efficiently within Exchange Online.

    © 2012–2025 Jet Mariano. All rights reserved.
    For usage terms, please see the Legal Disclaimer.

  • Automating User Offboarding in Microsoft 365 using PowerShell

    When a team member leaves your organization, it’s critical to offboard them securely and efficiently. Here’s a step-by-step PowerShell-based offboarding process that covers:

    ✅ Disabling the user in Local Active Directory
    ✅ Disabling the Azure AD account
    ✅ Removing all licenses
    ✅ Disabling MFA
    ✅ Converting the mailbox to a shared mailbox
    ✅ Granting full mailbox access to the supervisor


    Step 1 – Disable the User in Local Active Directory

    powershellCopyEditDisable-ADAccount -Identity jdoe
    

    Step 2 – Disable Azure AD User Account

    powershellCopyEditConnect-AzAccount
    Set-AzureADUser -ObjectId [email protected] -AccountEnabled $false
    

    Step 3 – Remove Microsoft 365 Licenses

    powershellCopyEditConnect-MgGraph -Scopes "User.ReadWrite.All", "Directory.ReadWrite.All"
    $UserId = (Get-MgUser -UserId [email protected]).Id
    Set-MgUserLicense -UserId $UserId -AddLicenses @() -RemoveLicenses @("tenant:licenseGUID")
    

    📝 Replace tenant:licenseGUID with the appropriate license GUID assigned to your tenant.


    Step 4 – Disable MFA

    powershellCopyEditConnect-MsolService
    Set-MsolUser -UserPrincipalName [email protected] -StrongAuthenticationRequirements @()
    

    Step 5 – Convert Mailbox to Shared

    powershellCopyEditConnect-ExchangeOnline
    Set-Mailbox -Identity [email protected] -Type Shared
    

    Step 6 – Grant Supervisor Full Access to the Shared Mailbox

    powershellCopyEditAdd-MailboxPermission -Identity [email protected] -User [email protected] -AccessRights FullAccess -InheritanceType All
    

    Summary

    Using PowerShell for offboarding saves time and ensures consistency. Always document changes and communicate them to HR or management for final closure.

    © 2012–2025 Jet Mariano. All rights reserved.
    For usage terms, please see the Legal Disclaimer.

  • 10 Essential PowerShell Commands for IT Administrators

    💻 PowerShell is an IT Admin’s best friend—whether you’re managing Active Directory, troubleshooting network issues, or automating daily tasks. These essential commands will help you work smarter, not harder.


    🔹 1. Find All Locked-Out Users in Active Directory

    🛑 Identify locked-out accounts instantly.

    powershellCopyEditSearch-ADAccount -LockedOut | Select-Object Name, SamAccountName, LockedOut
    

    Use Case: Quickly locate and assist locked-out users.


    🔹 2. Unlock a User’s Account in Active Directory

    🔓 Unlock a user’s account without using the GUI.

    powershellCopyEditUnlock-ADAccount -Identity jdoe
    

    Use Case: Enables IT admins to resolve lockouts in seconds.


    🔹 3. Force a Password Reset for a User

    🔄 Require a user to change their password at next login.

    powershellCopyEditSet-ADUser -Identity jdoe -PasswordNeverExpires $false -ChangePasswordAtLogon $true
    

    Use Case: Ensures security compliance without manual resets.


    🔹 4. Retrieve System Boot Time

    🖥️ Check how long a system has been running.

    powershellCopyEdit(Get-Date) - (gcim Win32_OperatingSystem).LastBootUpTime
    

    Use Case: Displays uptime in days, hours, and minutes.


    🔹 5. List Running Services with “Stopped” Status

    🚀 Check which services aren’t running.

    powershellCopyEditGet-Service | Where-Object { $_.Status -eq 'Stopped' } | Select-Object Name, DisplayName
    

    Use Case: Helps identify critical services that need restarting.


    🔹 6. Test Internet Connectivity

    🌐 Check if a machine has an active internet connection.

    powershellCopyEditTest-NetConnection -ComputerName google.com -InformationLevel Detailed
    

    Use Case: Quick and easy network diagnostics.


    🔹 7. Find the Last 10 Failed Login Attempts

    🚫 Track failed login attempts for security auditing.

    powershellCopyEditGet-EventLog -LogName Security -InstanceId 4625 -Newest 10
    

    Use Case: Detects brute-force attacks and failed password attempts.


    🔹 8. Get a List of Users with Expired Passwords

    🔑 Find all users with expired passwords in Active Directory.

    powershellCopyEditSearch-ADAccount -PasswordExpired | Select-Object Name, SamAccountName
    

    Use Case: Prevents user lockouts and ensures password updates.


    🔹 9. Get Disk Space Usage on a Server

    💾 Check available disk space across all drives.

    powershellCopyEditGet-PSDrive | Where-Object {$_.Provider -like "Microsoft.PowerShell.Core\FileSystem"} | 
    Select-Object Name, Used, Free
    

    Use Case: Helps avoid storage-related downtime before it happens.


    🔹 10. List & Stop Running Processes

    View active processes and terminate any misbehaving ones.

    powershellCopyEditGet-Process | Select-Object ProcessName, Id, CPU | Format-Table -AutoSize
    Stop-Process -Name "notepad" -Force
    

    Use Case: Quickly terminate resource-hogging processes without Task Manager.


    🚀 Conclusion: Work Smarter, Automate More!

    💡 PowerShell is a game-changer for IT admins, allowing faster troubleshooting, better automation, and enhanced security monitoring. Whether you’re managing user accounts, securing systems, or optimizing network performance, these commands will save time and effort.

    🖥️ Next Steps?
    📌 Bookmark this page and check back for more advanced PowerShell scripts!
    🔗 Need more automation tips? Visit the PowerShell Hub for deeper insights.

    © 2012–2025 Jet Mariano. All rights reserved.
    For usage terms, please see the Legal Disclaimer.

  • 10 Must-Have PowerShell Scripts for IT Troubleshooting

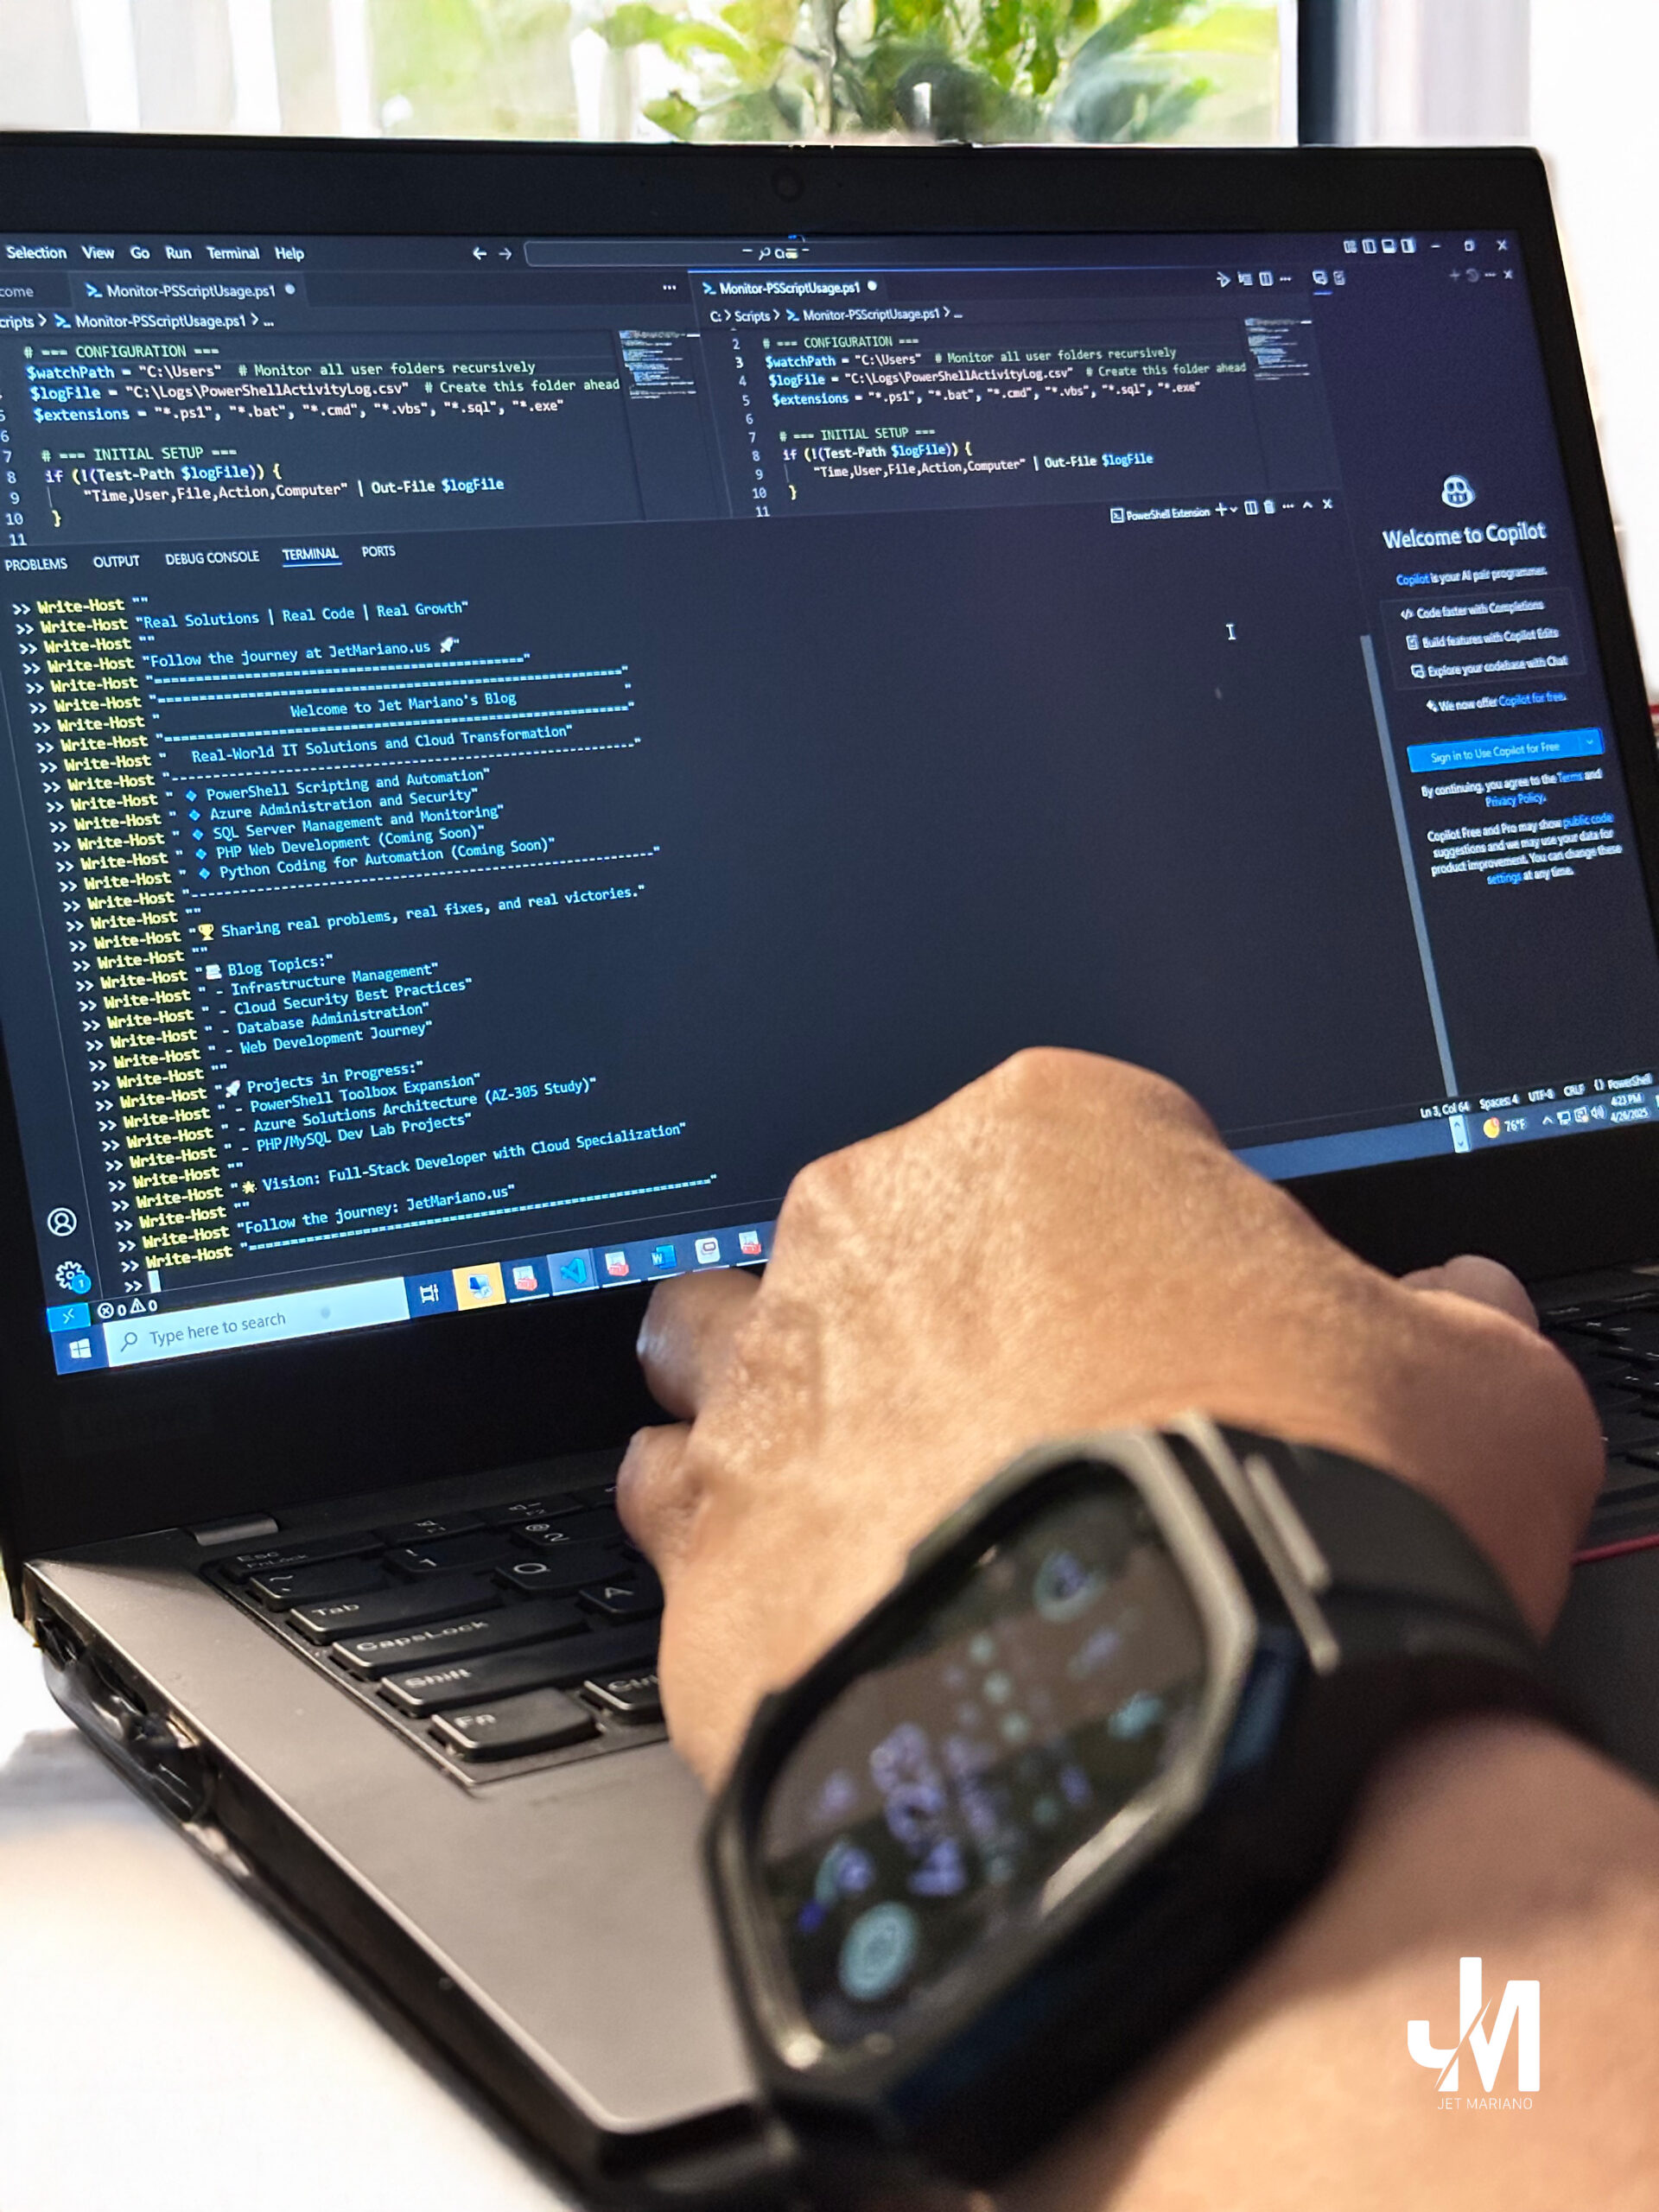
    PowerShell is a powerful tool for IT professionals, allowing automation, troubleshooting, and system management.
    Whether you’re handling system cleanup, retrieving Wi-Fi passwords, or managing processes, these PowerShell commands can be lifesavers.
    Here are five must-know PowerShell scripts to add to your IT arsenal.


    1. Extract All Installed Applications (For Inventory & Troubleshooting)

    Need to check what software is installed on a system? This script pulls a list of all installed applications along with their version, publisher, and installation date.

    Get-ItemProperty HKLM:\Software\Wow6432Node\Microsoft\Windows\CurrentVersion\Uninstall\* |
    Select-Object DisplayName, DisplayVersion, Publisher, InstallDate |
    Sort-Object DisplayName |
    Format-Table -AutoSize

    🔹 Bonus: Export the list to a CSV file for documentation:

    Get-ItemProperty HKLM:\Software\Wow6432Node\Microsoft\Windows\CurrentVersion\Uninstall\* |
    Select-Object DisplayName, DisplayVersion, Publisher, InstallDate |
    Export-Csv -Path "C:\InstalledApps.csv" -NoTypeInformation

    2. Find and Kill Stubborn Processes

    Have an unresponsive application? Use this script to forcefully close any running process by name.

    $processName = "Teams" # Change this to the process you want to kill
    Get-Process -Name $processName -ErrorAction SilentlyContinue | Stop-Process -Force

    🔹 Bonus: Convert it into a user-friendly GUI:

    Add-Type -TypeDefinition @"
    using System;
    using System.Windows.Forms;
    public class KillProcess {
        public static void Main() {
            string processName = Microsoft.VisualBasic.Interaction.InputBox("Enter process name to kill:", "Kill Process", "Teams");
            if (!string.IsNullOrEmpty(processName)) {
                System.Diagnostics.Process[] procs = System.Diagnostics.Process.GetProcessesByName(processName);
                foreach (var proc in procs) {
                    proc.Kill();
                }
            }
        }
    }
    "@ -Language CSharp
    
    [KillProcess]::Main()

    3. Automate System Cleanup (Cache, Temp Files, Event Logs)

    Over time, systems accumulate temporary files that can slow them down. This command clears temporary files, cache, and event logs:

    Write-Host "Clearing Temp Files, Cache, and Event Logs..." -ForegroundColor Green
    Remove-Item -Path "$env:TEMP\*" -Recurse -Force -ErrorAction SilentlyContinue
    Remove-Item -Path "C:\Windows\Temp\*" -Recurse -Force -ErrorAction SilentlyContinue
    Clear-EventLog -LogName Application, System, Security
    Write-Host "Cleanup Completed!" -ForegroundColor Cyan

    🔹 Bonus: Automate this cleanup by scheduling it in Task Scheduler.


    4. Retrieve Wi-Fi Passwords Saved on a PC

    Need to recover a saved Wi-Fi password? This script extracts the stored credentials for all previously connected networks:

    (netsh wlan show profile) | Select-String "\:(.+)$" | ForEach-Object { 
        $network = $_.Matches.Groups[1].Value.Trim()
        $password = (netsh wlan show profile name="$network" key=clear) | Select-String "Key Content\W+\:(.+)$"
        if ($password) { 
            Write-Host "Wi-Fi: $network | Password: $($password.Matches.Groups[1].Value.Trim())" -ForegroundColor Green 
        }
    }

    🔹 Use Case: If you’re connected to a Wi-Fi network but forgot the password, this script retrieves it instantly.


    5. Scan for Suspicious File Modifications (Forensic Command)

    This script performs a recursive scan on a target machine to find recently modified files with specific extensions and flag any that contain high-risk keywords. Ideal for forensic scenarios.

    $target = "RemoteComputerName"  # Replace with computer name or IP
    $extensions = @("*.ps1", "*.sql", "*.dll", "*.cs", "*.sln", "*.vbproj")
    $keywords = 'drop', 'truncate', 'remove', 'shutdown'
    
    $session = New-PSSession -ComputerName $target -ErrorAction SilentlyContinue
    if ($session) {
        Invoke-Command -Session $session -ScriptBlock {
            param($exts, $keywords)
            Get-ChildItem -Path "C:\" -Recurse -Include $exts -ErrorAction SilentlyContinue |
            Where-Object {
                $_.LastWriteTime -gt (Get-Date).AddDays(-90) -and
                ($_ | Select-String -Pattern ($keywords -join '|') -SimpleMatch -Quiet)
            } |
            Select-Object FullName, LastWriteTime, Length
        } -ArgumentList $extensions, $keywords | Export-Csv -Path "$env:USERPROFILE\Desktop\forensic-scan.csv" -NoTypeInformation
    
        Remove-PSSession $session
    } else {
        Write-Host "Unable to connect to $target"
    }
    

    Why it matters: This script was used during a forensic investigation while I was serving on a local government IT forensic team. Its purpose was to detect whether sensitive scripts or source code had been created, modified, or concealed on a colleague’s machine. By targeting specific file types and high-risk keywords (e.g., drop, truncate, remove, shutdown), the script helps identify signs of unauthorized automation, code tampering, or mismanagement of critical systems. It supported an internal review when key files were missing and operational stability was in question.


    6. Quick System Resource Snapshot

    # Display top 10 processes by CPU usage
    Get-Process | Sort CPU -Descending | Select -First 10
    
    # Show current CPU usage
    Get-Counter '\Processor(_Total)\% Processor Time'
    
    # Show available memory
    Get-Counter '\Memory\Available MBytes'
    
    # Summarize total, free, and used memory
    Get-WmiObject -Class Win32_OperatingSystem |
    Select-Object TotalVisibleMemorySize, FreePhysicalMemory |
    ForEach-Object {
        [PSCustomObject]@{
            'TotalMemoryMB' = [math]::Round($_.TotalVisibleMemorySize / 1024, 2)
            'FreeMemoryMB'  = [math]::Round($_.FreePhysicalMemory / 1024, 2)
            'UsedMemoryMB'  = [math]::Round(($_.TotalVisibleMemorySize - $_.FreePhysicalMemory) / 1024, 2)
        }
    }
    

    Why it matters: This comprehensive snapshot is a go-to tool for on-the-fly diagnostics. Whether you’re troubleshooting performance issues, memory leaks, or high CPU usage, this command instantly reveals which processes are draining resources—without launching Task Manager or Performance Monitor. Ideal for quick triage during server slowdowns or SQL bottlenecks.

    7. Check System Uptime

    $uptime = (Get-Date) - (Get-CimInstance Win32_OperatingSystem).LastBootUpTime
    Write-Host "System Uptime: $($uptime.Days) Days, $($uptime.Hours) Hours, $($uptime.Minutes) Minutes" -ForegroundColor Cyan
    

    Why it matters: Quickly see how long the system has been running—helpful in determining recent reboots or crashes.

    8. Check Disk Space

    Get-PSDrive -PSProvider FileSystem | Select-Object Name, Used, Free, @{Name="Free(GB)";Expression={"{0:N2}" -f ($_.Free / 1GB)}}
    

    Why it matters: Instantly assess available drive space and avoid unexpected application or SQL failures due to low disk capacity.

    9. Review Event Logs (System Errors Only)

    Get-EventLog -LogName System -EntryType Error -Newest 20 | Format-Table TimeGenerated, Source, EventID, Message -AutoSize
    

    Why it matters: Check for hardware, driver, or system errors logged in the last events—critical when troubleshooting.

    10. Forensic Script Scan – Local Machine Analysis

    This script performs a forensic scan of the local machine, identifying recently modified files with common scripting and development extensions. It’s ideal for monitoring changes or performing audits.

    $targetPath = "C:\"
    $extensions = '*.ps1', '*.php', '*.sql', '*.bat', '*.cmd', '*.vbs', '*.js', '*.dll', '*.config', '*.json'
    $outputPath = "C:\Temp\ScriptAuditReport.csv"
    
    Get-ChildItem -Path $targetPath -Include $extensions -Recurse -ErrorAction SilentlyContinue |
    Where-Object { $_.LastWriteTime -gt (Get-Date).AddDays(-90) } |
    Sort-Object LastWriteTime -Descending |
    Select-Object FullName, LastWriteTime |
    Export-Csv $outputPath -NoTypeInformation


    Why it matters: Use this script when you suspect undocumented code changes, malicious automation, or hidden activity on a machine. It pinpoints recently altered files with extensions commonly used for scripting or system manipulation. Ideal for incident response or auditing newly repurposed systems.

    Final Thoughts

    PowerShell is a must-have tool for IT professionals. These scripts help automate tasks, troubleshoot issues, and improve system efficiency. Which of these commands do you find most useful? Let me know in the comments!

    🚀 Stay tuned for more PowerShell tips and tricks!

    © 2012–2025 Jet Mariano. All rights reserved.
    For usage terms, please see the Legal Disclaimer.

  • How to Create and Manage a Shared Mailbox in Microsoft 365 Using PowerShell

    Introduction

    A shared mailbox allows multiple users to send and receive emails from a common address, making collaboration easier for teams. This guide walks you through creating a shared mailbox, assigning permissions, and verifying settings using PowerShell.

    Using PowerShell provides faster and more efficient management, especially when handling multiple mailboxes.


    🔹 Step 1: Connect to Microsoft 365 PowerShell

    Before creating the shared mailbox, connect to Exchange Online.

    Run the following command:

    powershellCopyEditConnect-ExchangeOnline -UserPrincipalName [email protected]
    

    📌 Replace [email protected] with your admin account email.


    🔹 Step 2: Create the Shared Mailbox

    Use this PowerShell command to create a shared mailbox:

    powershellCopyEditNew-Mailbox -Shared -Name "TeamMailbox" -DisplayName "Team Shared Mailbox" -PrimarySmtpAddress "[email protected]"
    

    📌 Replace "TeamMailbox" and "[email protected]" with your preferred mailbox name and email address.


    🔹 Step 3: Assign Permissions

    Once the mailbox is created, grant access to specific users.

    Grant Full Access (Allows users to manage the mailbox)

    powershellCopyEditAdd-MailboxPermission -Identity "[email protected]" -User "[email protected]" -AccessRights FullAccess -InheritanceType All
    

    Grant Send As Permission (Allows users to send emails from the shared mailbox)

    powershellCopyEditAdd-RecipientPermission -Identity "[email protected]" -Trustee "[email protected]" -AccessRights SendAs -Confirm:$false
    

    📌 Replace "[email protected]" with the email of the user who needs access.


    🔹 Step 4: Verify the Shared Mailbox and Permissions

    Once configured, verify that the mailbox exists and has the correct settings.

    Check Mailbox Details

    powershellCopyEditGet-Mailbox -Identity "[email protected]" | Format-List DisplayName,PrimarySmtpAddress,RecipientTypeDetails
    

    List Users with Full Access

    powershellCopyEditGet-MailboxPermission -Identity "[email protected]" | Where-Object { $_.AccessRights -eq "FullAccess" -and $_.User -notlike "NT AUTHORITY\SELF" } | Select-Object User,AccessRights
    

    List Users with Send As Permission

    powershellCopyEditGet-RecipientPermission -Identity "[email protected]" | Where-Object { $_.AccessRights -eq "SendAs" } | Select-Object Trustee,AccessRights
    

    🔹 Step 5: Confirm the Shared Mailbox in Microsoft 365

    You can also check the mailbox in Microsoft 365 Admin Center:

    1️⃣ Sign in to Microsoft Admin Center.
    2️⃣ Go to Exchange Admin CenterRecipientsShared.
    3️⃣ Locate the mailbox and confirm the settings.


    🚀 Conclusion

    By following these steps, you can create, manage, and verify a shared mailbox using PowerShell.

    No license required
    Centralized team email management
    Easier collaboration

    💬 How do you manage shared mailboxes in your organization? Share your best practices in the comments below! ⬇️

    © 2012–2025 Jet Mariano. All rights reserved.
    For usage terms, please see the Legal Disclaimer.

  • Managing VMware with PowerCLI: Essential PowerShell Commands

    Introduction VMware PowerCLI is a powerful tool that allows administrators to manage VMware environments using PowerShell. Whether you need to create virtual machines, check resource usage, or troubleshoot storage capacity, PowerCLI provides a streamlined approach to VMware management. Below is a guide to setting up PowerCLI and using essential commands for day-to-day VMware administration.


    Step 1: Install and Import VMware PowerCLI

    Before running VMware-related PowerShell commands, ensure that VMware PowerCLI is installed on your system.

    Install-Module -Name VMware.PowerCLI -Scope CurrentUser -Force

    After installation, import the module:

    Import-Module VMware.PowerCLI

    If you encounter SSL/TLS certificate warnings while connecting, configure PowerCLI to ignore invalid certificates:

    Set-PowerCLIConfiguration -InvalidCertificateAction Ignore -Confirm:$false

    Step 2: Connect to vCenter Server

    To manage your VMware environment, you need to authenticate with vCenter:

    Connect-VIServer -Server <Your-VCenter-Server> -User <Your-Admin-User> -Password '<Your-Password>'

    Once connected, you can retrieve information about your virtual infrastructure.


    Step 3: List VMware Hosts

    To view all available VMware hosts:

    Get-VMHost

    This provides a list of all ESXi hosts, their connection status, and available resources.


    Step 4: Retrieve Virtual Machines

    To get a list of all VMs in the environment:

    Get-VM

    For details of a specific VM:

    Get-VM -Name <VM-Name>

    Step 5: Checking vSAN Datastore Usage

    One common challenge in VMware environments is monitoring vSAN datastore usage. To check storage space:

    Get-VsanSpaceUsage -Cluster <Your-Cluster-Name>

    To calculate the percentage of used space, run:

    $vsanUsage = Get-VsanSpaceUsage -Cluster <Your-Cluster-Name>
    $usedPercentage = 100 - (($vsanUsage.FreeSpaceGB / $vsanUsage.CapacityGB) * 100)
    "vSAN Datastore is currently {0:N2}% full" -f $usedPercentage

    Step 6: Creating a New Virtual Machine

    If you need to create a new VM:

    New-VM -Name <VM-Name> -VMHost <Host-Name> -Datastore <Datastore-Name> -DiskGB 50 -MemoryGB 4 -NumCPU 2

    This command creates a VM with 50GB disk, 4GB RAM, and 2 CPUs.


    Step 7: Cloning an Existing Virtual Machine

    To create a clone of an existing VM:

    New-VM -Name <New-VM-Name> -VM <Source-VM-Name> -Datastore <Datastore-Name> -VMHost <Target-Host>

    Step 8: Managing VM Power States

    To power on a VM:

    Start-VM -VM <VM-Name>

    To shut down a VM:

    Stop-VM -VM <VM-Name> -Confirm:$false

    To restart a VM:

    Restart-VM -VM <VM-Name> -Confirm:$false

    Step 9: Deleting a Virtual Machine

    If a VM is no longer needed, you can remove it permanently:

    Remove-VM -VM <VM-Name> -DeletePermanently -Confirm:$false

    Step 10: Checking for Leftover Files in vSAN

    Even after deleting a VM, some files may remain in the datastore. You can check for orphaned files:

    Get-Datastore -Name <Datastore-Name> | Get-ChildItem -Recurse | Where-Object { $_.Name -like "*<VM-Name>*" }

    To manually remove leftover files:

    Remove-Item -Path "vmstore:\<Datastore-Name>\FolderName\<VM-Name>.vmdk" -Confirm:$false

    Final Thoughts

    Using PowerCLI to manage VMware environments improves efficiency and automation. Whether you need to monitor vSAN usage, create new VMs, or automate backups, PowerCLI provides a flexible solution. Keep this guide handy for reference as you work with VMware environments.

    Have any useful PowerCLI commands that you frequently use? Share them in the comments below! 🚀

    © 2012–2025 Jet Mariano. All rights reserved.
    For usage terms, please see the Legal Disclaimer.

error: Content is protected !!