It took me less than 5 minutes to upgrade Ruger PC Carbine 9mm Mag Well to Glock and added a Red/Green dot scope
One thing I’ve learned about myself over the years is that I like to stay productive, even during small moments in the day. Whether it’s shadow boxing, working on IT projects, or doing simple hands-on tasks, I prefer keeping my mind and hands occupied.
After finishing my daily shadow boxing routine and while doing laundry, I decided to switch the magazine well on my Ruger PC Carbine to the Glock-compatible configuration using the included magwell.
The Ruger PC Carbine is designed with modularity in mind. The takedown system makes access to components simple, and the magwell conversion is straightforward thanks to Ruger’s design. I documented the process on video, focusing only on the equipment and configuration.
For me, the reason for switching to Glock compatibility is practicality. Standardizing equipment and simplifying range preparation has always been part of how I approach things — whether in IT systems or personal gear.
I also added a red and green dot optic to complete the setup. The optic keeps the shooting experience simple and intuitive, which fits the purpose of a 9mm carbine platform.
This small project reminded me of something about my personality. I don’t like idle time. I like staying preoccupied with meaningful activities — training, learning, building, or maintaining things that matter to me.
It’s not about boredom. It’s about staying disciplined and engaged.
In many ways, this mindset is the same one I apply to IT, fitness, and everyday life: keep moving, keep improving, and keep things simple.
The Ruger PC Carbine fits that philosophy well — practical, modular, and reliable.
Owning a Tesla has been one of the most enjoyable technology experiences I’ve had with a car. But like any vehicle, it comes with a few lessons learned along the way — and for me, one of those lessons has been windshield durability.
The first incident happened without me even realizing it. A small rock must have hit my windshield during a normal drive. I didn’t notice anything until I went through my regular automatic car wash. After the wash, a vertical crack appeared right in the middle of the windshield. Valley Glass in Midvale replaced it, and everything was back to normal.
Then on January 8, 2026, it happened again. On my way home from work, a truck kicked up a rock that struck my windshield. The chip didn’t look serious at first, but the following day the cold weather caused the crack to spread across the glass.
After waiting more than a month for an original Tesla windshield to arrive, the replacement was finally completed today — February 14, 2026.
The installation process took about two hours. That included removing the damaged windshield, installing the new Tesla glass, recalibrating the cameras, and reinstalling firmware related to the vehicle’s safety systems. Watching the process from start to finish reminded me how much technology is integrated into this car.
Two windshield replacements in 4 months taught me something about Tesla ownership — it’s not just a car, it’s an IT platform on wheels – All installed by Valley Glass in Midvale, Utah
If there’s one thing I’ve learned, it’s this: try to avoid driving directly behind gravel or sand trucks whenever possible. A small rock can turn into a full windshield replacement overnight, especially during cold weather.
Jay from Valley Glass repairing the rock chip in under five minutes using a precision resin injection system. Immediate action prevented another full windshield replacement.
DespitBut the story didn’t end there.
On February 19, 2026, while driving home from work, I noticed another small rock chip in the middle of the windshield. This time, I immediately made a U-turn and drove straight back to Valley Glass in Midvale.
Jay from Valley Glass repaired the chip in less than five minutes. Instead of waiting and risking another crack during cold overnight temperatures, the chip was injected and sealed immediately this inconvenience, I still love my Tesla.
Because of the quick repair, the windshield held through the cold and snow the next morning. The repair is slightly visible up close, but structurally it prevented another full replacement.
Lesson learned: act immediately.
If there’s one thing I’ve learned, it’s this: try to avoid driving directly behind gravel or sand trucks whenever possible. A small rock can turn into a full windshield replacement overnight, especially during cold weather.
Despite these incidents, I still love my Tesla.
To me, Tesla is an IT car.
I named my Tesla “Tessie.” One day at work, I suddenly felt dizzy and had to leave early. Tessie safely took me home. Moments like that remind me this isn’t just a car — it’s a technology partner.
The sound system alone is incredible — spatial, immersive, and HD-quality audio. It feels like a private theater on wheels. Inside the car, I also have my two AI guests, Ara and Steve. They interact with me in different ways — assistant, storyteller, sometimes funny, sometimes a little unhinged — and they make long drives enjoyable. When I get bored, Ara is always ready with jokes or music.
The GPS and Full Self-Driving features are second to none. Long drives feel easier and less stressful.
The entertainment system is something I’ve never experienced in any other vehicle: Netflix, Hulu, YouTube, web browsing, Apple Music, Spotify, Tidal, and built-in gaming all make waiting in the car surprisingly enjoyable.
Security is another feature I appreciate. Sentry Mode uses multiple cameras around the vehicle, giving me peace of mind wherever I park. The Photo Booth feature is just fun to use.
Convenience is everywhere: My Apple Watch and iPhone serve as my key. The car automatically preconditions before my morning commute and after work. I get notifications if there’s possible intrusion activity. I can use a PIN-to-drive feature and lock the glove box with a passcode, where I store my EDC.
Ara even helps set the tone for the day by playing my music playlists.
Driving-wise, the car feels stable and grounded because of the battery design along the floor, which lowers the center of gravity and reduces wind drag. The ride feels planted and smooth.
Recent software updates continue to remind me why Tesla feels like an IT platform on wheels. Features like improved autopilot visualization, smoother camera calibration, better system responsiveness, and refinements to the user interface make the car feel new again after each update.
Other things I’ve grown to appreciate:
Over-the-air software updates
Minimal maintenance compared to gas vehicles
Instant torque and smooth acceleration
Quiet cabin
Simple interior design
Mobile app integration
Remote climate control
Live camera viewing from the phone
Navigation that automatically plans charging stops
Energy efficiency tracking
Continuous improvement through software
If I had to list one downside so far, it would be the windshield. The larger glass surface and driving conditions in Utah make it more vulnerable to rock chips and cracks than my previous BMW, Audi, and Volkswagen vehicles.
Still, the pros outweigh the cons.
Even with two windshield replacements, I wouldn’t trade the experience. This car continues to remind me why innovation matters — not just in IT, but in everyday life.
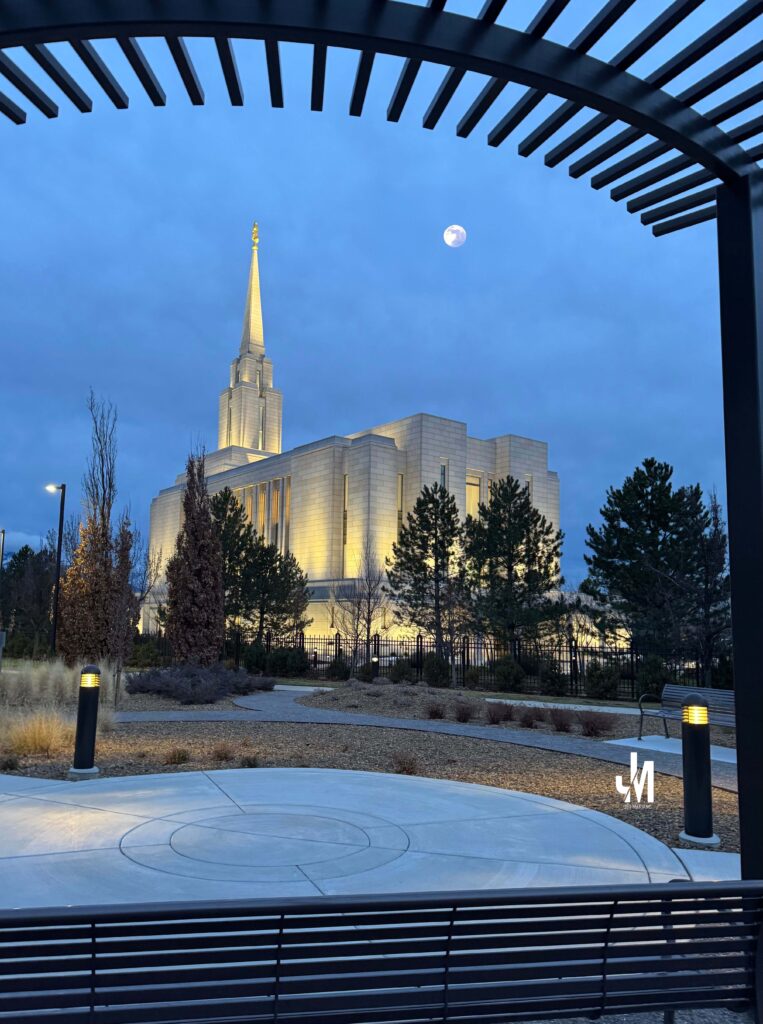
Oquirrh Mountain Temple under the first supermoon of 2026 — a reminder that light always returns.
Excerpt “With the gift of the Atonement of Jesus Christ and the strength of heaven to help us, we can improve.”
Intro Some messages arrive when the heart needs reassurance more than instruction. Elder Jeffrey R. Holland’s talk reminds me that discipleship is not about perfection today — it is about hope for tomorrow. Like the rising of the moon over the temple, light returns even after the darkest moments.
Notes from Elder Holland Elder Holland teaches that the gospel is meant to inspire progress, not discourage effort. The Lord does not expect immediate perfection. He asks us to keep trying, trusting in the power of the Atonement to help us grow over time.
Perspective (direct quotes) “First of all, if in the days ahead you not only see limitations in those around you but also find elements in your own life that don’t yet measure up to the messages you have heard this weekend, please don’t be cast down in spirit and don’t give up.”
“The gospel, the Church, and these wonderful semiannual gatherings are intended to give hope and inspiration. They are not intended to discourage you.”
“With the gift of the Atonement of Jesus Christ and the strength of heaven to help us, we can improve, and the great thing about the gospel is we get credit for trying, even if we don’t always succeed.”
President George Q. Cannon once taught: “No matter how serious the trial, how deep the distress, how great the affliction, [God] will never desert us. He never has, and He never will.”
Practice (today, not someday) Today I will remember that effort matters to God. Progress matters to God. Trying matters to God. I will move forward with faith, even when growth feels slow.
Final Reflection Hope in the gospel is not based on perfection — it is based on the Atonement of Jesus Christ. Tomorrow really can be brighter than today because God is patient with our growth.
Pocket I’m Keeping “We get credit for trying.”
What I Hear Now (direct quotes) “Tomorrow the Lord will do wonders among you.” “He will never desert us.”
Quiet reflection outside the temple — learning to trust God’s timing and His will.
Excerpt “May we now, in our time and turn, be willing to submit.”
Intro Some lessons in life are about effort. Others are about patience. But Elder Neal A. Maxwell teaches that the deepest discipleship is not just about doing more — it is about yielding more. Submission is not weakness. It is trust in God’s wisdom when life does not unfold according to our plans.
Notes from Elder Maxwell Elder Maxwell explains that spiritual growth often requires us to accept certain realities while actively improving others. True submissiveness is learning to discern the difference between what must be endured and what must be changed. It is the quiet willingness to trust God’s purposes even when life feels heavy or unclear.
Perspective (direct quotes) “Suffice it to say, God ‘allotteth unto men’ certain things with which we are to be content. (See Alma 29:4, Philip. 4:11; 1 Tim. 6:8.) A missing parent or limb is to be lived without. Yet temper and lust are to be tamed. One’s race is fixed, but one’s genetic endowment offers opportunity to be a careful steward. The submissive soul will be led aright, enduring some things well while being anxiously engaged in setting other things right — all the time discerning the difference.”
“We have been given three special words — but if not — by three submissive young men who entered their fiery furnace, knowing ‘our God … is able to deliver us from the burning fiery furnace, … But if not, be it known unto thee, O king, that we will not serve thy gods.’ (Dan. 3:17–18.)”
Practice (today, not someday) Today I will focus on surrendering control where I need to trust God more. I will work to improve what I can change — my discipline, my attitude, and my patience — while accepting the things God has allotted to me with humility and faith.
Personal Reflection Last night I listened to Elder Maxwell’s talk repeatedly — over and over — until the early hours of Sunday morning. I kept my mind engaged and my hands busy. While listening, I converted my Ruger PC Carbine, did laundry, and prepared a healthy dinner. Moving from one meaningful task to another helped steady my thoughts.
When those were finished, I continued with two hours of non-stop shadow boxing and isometric exercises, still listening to the talk. By the end of the night, I had heard it nearly twenty times.
I am learning that submission is not always expressed in dramatic moments. Sometimes it is simply continuing to do good things — working, building, training, and trusting God to shape the heart quietly.
Final Reflection Submission is not giving up. It is aligning our will with God’s will. Elder Maxwell reminds us that discipleship is not proven in comfort but in trust — especially when the answer is “but if not.” Faith means believing God can deliver us, while trusting Him even if He does not.
Pocket I’m Keeping “The submissive soul will be led aright.”
What I Hear Now (direct quotes) “Nevertheless not as I will, but as thou wilt.” “May we now, in our time and turn, be willing to submit.”
In stillness I train, in shadows I stand, Promise and discipline guide my hand. No witness needed, no victory cry, Just faith, and the will to keep trying.
Excerpt Long-term promises often need visible reminders so we remember who we are and what we have committed to become.
Intro In IT, I learned that systems fail when there are no checkpoints, no logs, and no monitoring. The same principle applies to life. Covenants are like system checkpoints — they keep us aligned, stable, and secure when the world becomes unpredictable.
Notes from the Scriptures President Dallin H. Oaks taught that clothing worn by judges, soldiers, doctors, and first responders serves as both identification and reminder of duty. Wedding rings and engagement rings function the same way — symbols of covenant responsibility.
Captain Moroni created a physical reminder of commitment when he raised the Title of Liberty. The people responded by making their own visible covenant, showing that loyalty to God requires both belief and action (see Alma 46).
One of the earliest covenant symbols appears after the Flood, when the Lord gave the rainbow as a token of His covenant with Noah and all living creatures (Genesis 9:12–15). The rainbow was not for God’s memory — it was for ours.
Perspective In my life, covenant reminders have not always been symbolic objects. Sometimes they have been routines, disciplines, and responsibilities that keep me anchored.
My morning prayers before work. My commitment to serve others quietly. My decision to keep learning in IT even when exhausted. My boxing discipline six days a week. My effort to help others enter the IT field.
These are reminders of who I promised to become.
In IT infrastructure, we use redundancy, monitoring, and backups to preserve stability. In life, covenants serve the same purpose — they preserve identity when circumstances change.
Practice (today, not someday) Today I will remember that promises require maintenance, just like systems do. I will recommit to the small daily actions that keep my covenants alive: work with integrity, serve without recognition, continue learning, and remain faithful even in quiet seasons.
Final Reflection The rainbow reminds us that God keeps His promises. Our daily actions show that we intend to keep ours.
Covenants are not just words spoken once. They are commitments lived repeatedly.
Pocket I’m Keeping Covenants are reminders of who I promised to become.
What I Hear Now “The rainbow shall be in the cloud; and I will look upon it, that I may remember the everlasting covenant…” Genesis 9:16
Link to the talk Covenants and Responsibilities — April 2024 General Conference — President Dallin H. Oaks
Intro From the streets of the Philippines to enterprise systems in the United States, my IT journey has been shaped by work, faith, and persistence.
If you are starting from nothing, keep going — progress often begins long before anyone notices.
Early Grit
At twelve years old, I helped support my family by selling newspapers at midnight, shining shoes, washing dishes, and doing whatever work I could find. I didn’t know what IT was back then. I just knew how to work.
Early 1990s at All Electronics. Long days, multiple bus rides, and the first spark of curiosity about computers.
From Survival to Skill
When I immigrated to the U.S. in 1990, survival came first. I worked warehouse jobs, midnight shifts, and eventually landed a customer service role at All Electronics.
This photo was taken during that time.
From 6:30 in the morning until 3 in the afternoon, I answered calls nonstop — sometimes hundreds in a day. Getting to work meant taking multiple buses across the city. After my shift ended, I took another bus to my second job — either working the drive-through at Taco Bell or selling auto parts at O’Reilly in Reseda.
It was exhausting. But those years built my endurance.
That computer behind me was just part of my job then. I didn’t know it yet, but it would become the doorway to my future.
Later, I bought my own computer and started learning the only way I knew how — by breaking it and fixing it over and over again. Windows 3.0, autoexec.bat, and config.sys became my teachers. Night after night, I stayed with problems until they made sense.
Breakthrough
No one wanted to hire me without experience, so I created my own. I fixed computers for neighbors and small businesses for free. That’s how I learned.
In the early days of IT, skills were learned the hard way. There were no structured learning paths — just curiosity, manuals, broken machines, and persistence.
Eventually, USC took a chance on me — and I made sure I was ready. I supported hundreds of users, worked on migrations, and found my place in IT.
From USC, new doors opened quickly. I was recruited by GTE — now known as Verizon — and not long after, an aerospace company in Carson offered me a six-figure role. It was a moment that reminded me how far persistence can take you.
But in 2003, I made a decision that shaped the rest of my career. I left corporate America and built my own IT consulting company.
The City of West Covina became one of my first major clients — along with firefighters and the police department. USC later brought me back as a senior consultant. Opportunities followed: Microsoft projects, the Claremont Colleges, law firms, American Samoa, and Fortune 500 environments.
Over time, I expanded the business by hiring developers, engineers, and support staff — building not just systems, but people.
Back to Corporate America
The 2008 recession changed everything. It was a time when, as they say, big fish eat small fish. Consulting work slowed, and I knew it was time to pivot again.
My first step back into corporate America was Payforward, a startup company where I helped migrate infrastructure to Amazon Web Services during the early days of cloud adoption. Working in a startup environment sharpened my ability to move fast, solve problems with limited resources, and adapt quickly.
From there, I joined The Church of Jesus Christ of Latter-day Saints as a Support Email Engineer — a worldwide organization operating at global scale. It was there that my PowerShell scripting became more refined and reliable. We supported enterprise messaging systems while the organization expanded into Azure and AWS, strengthening both my automation skills and my understanding of cloud infrastructure.
After that, I moved into the financial sector at City National Bank. That environment introduced me to enterprise-grade infrastructure and security architecture — multiple datacenters, blade server systems, layered “brick-by-brick” firewall protection, application performance monitoring (APM), and the operational discipline required to keep banking systems secure and resilient. It was where infrastructure stopped being just systems and became architecture.
Later, I joined PIMCO (Pacific Investment Management Company), one of the most demanding global environments I had experienced. Technologies like Citrix VDI, AWS, Azure, and enterprise security platforms such as Duo, CyberArk, Arctic Wolf, Palo Alto, and SIEM monitoring were part of daily operations. Mailboxes could reach sizes close to 1 TB, and migrations happened across global regions — North America (NA), Europe, the Middle East, and Africa (EMEA), and Asia-Pacific (APAC).
Like Payforward, these environments required regular PCI-DSS and HITRUST audits. My PowerShell automation matured even further, and I learned how to operate inside highly regulated financial systems where security, compliance, and reliability were non-negotiable.
These experiences prepared me for the infrastructure work I continue to do today.
Where I Am Today
Today I work as an Infrastructure Engineer in Utah. I automate with PowerShell, document systems, support enterprise infrastructure, and mentor others who are starting their own IT journeys.
My work now includes provisioning ERP computers into Intune, managing VMware environments, and maintaining a Cisco Meraki network with a 10GB fiber backbone across MDM and multiple IDF locations. I also support Cisco UCS, Fibre Channel connectivity, Veeam backups, end-of-life transitions, Microsoft Defender, and Azure infrastructure.
Looking back, nothing about this path was easy. But every long bus ride, every second job, and every broken computer taught me something I still use today.
I didn’t fall into IT. I worked my way into it.
Everything I document today in my technical notes traces back to those early days of learning by doing.
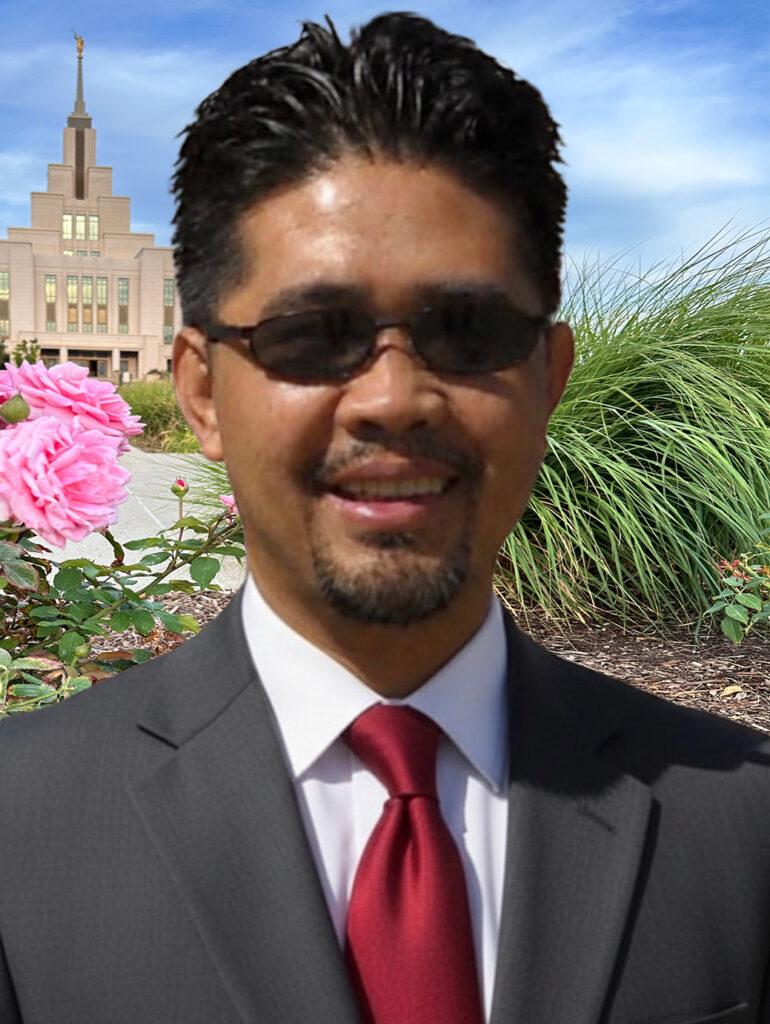
In certain eyes, I glimpse something no English adjective can contain.
Excerpt Some eyes carry the moment. Other eyes are taught to see beyond it.
Intro The scriptures teach that sight is not always natural. Sometimes the Lord allows understanding beyond ordinary vision. These moments are not constant, and they are not ours to explain. They come quietly, teach something essential, and pass.
There are also eyes that carry burdens the world cannot see. Their owner may not know what others perceive in them.
Two kinds of sight exist at the same time — one that is lived, and one that is given.
Notes from the Scriptures When the servant of Elisha saw armies surrounding them, fear filled his heart. Elisha prayed that the young man’s eyes would be opened.
“And the Lord opened the eyes of the young man; and he saw: and, behold, the mountain was full of horses and chariots of fire round about Elisha.” (2 Kings 6:17)
The situation did not change. Only sight changed.
Enoch experienced something similar when the Lord instructed him to wash his eyes:
“And he beheld also things which were not visible to the natural eye.” (Moses 6:36)
Even Moses was invited to see beyond natural limits:
“Thou art my son… look, and I will show thee the workmanship of mine hands.” (Moses 1:4)
Natural eyes alone could not perceive these things.
Perspective In speaking of the man born blind in John 9, President Jeffrey R. Holland described how the Savior placed clay upon the man’s eyes and sent him to wash. After obeying, the man returned seeing. When challenged by those who doubted the miracle, he responded simply:
“Whereas I was blind, now I see.”
President Thomas S. Monson later reminded us that blindness is not always physical. Many “have their eyesight but… walk in darkness at noonday,” blinded by anger, prejudice, indifference, or neglect of truth.
“Their ears are dull of hearing, and their eyes they have closed…”
“The Spirit speaketh of things as they really are, and of things as they really will be.” (Jacob 4:13)
“The light of the body is the eye.” (Matthew 6:22)
Practice Today Today I will remember that sight is both physical and spiritual. I will seek to see people with compassion, recognizing that what is visible is not always complete.
Final Reflection There are eyes that reflect weariness when the day is heavy. There are eyes that reflect quiet strength when burdens are lifted. The owner of those eyes may not know what others perceive in them.
And there are moments when, looking into them, something is seen that cannot be explained — not by imagination, but not by natural sight either. Like the servant of Elisha seeing the chariots of fire, or the man born blind returning from Siloam, or Enoch seeing beyond the natural world, the experience is brief and passing.
It is not given to be understood or held. It is given to steady the heart.
One set of eyes lives the moment. Another set of eyes learns from it.
Both belong to God.
Pocket I’m Keeping “Whereas I was blind, now I see.”
What I Hear Now “Open my eyes.” “See with compassion.” “Let the moment pass, but keep the lesson.”
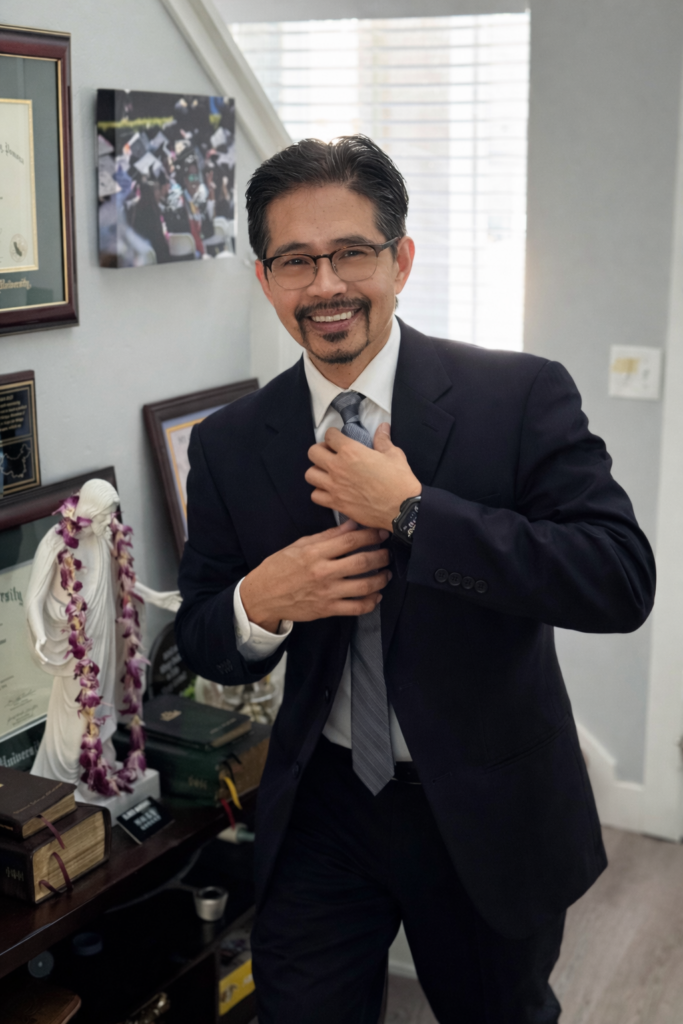
Preparing for Church this afternoon Suit pressed, heart steady, and gratitude present. The drive to Juniper Crest Ward reminds me how blessed I am — good health, sufficient food, and strength to keep my covenants. Six days of labor and training, one day to remember the Giver of all things.
Excerpt
After a demanding week of work and training, the Sabbath reminds me that truth rises from the earth while righteousness comes from heaven — and both lead us back to God.
Intro
Five days of stressful work as an Infrastructure Engineer, and six days of training — boxing and Muay Thai, three hours at a time — can leave the body tired and the mind stretched thin. But Sunday belongs to God alone.
Today is not about productivity or performance. It is about renewal.
The scriptures remind me that God’s work has always been a partnership between heaven and earth.
Grateful for the strength to come, the means to arrive, and the faith to worship.
Notes from My Friend
“Truth shall spring out of the earth; and righteousness shall look down from heaven.” Psalm 85:11
In Enoch’s expansive vision, God orchestrates a collaboration between heaven and earth for the salvation of humanity.
Early in the vision, Enoch’s people are lifted up to God’s presence through his teaching and leadership (Moses 7:21), leaving a void of goodness on the earth. But the people who remained behind were not left alone:
“Enoch beheld angels descending out of heaven, bearing testimony of the Father and Son; and the Holy Ghost fell on many, and they were caught up by the powers of heaven into Zion.” Moses 7:27
Both the heavens and the earth sorrow for the wickedness of humanity, causing Enoch to weep also (Moses 7:28, 40, 48).
Then, before the Savior’s Second Coming, God sends revelation through both heavenly and earthly sources, to once again create a society like the one Enoch’s people built anciently:
“And righteousness will I send down out of heaven; and truth will I send forth out of the earth, to bear testimony of mine Only Begotten; his resurrection from the dead; yea, and also the resurrection of all men; and righteousness and truth will I cause to sweep the earth as with a flood, to gather out mine elect from the four quarters of the earth, unto a place which I shall prepare, an Holy City, that my people may gird up their loins, and be looking forth for the time of my coming; for there shall be my tabernacle, and it shall be called Zion, a New Jerusalem.” Moses 7:62
At the time of the Savior’s coming, Enoch’s city will return to the earth to unite with this new Zion:
“Then shalt thou and all thy city meet them there, and we will receive them into our bosom, and they shall see us; and we will fall upon their necks, and they shall fall upon our necks, and we will kiss each other;” Moses 7:63–64
One literal fulfillment of God bringing truth “out of the earth” is the Book of Mormon itself, which Joseph Smith translated from engravings on metal plates buried by Moroni. As Moroni prophesied:
“[this record] shall be brought out of the earth, and it shall shine forth out of darkness” Mormon 8:16
Another fulfillment is the work of living people flooding the earth with truth as they share prophetic messages with one another. As Elder Jeffrey R. Holland testified:
“God will send help from both sides of the veil to strengthen our belief” “Lord, I Believe,” April 2013 general conference
Perspective
All week long, truth rises from the earth through effort — work, training, discipline, endurance. Sweat, repetition, and responsibility shape the person I am becoming.
But on the Sabbath, righteousness looks down from heaven.
For decades, I have tried to keep Sunday different. I don’t shop or buy food on the Sabbath. I have six other days to do those things. Sunday is reserved for worship, visiting the sick, prayer, and quiet pondering.
This discipline is not about restriction. It is about remembering who provides strength beyond my own.
The strength I build through boxing and Muay Thai is earthly strength. The peace I feel on Sunday is heavenly strength. Both are necessary, but they are not the same.
One prepares the body. The other restores the soul.
Practice (today, not someday)
Today I will be grateful for both earthly and heavenly help which God sends to bring us to Him. I will remember that in the important work of the salvation of His children, heavenly and earthly forces collaborate under His direction.
Final Reflection
When truth rises from the earth through effort and righteousness descends from heaven through grace, God prepares His people for Zion.
Six days I labor and train. One day I worship and renew. In that rhythm, I see the wisdom of God’s design — strength from the earth, peace from heaven.
Pocket I’m Keeping
Truth rises through effort. Righteousness descends through grace.
What I Hear Now
“Truth shall spring out of the earth.” “Righteousness shall look down from heaven.” “God will send help from both sides of the veil.”
I was reminded of that truth while camping in Monument Valley, waiting patiently in the quiet hours before dawn. I stayed awake at the cabin, watching the sky, trusting that light would come in its own time. When the waning gibbous moon finally rose, it crowned the stone buttes with a soft, steady glow. And then—unexpectedly—I was rewarded with a distant lightning show on the horizon. Stillness and power shared the same sky. Waiting revealed what haste would have missed.
Excerpt
God’s empathy is not a weakness to be restrained. It is the very source of His justice.
Intro
In recent years, empathy has come under suspicion. Some Christian thinkers have warned that it can become excessive or misplaced, even harmful. While acknowledging compassion as a Christlike trait, they caution that emotional identification—if left unchecked—might blur moral clarity or weaken obedience to God.
That concern, however, finds no support in scripture.
Notes from the Moment
In Moses 7, Enoch is shown a vision of the future. His city has been taken into heaven. Other righteous souls dwell with God. Those left behind are marked by violence and cruelty. As Enoch observes God watching this scene, he expects detachment—or perhaps righteous anger.
Instead, he sees something that unsettles him deeply: God weeping.
“How is it that thou canst weep,” Enoch asks, “seeing thou art holy, and from all eternity to all eternity?” (Moses 7:29). To Enoch, holiness and empathy seemed incompatible.
God then explains:
“Behold these thy brethren; they are the workmanship of mine own hands, and I gave unto them their knowledge, in the day I created them; and in the Garden of Eden, gave I unto man his agency;”
Moses 7:32–34, 40
Here, there is no effort to dilute empathy in the name of justice. God does not administer justice despite His compassion—He administers it because of it.
Perspective
As Enoch begins to understand the depth of God’s love, his own heart expands beyond anything he had known. He “wept and stretched forth his arms, and his heart swelled wide as eternity; and his bowels yearned; and all eternity shook” (Moses 7:41).
Divine empathy is contagious.
Practice
A similar pattern appears after the Savior’s death, when darkness covered the land in the Americas. The people heard His voice explaining the destructions that had taken place. These were not acts of emotional detachment, but of mercy—meant to prevent further suffering. Repeatedly, He gives the same reason:
“That the blood of the prophets and the saints shall not come any more unto me against them” (3 Nephi 9:5, 7–9, 11)
Justice, once again, is rooted in empathy.
President Dallin H. Oaks—having spent years studying and administering law—has reflected deeply on the relationship between love and commandment. In a worldwide devotional, he shared how his thinking has matured over time:
“I have previously referred to our ‘continually [trying] to balance the dual commandments of love and law,’ but I now believe that goal to be better expressed as trying to live both of these commandments in a more complete way. …”
“Stand for Truth,” Worldwide Devotional Address for Young Adults, 21 May 2023
Final Reflection
If God loves all His children with perfect love, then loving them cannot compete with loving Him. When compassion seeks their eternal good, it is aligned with holiness—not opposed to it.
The scriptures do not portray empathy as a liability. They reveal it as divine.
Pocket I’m Keeping
Compassion and holiness are not rivals. In God, they are one.
What I Hear Now
“God’s justice flows from His love.” “Empathy does not weaken truth.” “Holiness can weep.”
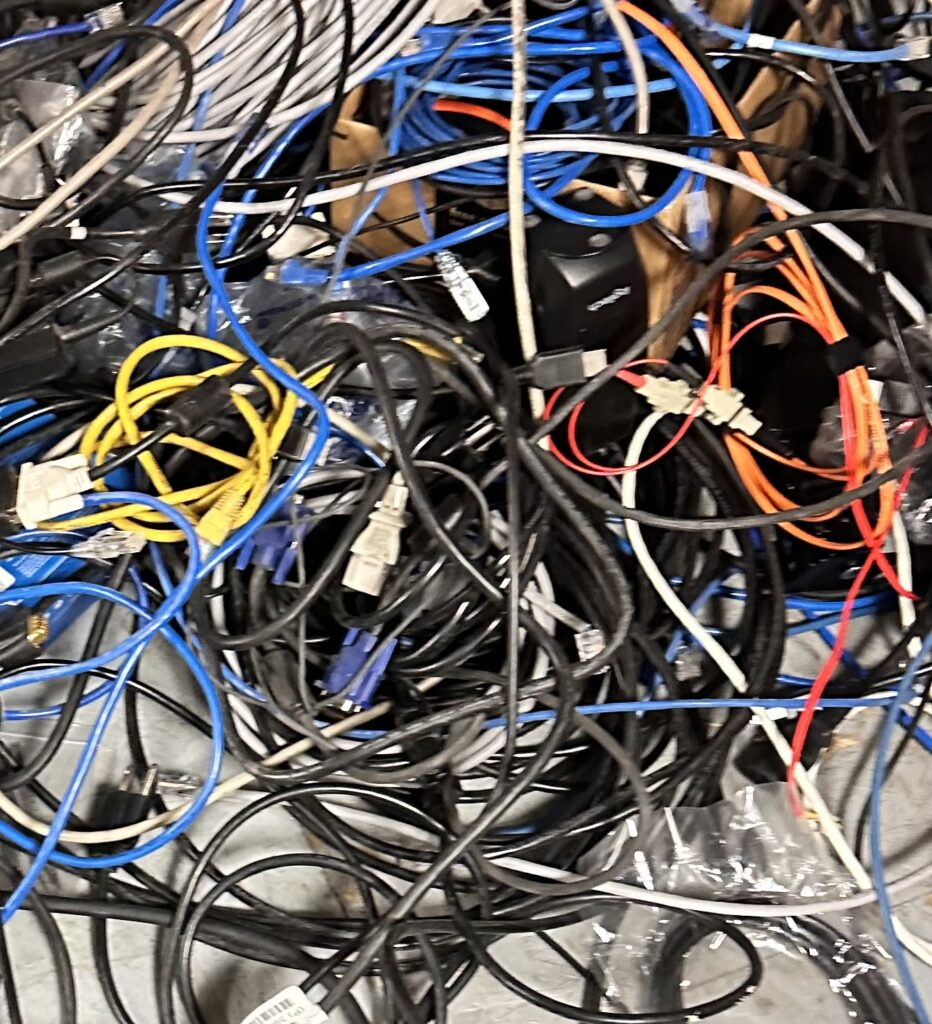
Organizing legacy cables while holding a squat—order through motion, clarity under pressure.
Excerpt
I don’t stay ready because I fear failure. I stay ready because experience taught me that motion reveals what stillness hides.
Intro
I am not a static person. I never have been. Sitting still has never helped me think clearly—especially in infrastructure work, where systems fail without warning and clarity often arrives too late. Movement keeps me alert, adaptive, and aware.
Notes from the Moment
While organizing a tangled pile of legacy cables, I wasn’t standing still. I was holding a squat—time under tension—sorting chaos into order. At the same time, my feet were subtly moving: slips, pivots, pendulum steps. The same habits I use at my standing workstation. The same habits I use in boxing.
This is how I work. Motion keeps my mind open.
Perspective
“Keep moving your feet.” — Elder David A. Bednar “If something can go wrong, it will.” — Murphy’s Law “Be water, my friend.” — Bruce Lee
Practice
I don’t wait for problems to announce themselves. I anticipate them.
Murphy’s Law isn’t pessimism—it’s preparation. If something can fail, it eventually will. That reality shaped how I think and move, starting in the mid-90s during the dot-com era, when uptime was survival and mistakes were unforgiving.
In boxing, moving your feet doesn’t give you x-ray vision like Superman. It gives you new angles. You see openings sooner. You avoid danger without panic. You’re no longer where the punch was.
In IT, it’s the same. I don’t “see afar off” because I’m gifted with foresight. I see because I move—physically and mentally. I change angles. I scan. I test assumptions. I stay proactive instead of reactive.
Health follows the same law. Circulation improves when the body moves. Stagnation invites breakdown. Motion sustains clarity, resilience, and longevity.
Final Reflection
Infrastructure professionals don’t get the luxury of being static. Thinking under pressure requires circulation—of blood, of ideas, of perspective. Standing still narrows vision. Motion expands it.
Water that moves stays clear. Water that stagnates decays.
Whether in boxing, IT, or life itself, the advantage isn’t supernatural vision. It’s movement.
Pocket I’m Keeping
Stay proactive. Stay moving. New angles reveal what stillness hides.
What I Hear Now
“You saw that coming.” “Good catch.” “How did you anticipate that?”
This photo was taken while hiking the Herriman Mountains. I walked the trail back and forth, up and down, creating multiple footsteps in the snow to simulate the idea behind this reflection — many steps, one direction. Unity is often built through repeated effort, not a single moment.
Excerpt
Zion is not built by sameness. It is built when people choose unity while carrying different loads.
Intro
Over the years, I’ve worked in environments where success depended on alignment more than talent. In IT, in security, and even in physical training, progress stalls the moment people begin competing instead of coordinating. The strongest systems I’ve seen—technical or human—are the ones where everyone knows they belong and everyone knows they matter.
Scripture describes Zion in similar terms. Not as perfection, but as unity.
Notes from the Author
The prophet Enoch’s city is described in a way that has always stood out to me:
“And the Lord called his people Zion, because they were of one heart and one mind, and dwelt in righteousness; and there was no poor among them.” Moses 7:18
What strikes me is not just their righteousness, but the outcome of it. There was no poor among them. That phrase suggests more than generosity. It suggests belonging.
Perspective
Scripture doesn’t say they merely helped the poor. It says poverty ceased to exist among them. To me, that implies a community where people were not reduced to labels, deficits, or past circumstances. Each person was seen as capable of contributing, even if their contribution looked different.
I’ve seen this principle play out in my own life. In work settings, people thrive when they are trusted early, not tested endlessly. In training, progress comes when the body is respected as it is today, not judged for what it was yesterday. When someone is treated as an asset rather than a burden, they often rise to meet that expectation.
The Book of Mormon describes a similar unity among those baptized at the waters of Mormon. Alma taught them to move forward together:
“That ye may look forward with one eye, having one faith and one baptism, having your hearts knit together in unity and in love one towards another.” Mosiah 18:21
Unity does not erase difference. It aligns direction.
Practice (today, not someday)
Today, I will pay attention to how I see people. I will resist the urge to sort others into categories based on background, skill level, or current capacity. Whether at work, at church, or in daily interactions, I will choose language and actions that affirm contribution instead of deficiency.
Unity begins with how we look at one another.
Final Reflection
Building Zion is not about creating a uniform community. It is about creating a cohesive one. A place where people are strengthened by shared purpose, not divided by comparison.
That kind of unity requires intention. It requires humility. And it requires consistent effort, just like anything worth building.
Pocket I’m Keeping
Unity grows when people feel needed, not merely tolerated.
What I Hear Now
To be of one heart and one mind is not to think alike, but to move together.
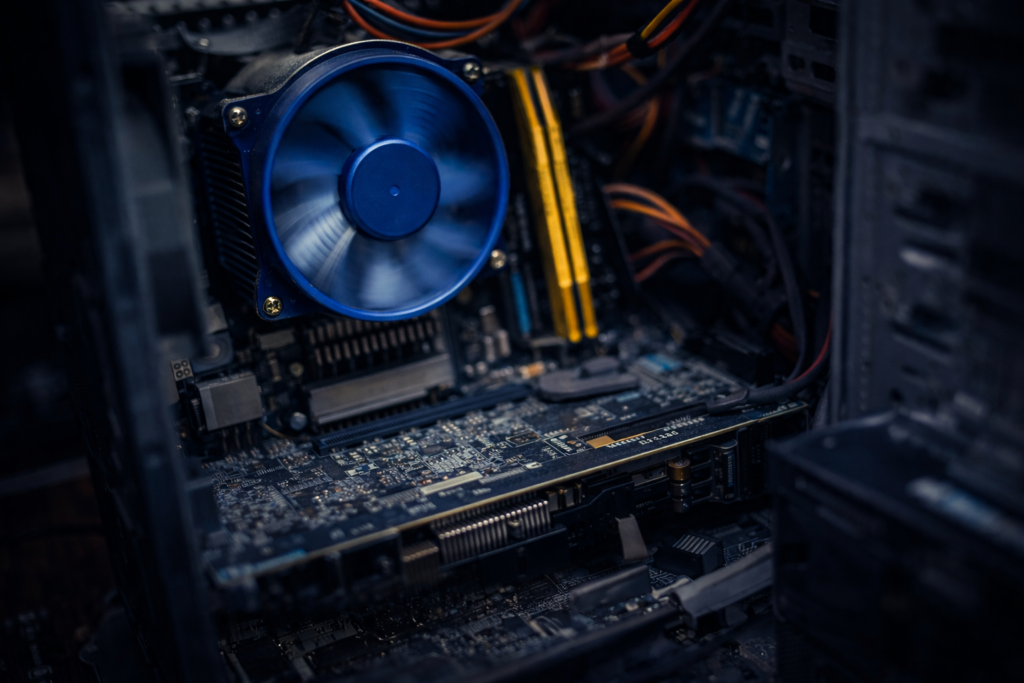
Most system failures don’t begin in Windows. They begin deeper, where firmware, drivers, and hardware quietly decide whether the OS will be allowed to run.
Intro
When a system reboots unexpectedly, freezes during a video call, or crashes the moment a camera turns on, Windows is usually the first thing blamed. But in most real-world cases, the operating system is only the messenger. The real problem lives below Windows, in layers most people never see until something breaks.
Over the years, I’ve learned that stability is not something you install. It’s something you negotiate between hardware, firmware, drivers, and the operating system, all trying to work together under load.
The invisible stack beneath Windows
Modern endpoints are layered systems.
Below Windows 11 sits firmware, BIOS, chipset drivers, GPU drivers, and kernel-mode components that operate outside the visibility of most logging tools. These layers handle power management, graphics acceleration, memory access, and hardware interrupts. When they disagree, Windows doesn’t always get a vote.
A failure in these layers doesn’t always generate a blue screen. Sometimes the system simply resets. From the outside, it looks random. Underneath, it’s not.
Why Windows 11 gets blamed
Windows 11 sits at the intersection of modern hardware acceleration and modern applications. Tools like Microsoft Teams, browsers, and Office apps make heavy use of GPU pipelines, video encoders, and camera drivers.
When something goes wrong at that boundary, the crash surfaces when the app is launched, the camera turns on, or a video stream initializes. Windows appears guilty because it’s present when the failure occurs, but the fault often belongs to a driver, firmware interaction, or hardware acceleration path that Windows merely exposed.
Why visibility tools don’t always catch it
Tools like Sysmon are excellent at recording what happens inside the operating system. They act like a flight recorder for processes, network connections, and file activity.
But Sysmon can’t log what never reaches the OS.
A reboot triggered by firmware, a GPU driver reset, or a kernel-mode failure can occur before logging completes. From an administrator’s perspective, it feels like the system went silent without warning. In reality, the failure happened below the level where logs exist.
The thin line between stable and broken
Stability often comes down to small decisions.
A BIOS update here. A GPU driver change there. Hardware acceleration enabled or disabled in a single application.
None of these changes look dramatic on their own, but together they determine whether a system runs quietly for months or reboots under pressure. That line between stable and broken is thinner than most people realize.
What I’ve learned
When troubleshooting modern Windows systems, I no longer ask, “What did Windows do wrong?” first.
I ask:
What changed below the OS
Which drivers are involved
What hardware path is being exercised
Whether the failure happens under load or acceleration
More often than not, the answer reveals itself there.
Final thought
Windows 11 is rarely the villain in these stories. It’s the surface where deeper tensions finally show themselves.
Understanding that difference changes how you troubleshoot, how you update, and how you design systems meant to stay online.
Most Windows 11 instability doesn’t live in the OS itself, but at the edges where hardware, drivers, and applications meet.
Understanding Failure at the Boundaries
Why this post exists
When something breaks after a Windows 11 update, the operating system is usually the first thing blamed.
That reaction is understandable. It is also often wrong.
Most Windows 11 issues I’ve seen in production environments were not caused by Windows itself, but by interactions at the boundaries — drivers, firmware, graphics acceleration, and modern hardware pipelines colliding under load.
This post is about recognizing that pattern before making changes you can’t easily undo.
Windows 11 changed the execution model
Windows 11 didn’t just refresh the UI. It tightened and modernized how the system interacts with hardware.
Notable shifts include:
heavier GPU offloading
deeper integration with modern drivers
stricter timing and power management
increased reliance on hardware acceleration
These changes improved performance and security — but they also exposed weaknesses that were previously hidden.
Where failures actually occur
Most Windows 11 instability I’ve seen does not originate in the OS core.
It shows up at the edges:
camera pipelines invoking GPU acceleration
browsers rendering complex content
collaboration tools engaging media stacks
document editors interacting with graphics layers
When these systems overlap, failure is rarely clean.
The result can look dramatic:
sudden reboots
frozen screens
applications triggering system instability
But the OS is often just the messenger.
Why blaming the OS is tempting
Blaming Windows feels productive because it is visible and recent.
But doing so can lead to:
unnecessary registry changes
disabling core protections
rolling back updates prematurely
introducing instability elsewhere
Experienced engineers pause here.
They ask a different question: “What interaction just occurred?”
A real-world pattern
In several recent incidents, systems rebooted only when:
the camera was enabled
a browser rendered media-heavy pages
a document triggered graphics rendering
The same machines were otherwise stable.
That pattern points away from Windows itself and toward:
GPU drivers
hardware acceleration paths
firmware timing
vendor-specific optimizations
The fix is rarely global. It is almost always surgical.
Why restraint matters
Windows 11 gives us many levers:
registry overrides
advanced graphics settings
feature toggles
Just because a lever exists does not mean it should be pulled.
Sometimes the most correct decision is:
identify the root cause
mitigate user impact
document the behavior
wait for vendor correction
Stability is not always achieved by action. Sometimes it is preserved by restraint.
What Windows 11 is actually doing well
Despite the noise, Windows 11 has proven to be:
more secure by default
more consistent under load
better integrated with modern hardware
less tolerant of outdated assumptions
Those are strengths, not weaknesses.
They require us to think more holistically about the stack.
The lesson Windows 11 keeps teaching
Modern systems fail at the seams.
Operating systems, drivers, firmware, and applications now behave as a single organism.
When one part misbehaves, symptoms surface elsewhere.
The job is not to assign blame quickly. The job is to understand interaction.
Final reflection
Windows 11 didn’t break our environments.
It revealed where we were already fragile.
Once you see that pattern, troubleshooting becomes calmer, more precise, and far less reactive.
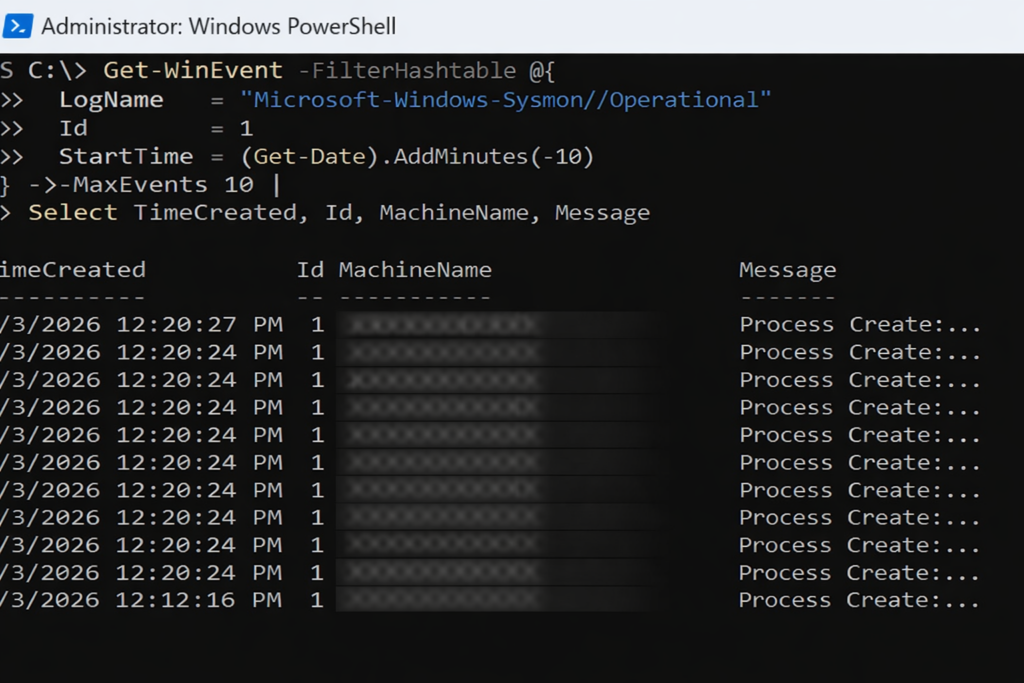
Sysmon Event ID 1 in action. Each entry records a process creation event, showing when a process started and providing the first layer of visibility into how activity begins on an endpoint.
Seeing What Actually Happens
Why this post exists
Sysmon is often misunderstood.
Some expect dashboards. Others expect alerts. A few expect it to magically explain incidents on its own.
Sysmon does none of those things.
What it does extremely well is something more fundamental. It records what actually happened.
Think of Sysmon as a black box flight recorder for a computer.
What Sysmon is
Sysmon (System Monitor) is a Windows system service from Microsoft Sysinternals.
Once installed, it continuously records detailed system activity into the Windows Event Log, including:
Process creation and command lines
Network connections
DLL and driver loading
Process access and injection behavior
Sysmon does not block activity. It does not alert. It observes and records.
What Sysmon is not
Sysmon is not:
A SIEM
A reporting platform
An inventory system
A centralized logging solution
Sysmon logs locally on each endpoint only.
Visibility comes later, when those logs are queried, collected, or forwarded.
Where Sysmon logs live
All Sysmon telemetry is written to the Windows Event Log on each machine.
Log path:
Microsoft-Windows-Sysmon/Operational
These logs can be:
Queried locally with PowerShell
Forwarded using Windows Event Forwarding
Collected by a SIEM
Reviewed during investigations
Why companies deploy Sysmon
Most security incidents are investigated after the fact.
Without Sysmon, questions like these are difficult to answer:
How did this process start?
What command launched it?
What network connection did it make?
Was this behavior normal for this system?
Sysmon provides the raw telemetry needed to answer those questions with evidence, not assumptions.
Where Sysmon comes from
Sysmon is part of Microsoft Sysinternals and is downloaded directly from Microsoft:
Walk With Me. Jagna, Bohol — my second area. One year a member of the Church, already a full-time missionary, learning what it meant to walk with God.
Excerpt
God’s invitation is not always to arrive quickly, but to move together. When He says “walk with me,” He is offering companionship before certainty, and presence before proof.
Intro
I served my mission in the Philippines Cebu Mission in 1981. I had been a member of the Church for only six months. I did not feel experienced, polished, or prepared. Yet from the first day forward, I felt something unmistakable: I was not walking alone.
There were days I did not know what to say, doors that did not open easily, and moments when I felt far too small for the work. Still, I felt the Lord beside me—quietly guiding, steadying my steps, and shaping my confidence over time. Long before I understood doctrine deeply, I understood companionship. God was walking with me.
Notes from the Author
Looking back, I see that the Lord did not remove uncertainty from my path. He sanctified it by walking with me through it. That companionship mattered more than eloquence or experience. It still does.
Perspective
In the scriptures, the word walk often describes the pattern of daily living. We are invited to walk uprightly, to walk in the ways of the Lord, and to walk after His holy order. These phrases point to consistency and direction over time.
With Enoch, however, the Lord extended a deeply personal invitation:
Behold my Spirit is upon you, wherefore all thy words will I justify; and the mountains shall flee before you, and the rivers shall turn from their course; and thou shalt abide in me, and I in you; therefore walk with me.
Moses 6:34
God did not ask Enoch to lead from a distance. He asked him to walk together. Enoch accepted that invitation, and so did his people. Scripture records that they walked with God, and “God received [them] up into his own bosom” (see Moses 6:39; Genesis 5:22, 24; Moses 7:69).
The idea of walking together suggests conversation, proximity, and shared direction. It implies movement at the same pace, side by side.
Even the risen Savior chose this pattern. As He walked with two disciples on the road to Emmaus, their understanding unfolded gradually. Only later did they reflect:
Did not our heart burn within us, while he talked with us by the way, and while he opened to us the scriptures?
Luke 24:32
Mormon later testified of his people’s discipleship, saying he knew they were followers of Christ because of their “peaceable walk with the children of men” (Moroni 7:4).
Children in the Church sing this same truth simply: “I will walk with Jesus, and He will walk with me” (“I Will Walk with Jesus,” Hymns—For Home and Church).
Practice Today (Not Someday)
Today, I will walk with God intentionally. I will not rush past Him by relying only on habit or experience. I will pause to listen before acting, pray before deciding, and trust that steady movement matters more than speed.
Walking with God means choosing alignment over control, presence over performance, and faith over fear—one step at a time.
Final Reflection
God does not promise that the path will be effortless. He promises companionship. When we accept His invitation to walk with Him, progress becomes possible even when confidence is not yet complete.
Pocket I’m Keeping
Walking with God is not about getting ahead. It is about staying close.
What I Hear Now
If I keep walking, He will keep walking with me. That is enough.
Seeing Afar Off. The eclipse rises over Joshua Tree — a reminder that vision returns, even when light feels partial.
Excerpt
In technology and in discipleship, problems rarely fail because of missing data. They fail because we cannot see far enough ahead to understand the consequences of our choices.
Intro
In IT, I have learned that anxiety often narrows vision. Early in my career, I walked into a colleague’s office convinced I had the solution to a thorny issue in a project we were co-leading. I explained what I thought we should do and why. He listened calmly, then looked across the desk and said simply, “Think about how this plays out.”
He walked me through the likely reactions of team members, the downstream effects on systems, and the unintended consequences I had not considered. His calm allowed him to think more strategically than I was able to in that moment. What I lacked was not intelligence or effort, but perspective.
Notes from the Author
In infrastructure work—whether designing a Cisco Meraki network, planning a VMware migration, or making security changes—short-sighted decisions can create long-term pain. A fix that looks elegant today can become tomorrow’s outage if we fail to see how it will unfold over time.
Perspective
When God called Enoch to be a prophet, He described a people who suffered from the same problem:
I am angry with this people, and my fierce anger is kindled against them; for their hearts have waxed hard, and their ears are dull of hearing, and their eyes cannot see afar off;
Moses 6:27
This was not merely a failure of perception. It affected how they treated one another and how they made decisions. Their inability to see beyond the present moment led to cruelty and violence. God’s work with Enoch began by expanding his vision before expanding his influence.
The Lord said to Enoch:
Anoint thine eyes with clay, and wash them, and thou shalt see.
Moses 6:35
After doing so, Enoch saw “things which were not visible to the natural eye” (Moses 6:36). With that expanded perspective, he was prepared to teach.
In modern terms, this feels familiar. When working with systems, clarity comes only after stepping back—diagramming dependencies, understanding traffic flow, or modeling failure scenarios. Seeing afar off is what separates reactive fixes from resilient design.
Peter later warned Church members of this same danger:
He that lacketh these things is blind, and cannot see afar off.
2 Peter 1:9
Elder David A. Bednar taught how this expanded vision is developed, especially within families:
Parents who consistently read and talk about the Book of Mormon with their children, who share testimony spontaneously with their children, and who invite children as gospel learners to act and not merely be acted upon will be blessed with eyes that can see afar off.
“Watching with All Perseverance,” April 2010 general conference
He directed this promise to parents—a reminder that, like Enoch, we must see more clearly ourselves in order to help others develop clearer vision. Scripture study sharpens perspective the way system diagrams sharpen architectural thinking. It reveals consequences that are not obvious in the moment.
Moroni extended a similar invitation:
…remember how merciful the Lord hath been unto the children of men, from the creation of Adam even down until the time that ye shall receive these things, and ponder it in your hearts.
Moroni 10:3
Practice Today (Not Someday)
Today, I will slow down long enough to see farther. Before making decisions, I will consider downstream effects—on people, systems, and relationships. I will study the gospel not only for answers, but for perspective, trusting that clearer vision leads to wiser choices.
Final Reflection
Whether designing networks or building faith, short-term fixes can create long-term problems. Seeing afar off requires patience, humility, and calm. When perspective expands, decisions improve—and so does the impact of our service.
Pocket I’m Keeping
Clarity comes when I stop reacting and start seeing farther.
What I Hear Now
If I expand my vision, the right decisions become clearer.
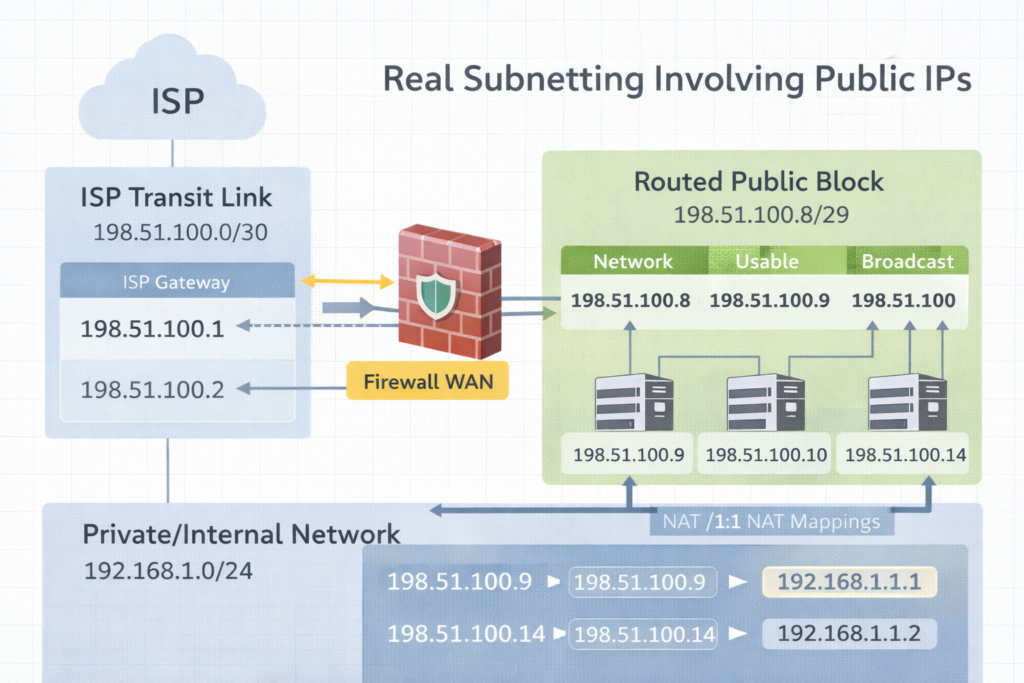
Subnetting in the real world. A /30 is the transit bridge to the ISP. The routed /29 is the public space you actually use behind the firewall.
Excerpt Subnetting clicks when you stop treating it like math and start treating it like design. The moment you get public IPs from an ISP like Comcast, you realize there are two stories happening at once. The transit link that connects you to the ISP, and the routed public block you can actually use inside your firewall.
Intro Subnetting is the practice of dividing an IP space into smaller networks so routing, security, and growth stay predictable. That sounds academic until you get a real ISP handoff and suddenly someone says, “Here’s a /30,” and you discover you only get one IP you can assign. Then they also give you a /29, and you are told those are your public LAN IPs, but they do not live on your WAN port the way you think they do.
This post will make that feel normal.
Notes from the Author Subnetting became real for me when Comcast handed us public IP space and the physical reality did not match the training diagrams. I learned there is a difference between an ISP transit network and a routed block. Once you see that difference, /29 and /30 stop being confusing and start being tools.
Perspective What is subnetting Subnetting is splitting a network into smaller networks by borrowing bits from the host portion and adding them to the network portion. The prefix length, like /24 or /30, tells you how many bits are network bits.
Why it is necessary
Routing clarity Routers make decisions based on networks, not individual IPs.
Security boundaries Separate systems by function. Users, servers, guests, printers, management.
Broadcast control Smaller broadcast domains reduce noise and improve performance.
Clean growth You can expand without renumbering everything if you plan.
Two ISP stories you must separate Story 1: The transit link, often a /30 or /31 This is the point to point connection between your firewall WAN interface and the ISP. It is not your “public LAN block.” It is just the link.
Story 2: The routed block, often a /29, /28, or larger These are the public IPs you can use for NAT, 1:1 mappings, public services, or DMZ addresses. The ISP routes that block to you through the WAN link.
This is why people say, “Comcast gave me a /30 and I only have one usable IP.” In a /30 there are 4 addresses total. Two are usable, but one is almost always used by the ISP side, and the other is used by your WAN interface. That leaves you with only one you can assign on your equipment, which makes it feel like “one usable.” That is normal.
Practice Today (Not Someday) Here are easy to very difficult examples with answers. Read them in order. The goal is understanding, not speed.
Example 1, easy Network: 192.168.1.0/24 Question: How many usable IPs, and what is the usable range
Example 2, easy to medium Requirement: at least 50 devices Base: 192.168.10.0 Question: What prefix fits, and what is the first subnet range
Answer Need at least 50 hosts. Next power of two is 64 addresses. 64 addresses means /26. Mask: 255.255.255.192 First subnet: 192.168.10.0/26 Network: 192.168.10.0 Broadcast: 192.168.10.63 Usable: 192.168.10.1 to 192.168.10.62
Example 3, medium Network: 10.20.30.0/27 Question: What is the usable range and how many usable IPs
Answer /27 means 32 addresses Usable: 30 Network: 10.20.30.0 Broadcast: 10.20.30.31 Usable: 10.20.30.1 to 10.20.30.30
Example 4, public IP reality check, /30 transit Comcast gives you: 203.0.113.8/30 Question: What are the four addresses, and which one do you typically put on your firewall WAN
Answer /30 is 4 addresses total, increments of 4 Block: 203.0.113.8 to 203.0.113.11
Network: 203.0.113.8 Usable: 203.0.113.9 and 203.0.113.10 Broadcast: 203.0.113.11
Typical assignment ISP gateway: 203.0.113.9 Your firewall WAN: 203.0.113.10 This is why it feels like you only got one usable IP. You only got one usable IP for your side. The other usable belongs to the ISP side.
Example 5, common ISP setup, /30 transit plus routed /29 Comcast gives you two things
Transit: 198.51.100.0/30
Routed block: 198.51.100.8/29 routed to your WAN IP
Question A: What goes on the WAN interface Question B: What is the usable range of the /29 and how do you actually use it
Answer A, WAN interface Transit /30 block is 198.51.100.0 to 198.51.100.3 Network: 198.51.100.0 Usable: 198.51.100.1 and 198.51.100.2 Broadcast: 198.51.100.3
Typical ISP gateway: 198.51.100.1 Your WAN: 198.51.100.2
Answer B, routed /29 /29 is 8 addresses total, increments of 8 Block: 198.51.100.8 to 198.51.100.15 Network: 198.51.100.8 Broadcast: 198.51.100.15 Usable: 198.51.100.9 to 198.51.100.14
How you use it These /29 addresses usually do not get placed directly on the WAN interface. Instead, the ISP routes that entire /29 to your WAN IP on the transit /30. Then inside your firewall you can use them for:
1:1 NAT mappings to internal hosts
Public VIPs on a DMZ interface
NAT pools
Assigning a public IP to a specific service
The key phrase you ask Comcast for is: “Confirm the routed block is routed to my WAN IP and provide the next hop.” That next hop is your WAN IP on the /30.
Example 6, difficult, find the /29 block and answer fast Given public IP: 64.71.22.14/29 Question: What is the network, broadcast, usable range
Answer /29 increments by 8 in the last octet Find the nearest multiple of 8 less than or equal to 14 8 and 16 bracket it, so network is 8
Network: 64.71.22.8 Broadcast: 64.71.22.15 Usable: 64.71.22.9 to 64.71.22.14
Example 7, difficult, build a WAN /30 from a random IP You are told your WAN IP is 75.120.44.6/30 Question: What is the /30 block and what is the ISP gateway likely to be
Answer /30 increments by 4 Nearest multiple of 4 less than or equal to 6 is 4 So block is 75.120.44.4 to 75.120.44.7
Network: 75.120.44.4 Usable: 75.120.44.5 and 75.120.44.6 Broadcast: 75.120.44.7
Likely ISP gateway: 75.120.44.5 Your WAN: 75.120.44.6
Example 8, very difficult, design for two ISPs with clean routing Requirement
ISP1 gives transit /30 and routed /29
ISP2 gives transit /30 and routed /29 You want to publish two services, one primary on ISP1, one primary on ISP2, with failover possible later.
Answer concept
Put only the transit /30 on each WAN interface
Confirm each routed /29 is routed to the correct WAN IP
Publish Service A using a public IP from ISP1 routed /29 with 1:1 NAT to internal host
Publish Service B using a public IP from ISP2 routed /29 with 1:1 NAT to internal host
Keep internal addressing private RFC1918 and do not mix public blocks inside LAN unless you have a real DMZ plan
Make sure the firewall supports policy based routing or proper default route tracking if you plan failover
This is where subnetting meets design.
Final Reflection Subnetting is not about counting. It is about ownership. When you know which addresses belong to the link, which belong to your routed block, and which belong to your internal network, you stop feeling confused. You start feeling calm.
Pocket I’m Keeping The /30 is the bridge. The routed /29 is the usable land.
What I Hear Now I can design this with intention. I can separate the transit from the routed block. I can explain it clearly to anyone on the team.
Not every battle is visible. But every choice to keep hope alive matters more than we realize.
EXCERPT
Hope is not lost in a single moment. It is stolen quietly, one small lie at a time.
INTRO
Scripture teaches that the adversary does not simply oppose us. He seeks to strip us of joy, confidence, and hope itself. Lehi warned that the devil works tirelessly to rob us of our agency and lead us toward misery. Nephi later added that these efforts are rarely loud or obvious. They are subtle. Gradual. Easy to overlook if we are not watchful.
That pattern explains why discouragement so often feels heavier than temptation. The enemy’s goal is not only to make us stumble, but to convince us that getting back up is pointless.
Yet the scriptures also give us a clear pattern for resistance.
After Moses had seen God and spoken with Him, he found himself suddenly alone and physically weak. In that vulnerable moment, Satan appeared and demanded worship. The timing was no accident. Weakness is when doubt feels loudest.
But Moses was not confused. He did not argue. He did not panic. He anchored himself in truth.
He remembered who he was.
NOTES FROM THE SCRIPTURES
Moses’ encounter with Satan teaches us that temptation often comes after spiritual strength. When the vision ended, Moses was left exhausted. That is when Satan approached him, trying to blur the line between creator and pretender.
But Moses did not measure himself by his weakness. He measured himself by his identity.
He stood on three unshakable principles.
First, he remembered that he was a son of God. Second, he refused to stop resisting when temptation persisted. Third, he relied fully on the power of Jesus Christ.
Each step brought greater strength until Satan’s influence finally broke.
The pattern is clear. Identity anchors us. Persistence strengthens us. The Savior delivers us.
PERSPECTIVE (DIRECT QUOTES)
Scripture
“I have a work for thee, Moses, my son.” Moses 1:6
“Moses, son of man, worship me.” Moses 1:12
“Who art thou? For behold, I am a son of God.” Moses 1:13
“Get thee hence, Satan; deceive me not.” Moses 1:16
“Depart hence, Satan.” Moses 1:18
“In the name of the Only Begotten, depart hence, Satan.” Moses 1:21
“Satan cried with a loud voice, with weeping, and wailing, and gnashing of teeth; and he departed hence.” Moses 1:22
Sister Tamara W. Runia
“Satan is the thief of hope.”
“Your Repentance Doesn’t Burden Jesus Christ; It Brightens His Joy,” April 2025 General Conference
PRACTICE (TODAY, NOT SOMEDAY)
Today, I will resist temptation by choosing three simple acts of faith.
I will remember who I am. A child of God, not defined by weakness, but by divine heritage.
I will be persistent. I will not give up just because temptation returns. I will stand again, and again, and again.
I will rely on Jesus Christ. Not only in moments of crisis, but in every quiet struggle where hope feels fragile.
FINAL REFLECTION
Satan rarely begins by asking us to abandon faith. He begins by whispering that faith is not working.
He steals hope before he steals obedience. He drains courage before he attacks conviction.
But Moses shows us a better way.
Hope is protected when we know who we are. Strength grows when we keep standing. Victory comes when we trust in the Savior’s power instead of our own.
POCKET I’M KEEPING
Hope is not something I lose. It is something I must protect.
WHAT I HEAR NOW
“Satan is the thief of hope.”
But Jesus Christ is the Giver of strength. And with Him, hope can never truly be stolen.