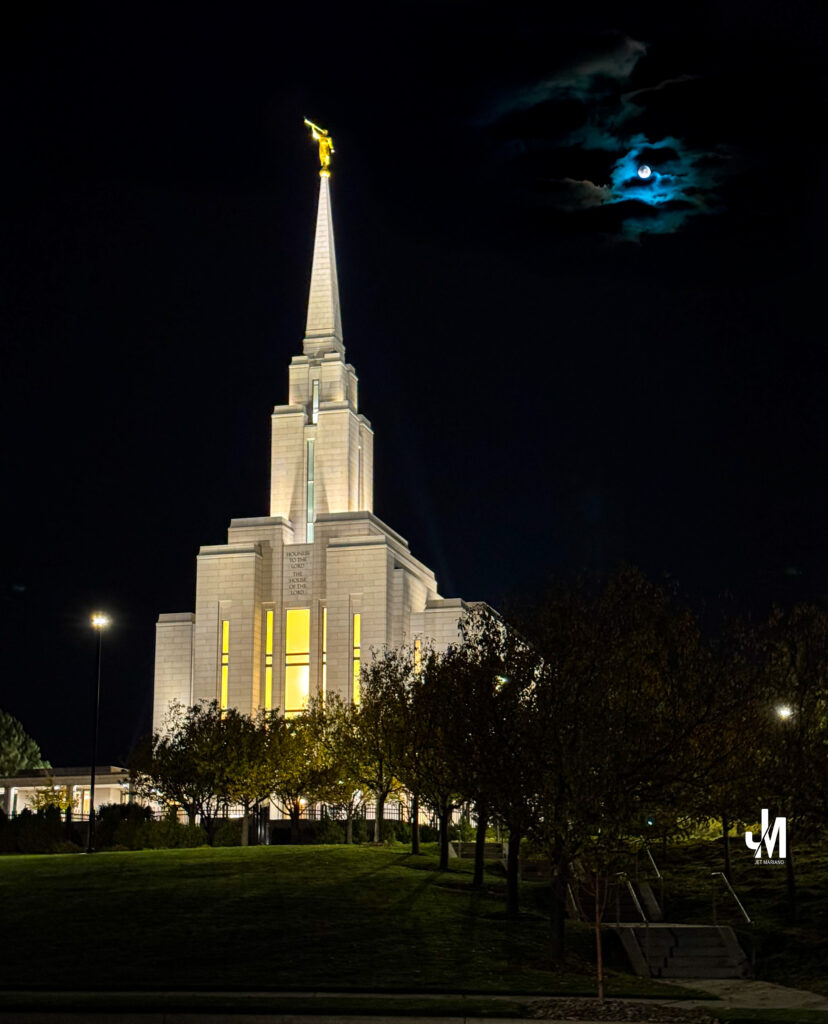
Bountiful Utah Temple at sunset captured from a hillside using a 500 mm lens, symbolizing patience, obedience, and spiritual ascent.
Excerpt Elder Neal A. Maxwell’s 10th guideline reminds me that obedience is not the end of exploration — it’s the very beginning of it.
Intro After a long week of deadlines and noise, I felt impressed to step away and climb the hill above Bountiful with my camera. As I waited for the sunset, I thought about Elder Neal A. Maxwell’s Guidelines for Righteous Living, especially Guideline #10: “Obeying is one of the best ways of exploring.” The higher I climbed, the clearer it became that obedience isn’t about restriction—it’s about finding higher ground and seeing life from God’s perspective.
Notes from Elder Neal A. Maxwell
No one would attempt to scale Mount Everest or the Tetons in jeans and a t-shirt without an expert guide.
We cannot climb the straight and narrow path without the guidance of the Holy Ghost and the protection of the whole armor of God.
If we are obedient, we will “discover, explore, and learn many great and wonderful things.”
Perspective Elder Maxwell’s Mountain Climber Analogy illustrates discipleship as a spiritual ascent.
Element
Description
Spiritual Parallel
The Climber
One who begins the ascent
The Individual / The Spiritual Explorer
The Challenge
The difficult climb
The Straight and Narrow Path
The Expert Guide & Gear
Requires a guide and full gear
The Holy Ghost and the Whole Armor of God
The Reward
Discovery and joy through obedience
Gaining Truth, Knowledge, and Joy in God’s Kingdom
Just as no one would attempt Everest without proper gear, the spiritual explorer must be clothed with faith, humility, and divine protection. The commandments are not chains but climbing ropes — tools that keep us safe on the ascent.
Practice (today, not someday) When I feel overwhelmed, I remind myself that obedience is not restriction; it’s direction. By following divine guidance daily, I move upward, step by step, through the fog of mortal challenges.
Final Reflection The mountain analogy reframes life’s climb: every commandment is an anchor point, every trial a ridge to strengthen the soul. The summit isn’t reached by speed, but by steady, faithful obedience — one prayer, one act of trust at a time.
Pocket I’m Keeping Obedience opens the path to discovery — the more I submit, the higher I climb.
What I Hear Now
“If you will be obedient, you will discover, you will explore, and learn many great and wo
📸 Caption (BTS)
Behind the Shot: I climbed above Bountiful with my 500 mm lens, waiting for the exact moment when the last light would touch the temple and the clouds would gather over Antelope Island. From this height, the horizon seemed infinite — a reminder that obedience, like climbing, always leads to a higher view.
From coding late nights to building real solutions — proof that persistence pays off. DeveloperJourney #IvyFalls #NoBandAidFix
Introduction: The Path Is the Practice
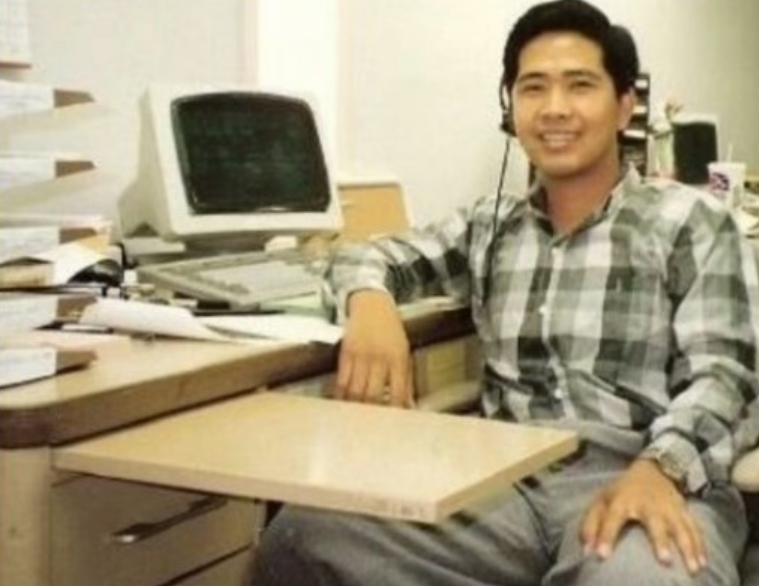
My journey to development and infrastructure followed the same rhythm — discipline by day, learning by night. While working full-time at All Electronics Corporation in Van Nuys (1990–1995), I woke at 4 A.M. to catch two LA Metro buses from Western and 3rd Street to my 6:30 A.M. shift, then sometimes worked evenings at the Taco Bell drive-thru in Glendale.
I wasn’t chasing titles; I was chasing understanding. At All Electronics, I became obsessed with the Integrated Circuit (IC) — the heartbeat of every computer. There was no Internet back then — only library books and endless curiosity. I crashed my own PCs, rebuilt them, and soon began fixing computers for free for anyone who needed help.
Back then, I used to dream of a day when I wouldn’t have to wait for the bus in the rain just to get home. Years later, those same dreams became reality — not through luck, but through faith, discipline, and persistence. The rides changed — from buses to a BMW, an Audi, and now a Tesla — but what never changed was the purpose: to keep moving forward.
Those early mornings and late nights opened the door to my first IT role at USC as a PC Specialist, then to GTE (now Verizon), Aerospace, and eventually to my own IT consulting business serving clients large and small across California and beyond.
Season of Refinement
While working full-time at USC, I entered what I call my season of refinement. By day I supported campus systems and users; by night I was a full-time student at Los Angeles City College (LACC) and a weekend warrior at DeVry University, studying Management in Telecommunications.
It was during this time that Microsoft introduced the MCSE (Microsoft Certified Systems Engineer) program. One of my LACC professors encouraged me to earn it, saying, “Once you have that license, companies will chase you.” He was right — that MCSE became my ticket to GTE, my first step into enterprise-scale IT.
My tenure at GTE was brief because Aerospace came calling with a six-figure offer just before Y2K — an opportunity too great to refuse. After Aerospace, I founded my own consulting firm — Ahead InfoTech (AIT) — and entered what I now call my twelve years of plenty.
One of my earliest clients, USC Perinatal Group, asked me to design and implement a secure LAN/WAN connecting satellite offices across major hospitals including California Hospital Medical Center, Saint Joseph of Burbank and Mission Hills, and Hollywood Presbyterian Hospital. We used T1 lines with CSU/DSU units and Fortinet firewalls; I supplied every workstation and server under my own AIT brand.
Through that success I was referred to additional projects for Tarzana and San Gabriel Perinatal Groups, linked by dedicated frame-relay circuits — early-era networking at its finest. Momentum carried me to new partnerships with The Claremont Colleges and the City of West Covina, where I served as Senior Consultant handling forensic and SMTP (email) engineering.
Word spread further. An attorney client introduced me to an opportunity in American Samoa to help design and build a regional ISP, and later to a contract with Sanyo Philippines. During this period Fortinet was still new, and I became one of its early resellers. I preferred building AIT servers and workstations from the ground up rather than reselling mass-produced systems. DSL was just emerging, yet most clients relied on dedicated T1 lines — real hands-on networking that demanded patience and precision.
Those were the twelve years of plenty — projects stretching from Los Angeles hospitals to overseas data links. By the time AWS launched in 2006 and Azure in 2010, I was already managing distributed networks and data replication.
When I returned to Corporate America, my first full-time role was at Payforward, where I led the On-Prem to AWS migration, building multi-region environments across US-East (1a and 1b) and US-West, complete with VPCs, subnets, IAM policies, and full cloud security. That’s when I earned my AWS certifications, completing a journey that had begun with cables and consoles and matured in the cloud.
Education, experience, and certification merged into one lesson: Discipline comes first. Validation follows. Degrees and credentials were never my starting line — they became the icing on the cake of years of practice, service, and faith.
My Philosophy: Code Like a Craftsman
Photography taught me patience. Martial Arts taught me form. IT taught me precision. All three share one secret: the art lies in repetition with awareness.
As Ansel Adams said:
“When words become unclear, I shall focus with photographs. When images become inadequate, I shall be content with silence.”
Coding feels the same. When logic becomes unclear, I focus. When code seems inadequate, I find peace in understanding.
Build three apps (CRUD, API, SPA) + README + screenshots + a short blog for each.
Final Reflection
From library nights in Koreatown to pushing code in the cloud, this path proves that curiosity and consistency still change lives. Keep learning, keep building, and remember — every keystroke is one more kick toward mastery. This blog will continue to grow as technology changes — come back often and build along with me.
🪶 Closing Note
I share this story not to boast but to inspire those still discovering their own path in technology. Everything here is told from personal experience and memory; if a date or detail differs from official records, it’s unintentional. I’m grateful for mentors like my LACC professor, who once told me to look up a name not yet famous — Bill Gates — and earn my MCSE + I. He was right: that single decision opened countless doors.
I don’t claim to know everything; I simply kept learning, serving, and sharing. My living witnesses are my son, my younger brother, and friends who once worked with me and now thrive in IT. After all these years, I’m still standing — doing what I love most: helping people through Information Technology.
⚖️ Legal Disclaimer
All events and company names mentioned are described from personal recollection for educational and inspirational purposes only. Any factual inaccuracies are unintentional. Opinions expressed are my own and do not represent any past or current employer.
From Customer Service Rep to PC Specialist, Network Engineer, System Administrator, DevSecOps, and now Infrastructure Engineer — a journey built on faith, discipline, dedication, and gratitude.
Introduction: The Path Is the Practice
My story didn’t begin with servers or certifications. It began at All Electronics Corporation in Van Nuys, California, where I worked full-time from 6:30 A.M. to 3:00 P.M., taking two Metro buses and walking a block from the station — rain or shine — from December 1990 to late 1995.
I woke as early as 4 A.M. to catch the first bus at Western and 3rd Street in Los Angeles, sometimes heading straight to my evening shift at the Taco Bell drive-thru in Glendale. Those were humble, exhausting days that taught me discipline and grit — lessons that would shape every part of my career.
At All Electronics, I became fascinated by the IC — Integrated Circuit, the heart of every desktop computer. I wanted to understand it, not just sell it.
Back in my Koreatown apartment, I turned curiosity into calling. No Google. No YouTube. No AI. Just library books and endless nights of self-study. I intentionally crashed my computers and rebuilt them until every fix became muscle memory.
Once confident, I started offering free repairs and computer lessons to friends, relatives, and senior citizens — setting up printers, fixing networks, and teaching email basics. Those acts of service opened the door to my first full-time IT job at the University of Southern California (USC) as a PC Specialist.
I still remember waiting at the bus stop in the dark, dreaming of the day I wouldn’t have to ride in the rain. Years later, those same dreams became reality — not through luck, but through faith, discipline, dedication, and gratitude. The rides changed — from buses to a BMW, an Audi, and now a Tesla — but what never changed was the purpose: to keep moving forward while staying grounded in gratitude.
Season of Refinement
While working full-time at USC, I entered what I call my season of refinement. By day I supported campus systems and users; by night I was a full-time student at Los Angeles City College (LACC) and a weekend warrior at DeVry University, studying Management in Telecommunications.
It was during this time that Microsoft introduced the MCSE (Microsoft Certified Systems Engineer) program. One of my professors at LACC encouraged me to earn it, saying, “Once you have that license, companies will chase you.” He was right — that MCSE became my ticket to GTE (now Verizon), my first step into enterprise-scale IT.
My tenure at GTE was brief because Aerospace came calling with a six-figure offer just before Y2K — an opportunity too good to refuse. After Aerospace, I founded my own consulting firm — Ahead InfoTech (AIT) — and entered what I now call my twelve years of plenty.
One of my earliest major clients, USC Perinatal Group, asked me to design and implement a secure LAN/WAN connecting satellite offices across major hospitals including California Hospital Medical Center, Saint Joseph of Burbank and Mission Hills, and Hollywood Presbyterian Hospital. We used T1 lines with CSU/DSU units and Fortinet firewalls; I supplied every workstation and server under my own AIT brand.
Through that success I was referred to additional projects for Tarzana and San Gabriel Perinatal Groups, linked by dedicated frame-relay circuits — early-era networking at its finest. Momentum led to new partnerships with The Claremont Colleges and the City of West Covina, where I served as Senior Consultant handling forensic analysis and SMTP/email engineering.
Word spread. One attorney client introduced me to an opportunity in American Samoa to help design and build a regional ISP, and later to a contract with Sanyo Philippines. During this period Fortinet was still new, and I became one of its early resellers. Refusing to rely on mass-produced systems, I built AIT servers and workstations from the ground up for every environment. DSL was just emerging, yet most clients still relied on dedicated T1s — real hands-on networking that demanded precision and patience.
Those were the twelve years of plenty — projects that stretched from local hospitals to overseas data links, from LAN cables to international circuits. By the time AWS arrived in 2006 and Azure followed in 2010, I had already been building and managing distributed networks for years.
When I returned to Corporate America, my first full-time role was at Payforward, where I led the On-Prem to AWS migration, designing multi-region environments across US-East (1a and 1b) and US-West, complete with VPCs, subnets, IAM policies, and full cloud security. That’s when I earned my AWS certifications, completing a journey that had begun with physical servers and matured in the cloud.
Education, experience, and certification merged into one lesson: Discipline comes first. Validation follows. Degrees and credentials were never my starting line — they were the icing on the cake of years of practice, service, and faith.
My Philosophy: One Discipline, Many Forms
Whether in Martial Arts, IT, or Photography, mastery comes from repetition, humility, and curiosity. As Ansel Adams wrote:
“When words become unclear, I shall focus with photographs. When images become inadequate, I shall be content with silence.”
Everyone can take a photo; not everyone captures a masterpiece. Everyone can study tech; not everyone understands its rhythm. Excellence lives in awareness — the moment when curiosity meets purpose.
The Infrastructure Engineer Path
1️⃣ Foundations
Learn the essentials: Windows Server, Active Directory, DNS/DHCP, GPOs, Networking (VLANs, VPNs), Linux basics, and PowerShell. Free Resources:
Document every lab, build diagrams, post scripts on GitHub, and write short lessons learned.
Final Reflection
From bus stops to boardrooms, from fixing desktops to deploying clouds — the principles never changed: serve first, learn always, and build things that last. This blog will continue to evolve as technology changes — come back often and grow with it.
🪶 Closing Note
I share this story not to boast, but to inspire those still discovering their own path in technology. Everything here is told from personal experience and memory; if a date or detail differs from official records, it’s unintentional. I’m grateful for mentors like my LACC professor, who once told me to look up a name not yet famous — Bill Gates — and earn my MCSE + I. He was right: that single decision opened countless doors.
I don’t claim to know everything; I simply kept learning, serving, and sharing. My living witnesses are my son, my younger brother, and friends who once worked with me and now thrive in IT. After all these years, I’m still standing — doing what I love most: helping people through Information Technology.
⚖️ Legal Disclaimer
All events and company names mentioned are described from personal recollection for educational and inspirational purposes only. Any factual inaccuracies are unintentional. Opinions expressed are my own and do not represent any past or current employer.
(October 22, 2025 — Guideline #18 from Elder Neal A. Maxwell’s “21 Guidelines for Righteous Living”)
Fall reflection of the Idaho Falls Temple with the Snake River in the foreground—a visual reminder that God’s light remains constant even when clouds move through.
Excerpt
“Hopefully, we will do as the Master did and acknowledge that God is still there and never doubt that sublime reality—even though we may wonder and might desire to avoid some of life’s experiences.” — Elder Neal A. Maxwell
Intro
Elder Neal A. Maxwell’s Guideline #18 addresses the fundamental issue of constancy in a world of crisis. We are promised that trials—the stormy and dark moments—will come. The world often responds with fear and panic, but the disciple finds peace in a different reality.
The core instruction is simple and absolute: “Know that the Son of God is always there. His light will never go out, and the cloud cover will pass.”
As an Infrastructure Engineer, I understand the concept of a High Availability (HA) System—a service guaranteed to remain functional without failure, no matter what happens to individual components. The Lord is our perfect, 100% available HA resource. Our faith is the mechanism by which we connect to and draw power from that never-failing light source.
Perspective
The High Availability (HA) System Analogy Faith in Jesus Christ provides us with a spiritual redundancy and uptime guarantee that no mortal system can match.
Element
The Network (Mortal Life)
The Spiritual Parallel
The Primary Server
Our own strength, energy, and will to endure.
Our personal resolve, which can be depleted or “go down.”
The Failover System
The backup system that ensures continuous service during a crisis.
Jesus Christ: The perfect, always-on resource. His light will never go out.
The Downtime
The “stormy and dark moments of life”—trials, afflictions, Gethsemane-like anguish.
Feelings of being forgotten, forsaken, or unappreciated (as the Savior felt).
The Uptime Guarantee
The system is guaranteed to remain functional (100% availability).
The Sublime Reality: God is always there; the cloud cover will pass; the Atonement is total and constantly available.
Elder Maxwell reminds us that just as the Master acknowledged that God was still there even as He drank the bitter cup, we must never doubt that sublime reality, even if we wish to pray away the pain.
Practice (today, not someday)
To fully utilize this constant source of light, we must practice connecting to the divine HA system daily.
Acknowledge the Source: In every prayer, I start by explicitly acknowledging God’s constancy and omniscience—that He lives in an “eternal now where the past, present, and future are constantly before Him.” This grounds me in the reality that my current struggle is only a single frame in His perfect, eternal video stream.
The Enduring Test: I try to view current perplexities and intellectual shortfalls not as system failures, but as a temporary “muddled, mortal middle.” The ability to endure well and remain faithful while the outcome is still uncertain is the true test of my connection to His light.
Refusal to Be Uncomforted: In moments of deep difficulty, I actively refuse to be uncomforted. I deliberately turn my thoughts toward the promises I have received and the knowledge of Christ’s character, choosing to believe that He is there and that my temporary “downtime” is only a small moment.
Final Reflection
The assurance that His light will never go out is the ultimate security doctrine. We can be vexed by uncertainties in the immediate steps ahead, but we can have clear faith in the ultimate outcomes at the end of the trail.
Our ultimate safety is found in keeping our precious perspective wherever we are and keeping the commandments however we are tested. The Lord knows our individual bearing capacities, and because the Son of God is always there, we have the power to receive help and guidance over adverse things.
What I Hear Now
“Your current crisis has an expiration date. His light does not. Stay connected.”
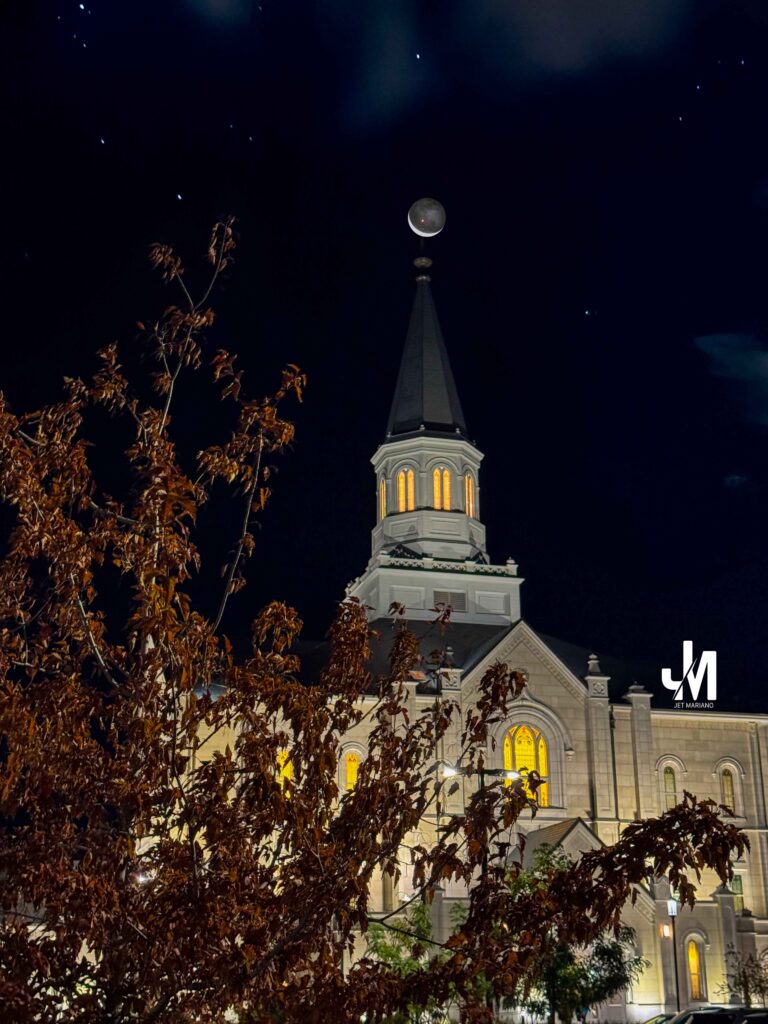
The Manti Temple: A testament to souls stretched by faith. Elder Maxwell taught that the soul is like a violin string—it only makes music when it’s under tension. Our greatest works, like this one, emerge from our deepest stretches.
Intro
The journey of discipleship is rarely comfortable; it is, by divine design, a process of tension. Before we can accept that tension, we must first recognize our divine capacity. Elder Neal A. Maxwell’s Guideline #16 addresses this necessity, giving us the perfect, two-part charge: “Believe in yourself not only for what you now are but for what you have the power to become… and let the Lord stretch your soul.”
The Manti Temple stands as a physical testament to enduring effort and spiritual pressure. Like that magnificent structure built by saints who were stretched, we are only capable of fulfilling our highest purpose when we embrace our potential and accept the load of our trials. The core truth is: The soul is like a violin string. It makes music only when it is stretched.
Excerpt
“Someone has said that the soul is like a violin string. It makes music only when it is stretched. And because he loves you, the Lord will stretch your soul.”
— Elder Neal A. Maxwell
Perspective
The System Stress Test Analogy
As an Infrastructure Engineer, I know that hardware is pushed to its limits before deployment to guarantee reliability. Our spiritual development follows the same principle of Stress Testing. The stretching is not a punishment for a failed system, but a loving process to ensure maximum spiritual resilience and capability.
Element
The Process (Mortal Life)
Spiritual Capacity (The Soul)
The Blueprint
Self-Belief: Believing in the “great possibilities” the Lord sees in you.
Acknowledge your divine identity and potential for greatness.
The Mechanism
Tension: Applying controlled, intense load to force reliance on a greater power.
The Lord’s tutoring (trials, grief, and opposition) designed to force us to choose Him.
The Outcome
Music: A refined, resilient character, fitted for greater service and happiness.
The ability to endure well and fulfill the promises you made long ago.
Elder Maxwell makes it clear that God “will tutor us by trying us because He loves us, not because of indifference!” We must trust that the Father, being perfect, is fitting us for further service and eternal joy.
Practice (Today, Not Someday)
To utilize the power of this guideline, we must actively participate in the stretching process:
Reframing the Crisis: I consciously reframe moments of deep difficulty—the moments when I feel stretched thin—not as random misfortune, but as the precise tutoring designed to fulfill my potential. I remember the violin string: if I feel this tension, I am close to making music.
Give Your Only True Possession: I strive to recognize that the only possession truly mine to give is my will. When faced with a trial, I work to let my will be “swallowed up in God’s will” rather than demanding that my will be done. This submission is the only way the stretching can be successful.
Endure for the Witness: I understand that some experiences are not explainable in the moment. I must endure the trial of my faith, trusting that the witness and the understanding of the lesson will come after I have held fast through the stretch.
“The only way to play a celestial symphony is to accept the necessary tension of mortality.”
Final Reflection
We cannot ask for immunity from tribulation when the only perfect man who ever walked the earth did not have it. The courage to face life’s challenges comes from knowing that the Lord has placed us here now, precisely because of the skills and talents that are packaged within each of us. By accepting the stretching, we allow our souls to be made resilient and ready to sound forth a lasting, beautiful melody.
Morning light at the Orem Utah Temple—where discipline becomes devotion and reflex turns into righteousness.
(October 20, 2025 — Guideline #8 from Elder Neal A. Maxwell’s “21 Guidelines for Righteous Living”)
Excerpt
In moments of pressure, there’s no time for debate. What we practice daily determines what we choose instinctively.
Intro
Elder Neal A. Maxwell’s Guideline #8 teaches that discipleship is not just knowing what’s right but becoming the kind of person who does what’s right automatically. Just as an athlete relies on muscle memory, disciples rely on spiritual reflexes—responses trained by repeated obedience.
In my world of IT, when systems crash, there’s no time to analyze from scratch. I act on instinct built from years of disciplined practice. Spiritual life requires the same readiness—decisions born not of panic but of principle.
Perspective
The Quarterback Analogy Elder Maxwell used the example of a great quarterback to explain righteous reflexes.
Element
Description
Spiritual Parallel
The Quarterback
A great quarterback doesn’t pause mid-play to analyze how to hold the football.
The individual in life’s fast-moving moments.
The Action
Proper technique is internalized—it’s all reflex.
Righteousness must be practiced until it becomes instinct.
The Reason
Life offers too many temptations and sudden tests to always stop and reason through them.
We need habits of holiness, not hesitation.
The Goal
The quarterback throws correctly without thinking.
The disciple chooses correctly without delay—spiritual safety through reflex.
Elder Maxwell reminded us that we cannot afford slow moral decisions: “Do the right thing out of reflex and not agonize over a temptation to which you then might succumb.”
Practice (today, not someday)
Righteous reflexes aren’t built overnight—they’re shaped through disciplined repetition. My daily rhythm keeps both body and spirit tuned to respond to life’s pressures with steadiness and faith.
Every night, I review tomorrow’s priorities, focusing on what’s urgent and important. I close my day with scripture study, prayer, and meditation. At 4 a.m., I start again—prayer first, then stretching, followed by 120 straight push-ups to keep my body strong and my mind awake.
Breakfast is clean and balanced before I shower and prepare for work. If I’m early, I swing by either the Oquirrh or Taylorsville Temple to photograph the morning light—my quiet offering before the day begins. By 6:30 a.m., I’m at my desk, handling the priorities of the day.
Saturday is for temple worship. Sunday is for renewing my covenants. Then Monday begins again. These patterns are not habits of routine—they are habits of devotion. They’ve become my spiritual reflexes: instinctive, practiced, and constant.
Closer Reflection
Elder Maxwell’s “righteous reflexes” remind me of Bruce Lee’s legendary speed—so fast that 1970s cameras could barely record it. Lee trained until motion became instinct; every move came from memory, not hesitation.
Spiritual reflexes are the same. They come from daily, disciplined practice until obedience is automatic. Bruce Lee said, “I fear not the man who has practiced 10,000 kicks once, but the man who has practiced one kick 10,000 times.”
In IT, the same principle applies. After years of handling systems under pressure, I’ve learned to respond instinctively—knowing where to look, how to act, and when to stay calm. It’s muscle memory built through faith and repetition.
Whether in martial arts, spirituality, or technology, true mastery comes when preparation and reflex move as one—when right choices and right actions flow as easily as recognizing the palm of your own hand.
Pocket I’m Keeping
When pressure comes, I don’t have to think twice. I’ve already decided to do what’s right.
What I Hear Now
“Keep practicing righteousness until it becomes your reflex.”
Captured outside the Oquirrh Mountain Utah Temple under a moonlit sky—a quiet reminder that repetition builds readiness. Every photo, every prayer, every early start is practice for spiritual precision.
Day: Autumn flowers and clear sky framing the Orem Utah Temple—captured before my proxy endowment. Night: The Orem Utah Temple illuminated under the moon—taken after completing sacred ordinances.
Excerpt
Becoming is more than doing—it’s transforming. The gospel doesn’t just ask for effort; it asks for change.
Intro
These photos were taken on October 18, 2025—before and after my proxy endowment at the Orem Utah Temple. The sunlight and moonlight felt like bookends to a sacred day.
I never photograph temples as a tourist. Each image is a memory of worship—an imprint of the moment I performed sacred ordinances and left a part of my old self on the altar. The lens simply helps me remember what the Spirit taught that day.
President Dallin H. Oaks’ message “The Challenge to Become” echoed in my mind as I walked the temple grounds: the gospel is not about what we do but who we become through covenant living.
Perspective
The temple reminds me that becoming is a process. Every ordinance refines character. Every act of service—inside or outside the temple—draws me nearer to what Heavenly Father intends me to be.
President Oaks’ invitation is personal: the world values performance; heaven values transformation. My work, my worship, and my quiet efforts at home and at Church are all shaping me into something more Christlike.
When I leave the temple, I ask not, “What did I accomplish?” but “Who am I becoming?”
Direct Quotes from President Oaks
“It is not enough for anyone just to go through the motions. The commandments, ordinances, and covenants of the gospel are not a list of deposits required to be made in some heavenly account. The gospel of Jesus Christ is a plan that shows us how to become what our Heavenly Father desires us to become.”
“In contrast to the institutions of the world, which teach us to know something, the gospel of Jesus Christ challenges us to become something.”
Practice (today, not someday)
I will focus less on checking boxes and more on softening my heart. In every task—whether leading, fixing, or serving—I’ll remember that heaven measures growth, not status.
Becoming Christlike happens quietly: through patience with others, humility in learning, and gratitude after every challenge.
Final Reflection
President Oaks’ counsel changes how I see discipleship. The gospel isn’t a checklist; it’s a journey of transformation. Every temple visit, every ordinance, every prayer adds to who I am becoming.
I’m grateful the Lord sees me not as I am but as I can be. That vision gives purpose to every struggle, reminding me that growth is the goal—and grace is the guide.
Pocket I’m Keeping
“The gospel of Jesus Christ challenges us to become something.” That single line redefines every effort I make.
What I Hear Now
“Keep walking. You’re not just doing—you’re becoming.”
Behind the Shot (BTS)
Saturday, October 18, 2025—before and after my proxy endowment at the Orem Utah Temple. The late afternoon light revealed bright autumn blooms; by nightfall, the temple glowed beneath the moon. Both shots symbolize the Lord’s invitation to grow from light to greater light.
Crescent moon rising above the Taylorsville Utah Temple spire—captured in double exposure before sunrise. 70-200 2.8G mounted on tripod
Excerpt
Elder Neal A. Maxwell teaches that the loneliness that sometimes comes with righteousness is where we grow closer to God—and where we learn the courage of “But if not.”
Intro
At 6 a.m., Oct 17, 2025, I pulled over at the Taylorsville Temple and framed a moon-over-spire double exposure while listening (again) to Elder Maxwell’s 21 Guidelines for Righteous Living—especially Guideline 20. This week’s trials were real, yet the Spirit kept bringing me back to Daniel 3: God can deliver—but if not, we still will not bow. That truth has turned my fear of workload into faith to move forward with Him.
Notes from Elder Neal A. Maxwell
Righteousness can feel lonely, but that is where we come closer to God.
Fidelity means not bowing—even when the fire is hot.
God is able to deliver; But if not, disciples still trust and obey.
Act in faith now—serve, pray, and work; heaven’s help becomes practical courage.
Perspective (direct quotes )
The Story of Shadrach, Meshach, and Abednego To emphasize this point, Elder Maxwell recounts the biblical story:
The Fiery Furnace: Shadrach, Meshach, and Abednego were thrown into a fiery furnace that was heated to such a high temperature that the men who tended the furnace died.
The Fourth Figure: The scriptures describe the three young men walking around in the midst of the furnace unharmed. The scripture then says, “And there was a fourth figure in the fire and its form was likened to the Son of God.”
The Promise: Elder Maxwell concludes that when you are passing through these trials and lonely moments, the Lord will be especially close to you.
They were cast into the fire because they refused to bow to the idol of King Nebuchadnezzar (Daniel 3:16–17). Their loyalty brought them closer to God—the pattern for all discipleship.
Scripture (Daniel 3:17–18)
17If it be so, our God whom we serve is able to deliver us from the burning fiery furnace, and he will deliver us out of thine hand, O king. 18But if not, be it known unto thee, O king, that we will not serve thy gods, nor worship the golden image which thou hast set up.
Practice (today, not someday)
Pray, then step into the hard tickets and deadlines: God is able—but if not, I still will not bow to fear or compromise.
Serve and mentor anyway; courage grows as I lift others.
Keep temple focus and steady duty; closer to God is the goal, not merely quick fixes.
Final Reflection
Elder Maxwell’s witness reframed my week: **God can deliver—**and often He does. But if not, I can still move forward with Him. As I prayed and worked, impressions came and solutions followed. Either way, the fire became a classroom, and I felt closer to God than ever.
Pocket I’m Keeping
“God is able—but if not, I will not bow.” If there is a furnace, there is also a Fourth.
What I Hear Now
“Trust Me. Whether I calm the fire or walk you through it, you are not alone.”
Captured outside the Mount Timpanogos Temple during peak fall—standing in stillness after a long day, I waited for the sky to open and remind me that light always returns.
Excerpt
Autumn reminds me that service is like the seasons—quiet, constant renewal. Even when we’re tired or uncertain, giving of ourselves brings color back to the soul.
Intro
This week felt like an uphill climb. Long nights, long thoughts. I could barely rest, yet something inside me refused to quit. I realized once again that when you love what you do—when your work serves a purpose beyond yourself—fatigue fades behind fulfillment.
Years ago, in another IT assignment, I worked through the night restoring a critical system. No one saw the hours or the quiet prayers between reboots, but the satisfaction came from knowing others could keep working because I did not stop. That same quiet joy has followed me ever since. It’s the joy of standing up, of helping, of serving—whether the task is big or small.
Notes from President Monson
“Unless we lose ourselves in service to others, there is little purpose to our own lives.”
“Man’s greatest happiness comes from losing himself for the good of others.”
“At baptism we covenanted to bear one another’s burdens, that they may be light.”
“How many times has your heart been touched as you have witnessed the need of another? How often have you intended to be the one to help—and yet life’s busyness interfered?”
Perspective
President Monson’s words reached deep this week. I saw how easy it is to get lost in endless to-dos, alerts, and deadlines—the “thick of thin things.” Service, however, brings focus. When I choose to help, I find peace. When I act, I feel alive again. The Savior’s example is the ultimate model of losing oneself in love and lifting others quietly, consistently, and completely.
Practice
Today, not someday, I can serve—by listening more, forgiving faster, and stepping forward even when tired. True discipleship isn’t about grand gestures; it’s in the small, unseen moments where compassion overrides convenience.
Final Reflection
Each time I walk past the temple, I’m reminded: service sanctifies. The light that falls upon its walls is the same light that can fill our hearts when we give of ourselves freely. The world doesn’t need our perfection—it needs our presence.
Pocket I’m Keeping
When I help someone quietly, heaven notices loudly.
What I Hear Now
“We become so caught up in the busyness of our lives… too often we spend most of our time taking care of the things which do not really matter much at all in the grand scheme of things.”
Manila Philippines Temple — I waited for the exact second the sun aligned with the spire. The light pierced through just as if Heaven itself whispered, “I’m still here.”
Excerpt
The sun hid behind the spire—then broke through. That light reminded me of a different storm long ago, when a screen turned blue, and I learned that faith and persistence are built the same way: line upon line, brick by brick.
Intro
November 1999. The world was bracing for Y2K. I was working for an aerospace company in Carson, California, getting ready to drive my parents to LAX for their flight to the Philippines. Before leaving, I decided to double-check our Veritas backup on the Exchange 5.5 server running on Windows NT 4.0. Then came the dreaded BSOD—Blue Screen of Death.
My shift was supposed to end at 4 PM Friday. I didn’t go home until Monday morning. No sleep, no shortcuts—just brick-by-brick rebuilding until email was restored. I missed saying goodbye to my parents, but I kept the company connected.
Notes from Elder Maxwell
“You’ve all been in a storm… when you couldn’t see the sun but you knew it was still there. Likewise, in the stormy and dark moments of life know that the Son of God is always there. His light will never go out.”
That quote became my anchor—both in IT and in life.
Perspective
That night taught me more than any certification. There was no Google, no AI, no online forums—just manuals, backups, and faith that the system could rise again. Today, AI fixes in seconds what once took days. But the light that kept me going then still burns now: the belief that persistence itself is a form of faith.
Practice (today, not someday)
When systems—or souls—crash, don’t panic. Pause, breathe, and build.
Keep working, even if it’s one file or one prayer at a time.
Remember: the Light is constant, even if the screen goes dark.
Final Reflection
The Manila Temple photo symbolizes that memory. When the sun broke through the spire, I felt the same quiet assurance I knew in 1999: He never left me. The blue screen, the missed flight, the fatigue—it was all part of learning that perseverance is light in motion.
Pocket I’m Keeping
The Light never goes out—only our view of it does.
What I Hear Now
“Faith is not seeing the light; it’s working until it returns.”
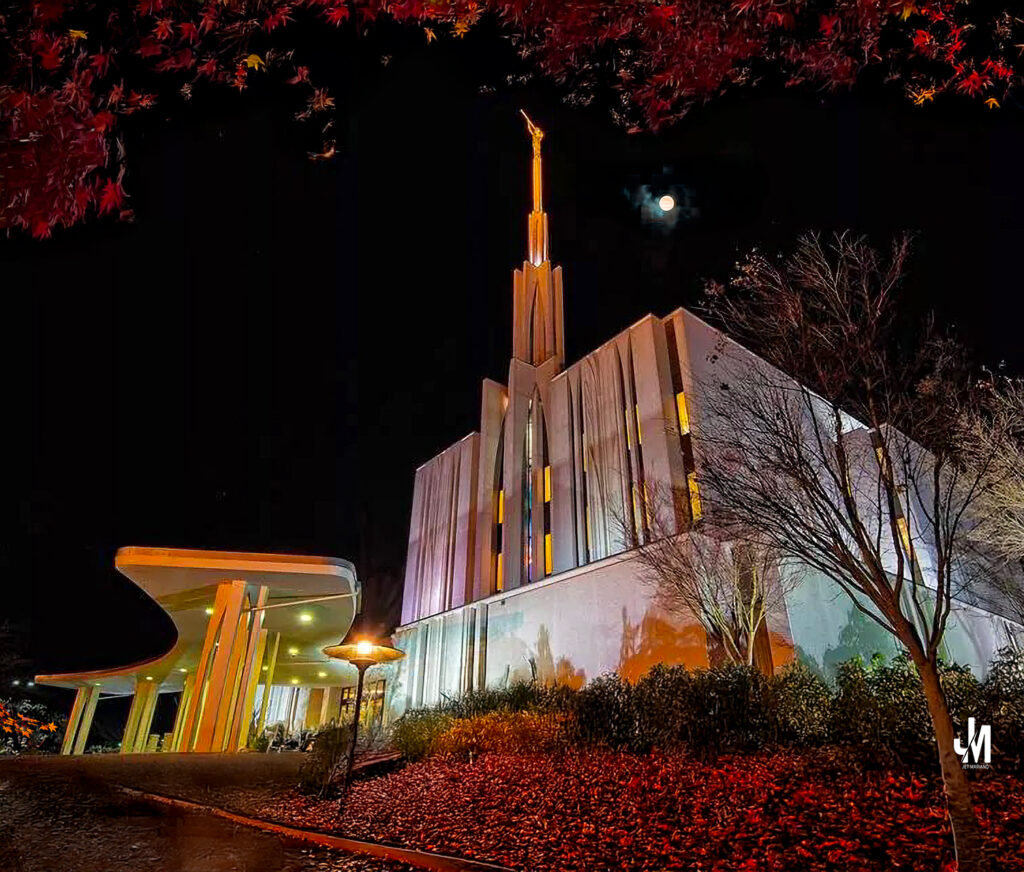
Seattle Washington Temple — 14°F, suit and tie, icy pavement underfoot. I slipped once, stood again, and framed this shot while the moon played peek-a-boo above the spire. My camera gear cushioned the fall, my faith kept me standing.
Excerpt
Sometimes the light we chase nearly costs us everything. But when we stand back up—cold, bruised, and trembling—we find not just the shot, but the story that defines us.
Intro
It was 14°F in Seattle. I was dressed in a suit and tie for a wedding when the moon began to play peek-a-boo behind the temple spire. I scouted the icy pavement for the right angle, slipped hard, and hit the ground. My camera backpack broke the fall. Still, I stayed—shot after shot—until my legs began to stiffen from the cold. Gathering what energy I had left, I ran toward the temple’s visitor center. Kind hands brought me into a heated room and warmed me back to life. That night reminded me why I rarely back down—from freezing weather, failing systems, or storms that test the soul. The temple stood unshaken, and so did I.
Why I kept going: It wasn’t skill—it was discipline. A simple, healthy routine and a promise to avoid quick fixes helped me stay steady. I’m not the smartest; I’m just “never say die.” I started from zero, and service keeps me moving.
Notes from {Speaker}
Courage isn’t the absence of cold; it’s pressing the shutter before the light fades.
Sometimes the miracle isn’t surviving—it’s still choosing to serve after you do.
The temple teaches us that endurance and grace can share the same frame.
Perspective
In IT, storms don’t always come from the sky—they come from critical outages, failed updates, and people relying on you at impossible hours. I’ve faced those too—sometimes while boarding flights or crossing oceans. I was in the Philippines before COVID and still handled tickets for a U.S. client. At Incheon Airport, I restored a VM. In Western Samoa, I fixed email for a company thousands of miles away. Once, 29,000 feet above ground, my soft-phone rang mid-flight—Tahiti users couldn’t send email. I helped them anyway. You could call me a workaholic. I call it love for helping people.
Practice (today, not someday)
When fatigue hits, serve once more—small acts reignite large faith.
Write down one storm you’ve survived and what it taught you.
Find a temple—or a quiet place—and let stillness thaw your heart.
Final Reflection
My life has felt like a series of tours of duty—local government, universities, law firms, manufacturing, perinatal, and home builders—each relying on me as a “Swiss knife” of IT. After the 2012 recession, I lost clients but not calling. I passed the business to my son and returned to corporate life in 2014.
“Vacation?” I can’t recall one. Every trip seemed to bring a new emergency. But I’ve learned to see service as my rest—because helping others is where my soul finds warmth. I’ve done this since before Google or AI existed, when documentation came from books and discipline.
Through it all, the pattern holds—stand a little longer, look for the moon, run for warmth when you must, and let the temple remind you that light is never lost to the cold.
Pocket I’m Keeping
Light is rarely free; it asks something of us.
What I Hear Now
“If the only thing you take into the storm is faith, it will be enough.” “Composition comes back after compassion—first for yourself, then for others.”
Link to the Talk
My IT Journey — the long road that led to that frozen night at the Seattle Temple.
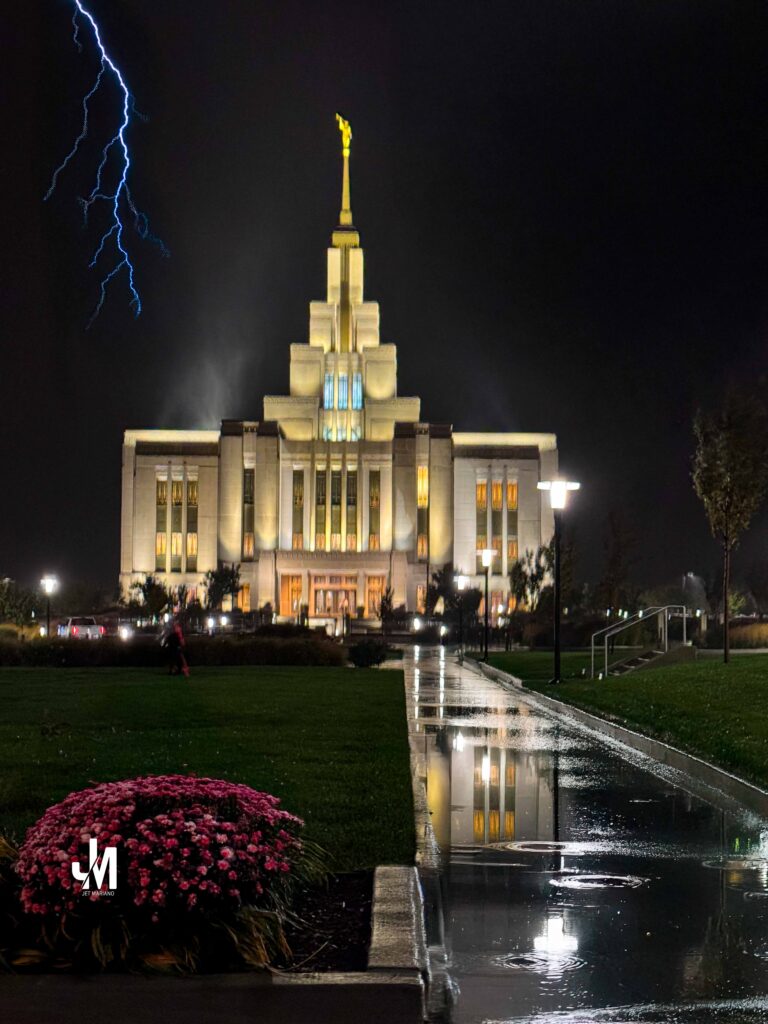
Lightning breaks over Saratoga Springs Temple—framed through the open driver’s window, with rain reflections and the flower bed lit by my Tesla.
Behind the Shot (BTS)
I waited patiently for the perfect lightning strike, switching my iPhone to video mode so I could later capture the exact frame. I parked strategically, rolled down the driver’s window, and composed the scene—rain-slick path, temple reflection, and the flower bed on the left illuminated by my Tesla’s headlights. I took over fifty shots, braving 55-mph winds and heavy rain until I was drenched to the bone.
Tesla’s Summon feature became my safety net—it allows the car to move itself up to 20 feet in a straight line. I’ve visited this temple many times and know exactly where to park during storms like this. When the lightning finally hit, my car quietly rolled beside me, heater set to 75°, ready to bring warmth after the storm.
Excerpt
Setbacks lose their sting when we turn outward. The surest cure for heaviness of heart is to lift another’s. In serving, we find strength we didn’t know we still had.
Intro
After proxy endowment at the Saratoga Springs Temple, rain came hard—55 mph winds, lightning cracking over the spire. I was soaked through but determined to capture the moment. This week was one of the toughest—under the weather, training a new engineer, racing the Windows 10 → 11 deadline. Yet, even weary, I pressed on. Elder Neal A. Maxwell once said, “When difficulties come, don’t feel sorry for yourself. Lose yourself in service… When you feel down, lift other people up.” That truth steadied me more than the storm.
Perspective
In IT, storms don’t always come from the sky—they come from deadlines, downtime, and people who depend on you. The temptation to withdraw is strong, but the gospel has taught me that light returns when I reach outward. Service becomes medicine: teaching, fixing, lifting, sharing, mentoring. Each act reorders the soul toward purpose. The temple reminded me that the Lord’s work never pauses for weather, and neither should mine.
Practice (today, not someday)
When exhaustion whispers, “You’ve done enough,” I’ll answer with quiet action. I’ll keep helping the next person who needs guidance—whether that’s a coworker puzzled by PowerShell or a friend weighed down by unseen battles. The Savior’s healing always flowed outward; so must mine.
Final Reflection
The downpour cleansed more than the temple steps—it washed away my self-pity. I realized that serving amid struggle doesn’t drain me; it refills me. My soaked jacket, cold hands, and the warmth of my car’s heater at 75° felt symbolic: heaven never leaves its servants freezing in the storm.
Pocket I’m Keeping
“Lose yourself in service.” When the clouds gather again, I’ll remember this night of lightning and light—how the act of giving steadied the heart that was slipping.
What I Hear Now
“Lift others. That’s how I’ll lift you.” The whisper wasn’t from the wind but from the One who calms it.
Macro ant on a leaf—small bug, big damage. Quiet inbox rules (forward/delete/hide) are how real-account impersonation starts. This post shows 10 PowerShell fixes to stop it fast.
Excerpt Most “email impersonation” losses start quietly—rules that forward, delete, or hide mail. This playbook backs up evidence, stops the bleed, removes risky rules, clears forwarding, and verifies. Calm hands, clear steps.
Intro Most “email impersonation” (BEC) starts in two ways:
Real-account misuse—someone phishes a password/token and quietly adds inbox rules (forward, delete, hide) or enables mailbox forwarding.
No-account spoofing—look-alike domains and weak SPF/DKIM/DMARC let crooks send as if they’re us.
This post fixes bucket #1 fast. You don’t need Compliance Center/Purview to clean a single mailbox: run these in Windows PowerShell 5.1 to back up → stop all rules → remove risky patterns → clear forwarding → verify. The examples below target [email protected]. After cleanup, keep the door shut by disabling SMTP AUTH/legacy protocols and blocking external auto-forwarding. (For bucket #2, tighten SPF/DKIM/DMARC—that’s outside this quick fix.)
Perspective There are no super heroes in IT—no capes, no instant rescues. When rules go rogue, heroics make noise; runbooks make progress. The job is to protect people’s work with boring, proven steps.
Practice (today, not someday)
Connect (read-only) — open a secure session to Exchange Online for the mailbox you’re fixing. Import-Module ExchangeOnlineManagement -RequiredVersion 3.9.0 -Force Connect-ExchangeOnline -UserPrincipalName [email protected] -ShowBanner:$false $mbx = "[email protected]"
Backup rules to CSV (read-only) — take a snapshot so you have evidence and an easy rollback reference. $ts = (Get-Date).ToString('yyyyMMdd-HHmm') Get-InboxRule -Mailbox $mbx | Select Name,Enabled,Priority,From,SentTo,SubjectContainsWords,MoveToFolder,ForwardTo,RedirectTo,DeleteMessage,StopProcessingRules | Sort Priority | Export-Csv "$env:USERPROFILE\Desktop\$($mbx)-InboxRules-$ts.csv" -NoTypeInformation -Encoding UTF8
Disable all rules (change) — safe stop; nothing runs while you fix things. Get-InboxRule -Mailbox $mbx | Disable-InboxRule -Confirm:$false
Remove delete rules (change) — get rid of any rule that silently deletes messages. Get-InboxRule -Mailbox $mbx | Where-Object {$_.DeleteMessage} | ForEach-Object { Remove-InboxRule -Mailbox $mbx -Identity $_.Name -Confirm:$false }
Remove hide/stop rules (change) — remove rules that hide mail (Junk/Archive/RSS/Conversation History) or halt further processing. Get-InboxRule -Mailbox $mbx | Where-Object { $_.StopProcessingRules -or ($_.MoveToFolder -match 'Junk|Archive|RSS|Conversation History') } | ForEach-Object { Remove-InboxRule -Mailbox $mbx -Identity $_.Name -Confirm:$false }
Remove forward/redirect rules, focusing on external (change) — strip any rule that forwards or redirects mail, especially off-tenant. $internal = @('jetmariano.us') # add internal domains if needed $rules = Get-InboxRule -Mailbox $mbx foreach($r in $rules){ $targets=@() foreach($t in @($r.ForwardTo)+@($r.RedirectTo)){ if($t -is [string]){$targets+=$t} elseif($t.PrimarySmtpAddress){$targets+=$t.PrimarySmtpAddress.ToString()} elseif($t.Address){$targets+=$t.Address.ToString()} elseif($t){$targets+=$t.ToString()} } $external = $false foreach($addr in $targets){ if($addr -match '@'){ $domain = ($addr -split '@')[-1].ToLower() if(-not ($internal -contains $domain)){ $external = $true } } } if($external -or $targets.Count -gt 0){ Remove-InboxRule -Mailbox $mbx -Identity $r.Name -Confirm:$false } }
Clear mailbox-level forwarding (change) — turn off any top-level forwarding set on the mailbox. Set-Mailbox -Identity $mbx -DeliverToMailboxAndForward:$false -ForwardingSmtpAddress $null -ForwardingAddress $null
Verify list and count (read-only) — prove you’re clean; zero is ideal. Get-InboxRule -Mailbox $mbx | Sort Priority | Format-Table Name,Enabled,ForwardTo,RedirectTo,MoveToFolder,DeleteMessage -Auto (Get-InboxRule -Mailbox $mbx | Measure-Object).Count
Re-enable only safe movers (optional change) — if you truly want routine filing, turn on only simple move-to-folder rules. Get-InboxRule -Mailbox $mbx | Where-Object { $_.MoveToFolder -and -not $_.ForwardTo -and -not $_.RedirectTo -and -not $_.DeleteMessage -and -not $_.StopProcessingRules } | ForEach-Object { Enable-InboxRule -Mailbox $mbx -Identity $_.Name -Confirm:$false }
Disconnect (read-only) — close your session cleanly. Disconnect-ExchangeOnline -Confirm:$false
Final Reflection The work narrowed down to steady steps. Not a clever hack—just patience, order, and protection of someone’s inbox.
Pocket I’m Keeping Runbooks over heroics.
What I Hear Now Be steady. Protect the work. I’ll show you the next step.
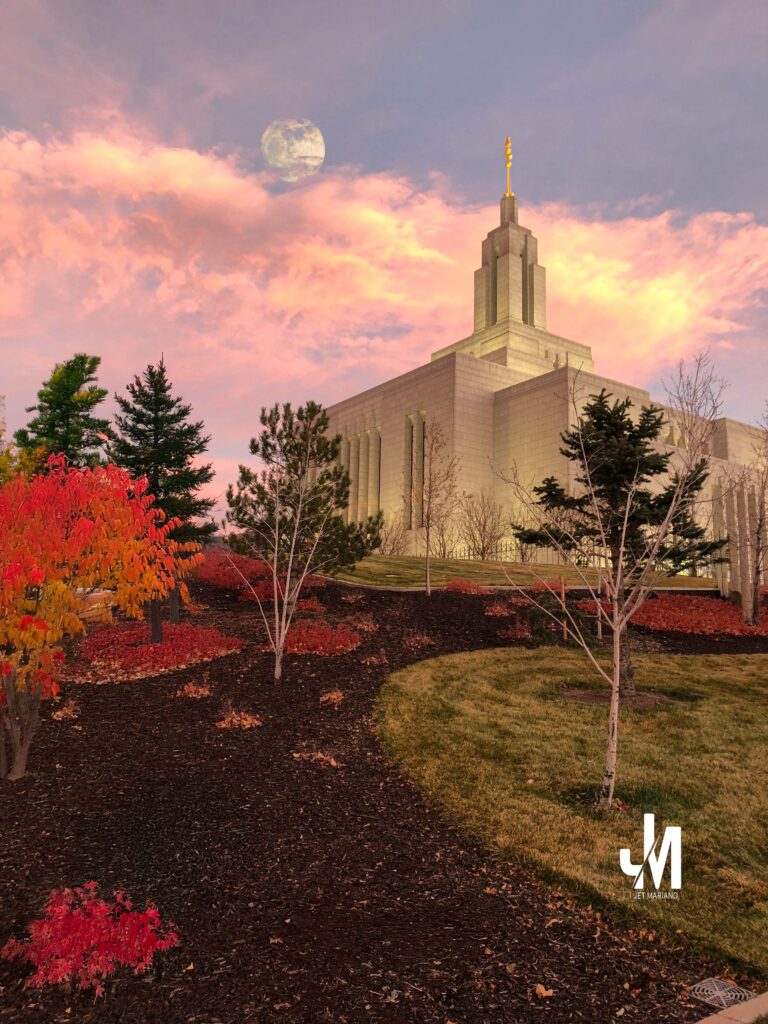
Super Harvest Moon rising through thin clouds over the Draper Utah Temple. Double exposure, short telephoto (70–100 mm f/2.8) on tripod.
Excerpt Setbacks aren’t a verdict; they’re the venue. What feels like a bad break can become a disguised doorway when we trust the Lord’s larger view.
Intro Elder Neal A. Maxwell taught that “bad breaks need not ruin a good man or a good woman… so often in life opportunity comes disguised as tragedy,” and, “trust the Lord, for He sees your possibilities even when you do not.” Those lines met me this week. Sleep was thin, appetite gone, heart stretched—but even the stretch nudged me heavenward.
Perspective There are no super heroes in IT—no capes, no instant rescues. Systems fail, humans tire, plans bend. The real test is not whether I dodge hard things but whether I meet them with faith, honesty, and steady work. Joseph didn’t waste Egypt, and Job didn’t waste ash and silence. I don’t want to waste my own classroom of adversity.
Practice (today, not someday)
Whisper a prayer of trust: “Lord, I choose to keep trying.”
Do one quiet act of goodness for someone who can’t repay you.
Write a single line of gratitude for help you didn’t expect.
Sit in a patch of light—outside or by a window—and breathe until your shoulders lower.
Final Reflection Worry took sleep and appetite, yet the Lord met me in the stretch. He didn’t remove the weight; He strengthened my will and widened my view. A bad break does not define me; how I walk through it, with Him, refines me.
Pocket I’m Keeping “Proving is strengthening.” When the wind rises, roots go deeper.
What I Hear Now Be steadfast. Keep moving toward Me. I know how to carry you.
Green dragonfly camouflaged among yellow-green croton leaves; wings catch a thin line of light.
Excerpt
A dragonfly vanishes into the croton leaves—nearly invisible until the light catches its wings. Even when we can’t see, the Light is still there.
Intro
Elder Neal A. Maxwell compared life’s dark weather to a storm where we cannot see the sun but know it is still there. Likewise, in our stormy moments the Son of God remains constant. This image of a camouflaged dragonfly became a quiet parable of that promise.
Notes from Elder Maxwell
“You’ve all been in a storm… when you couldn’t see the sun but you knew it was still there. Likewise… the Son of God is always there. His light will never go out.”
Hope is not wishful thinking; it is trust in a steady, unwavering Light.
Our task is to keep moving by faith when sight is momentarily withheld.
Perspective
Camouflage works because color and pattern mimic the surroundings. Fear does the same—blending truth into the noise until guidance seems gone. But the Light hasn’t moved. Shift your angle, breathe, and let the glare settle; suddenly the wings glint, and direction returns.
Practice (today, not someday)
When anxiety spikes, pause and pray: “I know You’re here even if I can’t see.”
Name one current “storm,” then write one way Christ has lifted you before.
Look for small glints—scripture lines, kindness, music—that catch the light.
Final Reflection
Faith is the discipline of remembering the sun in a storm and the Savior in shadow. The scene may hide Him for a moment; it cannot extinguish Him.
Pocket I’m Keeping
“His light will never go out.”
What I Hear Now
Hold course. Let Me be your fixed point while the weather passes.
Morning butterfly perched on a dew-tipped blade of grass, reflected in still water as sun rays break through—an image of quiet patience and light.
Excerpt
Patience is not indifference—it’s caring deeply and trusting God’s timing. This image came from quiet hours beside dew and light, waiting for a butterfly to choose the leaf.
Intro
Elder Neal A. Maxwell taught that patience is “caring very much” while submitting to “the process of time.” It partners with faith, agency, humility, and love. Photographers know that rhythm: you prepare, you wait, you don’t rush the scene—and grace arrives.
Patience isn’t passive; it’s faithful submission to God’s wiser timetable.
We “run with patience,” not a sprint—enduring well, not merely long.
Patience protects agency—we don’t force outcomes or people.
It ripens discernment: we learn what matters most and let lesser things rest.
Tribulation “worketh patience,” which yields experience and the “peaceable fruit of righteousness.”
Photo Field Notes
Early-morning dew, low angle, and stillness. I set a full-frame body with a Nikon 105mm f/2.8G on a spider tripod, remote trigger attached. I hid off-axis, letting the leaf steady and the light settle. The butterfly came only when the world quieted enough to feel safe. Exposure and focus were ready—the rest required waiting.
Perspective
Macro work is a sermon in inches. If I keep opening the “oven door,” the scene falls flat. When I trust the light, honor the creature’s freedom, and wait, the frame fills with reverence. So it is with discipleship: God’s work in us is real but rarely rushed.
Practice (today, not someday)
Replace one hurry with one holy pause.
Let someone else’s agency breathe; resist “fixing.”
Choose one worthy thing and stay with it past the fidgets.
Pray, “Let patience have her perfect work in me.”
Final Reflection
Patience is obedience prolonged—faith that keeps the shutter half-pressed until grace enters the frame. God’s timing is not late; it is luminous.
Pocket I’m Keeping
“Patience makes possible a personal spiritual symmetry.” (Maxwell)
What I Hear Now
Wait with Me. I’m shaping both the moment and you.
a monarch resting on a sunflower — a living parable of light, patience, and lift.
Excerpt
When trials feel like too much, remember: the Lord proves us to strengthen us. Like a butterfly on a sunflower, we are held up by light we didn’t make and warmth we didn’t earn.
Intro
Elder Henry B. Eyring taught that through the glorious Atonement, Jesus Christ knows exactly how to succor us. Strength doesn’t grow in comfort; it grows when we feel stretched beyond what we thought we could bear. If we continue in faith — especially when it feels impossible — we become spiritually stronger.
Notes from Conference (Oct 5, 2025 General Conference)
Christ can succor perfectly because He has felt every mortal challenge.
Proving times are strengthening times, not signs of abandonment.
Discipleship is continuing — never giving up, always trying again in Him.
Faith while it’s hard invites His power to change us.
Perspective
God is mindful — of sunflowers and butterflies, and even more of souls. Elder Neal A. Maxwell reminded us that there are more stars than grains of sand, yet “souls matter more than stars.” If heaven attends to sparrows and petals, it will not forget your name, your tears, or your next step.
Practice (today, not someday)
Whisper a prayer of trust: “Lord, I choose to keep trying.”
Do one small act of goodness for someone who can’t repay you.
Write a line of gratitude for help you didn’t expect.
Sit in a patch of light — outside or by a window — and breathe until your shoulders lower.
Final Reflection
The Atonement is not just rescue; it is renewable strength. Trials may bend us, but in Christ they do not break us. Keep turning your face to the light. He will meet you where courage runs thin and hope begins again.
Pocket I’m Keeping
“Proving is strengthening.” When the wind rises, roots go deeper.
What I Hear Now
Be steadfast. Keep moving toward Me. I know how to carry you.
“watching the river run” — Big Cottonwood Canyon, Utah. Long-exposure fall stream; motion becomes grace. Shot very low on a tripod with remote shutter. 4-second exposure at f/11, ISO 200 to smooth the water like silk while keeping the scene crisp.
Excerpt
The current is fast and the banks are close—but I can still choose calm. Today I’m learning that peacemaking starts inside me, then flows outward.
Intro
This stream looks like my week—swirl, speed, and color. I can’t control every bend, but I can decide the spirit I bring into each conversation.
Notes from Elder Gary E. Stevenson(Oct 4, 2025 Sat AM GC)
Peacemaking is a Christlike attribute that begins in hearts, then homes, then communities.
It requires courage and wise compromise without sacrificing principle.
Lead with open hearts, not closed minds; extended hands, not clenched fists.
Taught by Jesus Christ in scripture and reaffirmed by living prophets today.
Notes from Elder Kelly R. Johnson(Oct 4, 2025 Sat AM GC)
Seek validation vertically, not horizontally.
When others try to label us by weaknesses, stand strong in who we truly are—children of God.
Identity in Christ anchors peacemaking; it removes the need to win and invites us to love.
President Russell M. Nelson has taught that using labels can breed animosity, judging, and division; peacemakers look past labels to divine identity.
Perspective
Peace isn’t pretending tensions don’t exist. It’s choosing the Lord’s way—firm in truth, soft in tone, willing to listen, ready to reconcile. Knowing whose I am steadies who I am, so I don’t need to fight for labels or approval.
Practice (today, not someday)
Stop: rehearsing comebacks; seeking validation from reactions and “likes.” Start: pray before hard talks; state principles clearly, then ask sincere questions; offer one olive-branch action (thanks, brief apology, or specific help); write “I am a child of God” at the top of today’s notes.
Final reflection
Rivers carve rock not by force but by steadiness. Peacemaking works the same—courageous, principled, and patient because my identity is anchored in Him.
Pocket I’m keeping
Extended hands, not clenched fists—rooted in the quiet confidence of a child of God.
What I hear now
Be brave and gentle. Hold to truth. Let peace start in your heart and flow to your words.
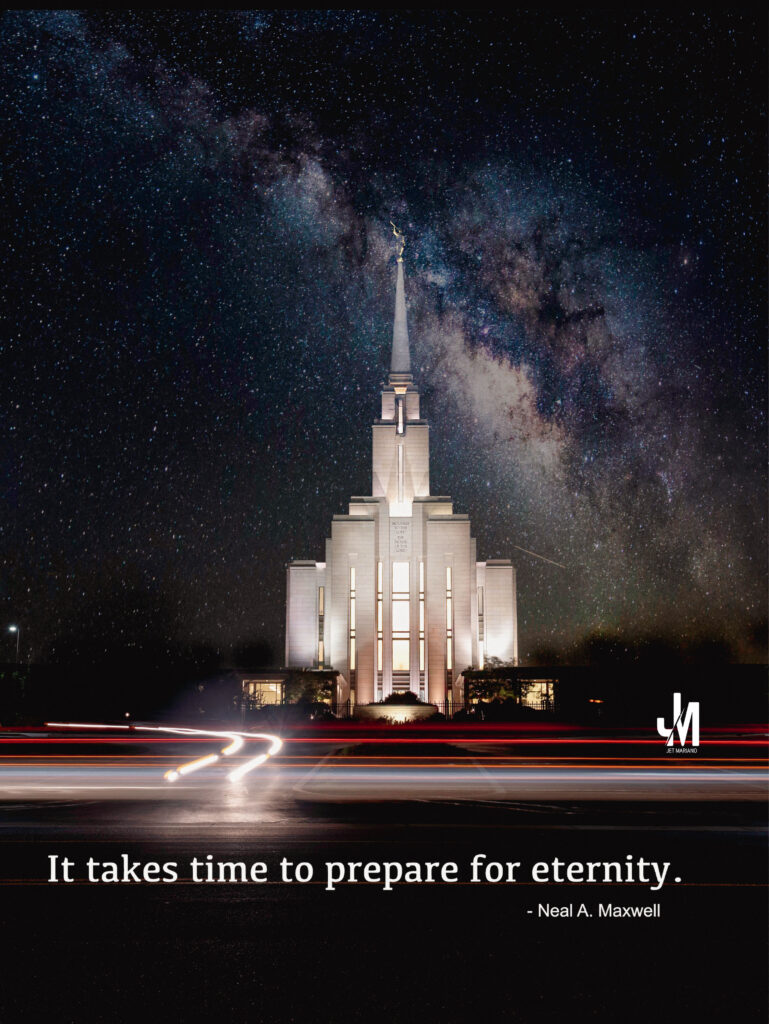
Night setup: Nikon 14–24mm f/2.8G on tripod • Manual/Bulb • 30-second exposure • f/2.8 • ISO 2400
Excerpt It struck on a day I never expected—like the day I lost my father, on my birthday. The same jolt ⚡️ twice. Bitter and sweet at once.
Intro Some experiences arrive unannounced and unforgettable. The day held joy—time with loved ones, a wonderful dinner, thoughtful gifts 🎁 (I treasure shirts and cologne and keep them for years). Yet the soul-stretching overshadowed the sweetness, and the ache still lingers.
Notes from Elder Neal A. Maxwell • “It takes time to prepare for eternity.” • God customizes our curriculum—He gives what we need, not always what we like. • Discipleship is daily; steady choosing matters more than dramatic moments. • Meekness is strength under control. • Cheerfully submit: trust His timing and tutoring. • Be grounded and settled in Christ to endure well, not just long.
Perspective The lingering pain doesn’t mean I failed; it means the lesson matters. Like completed IT projects etched in memory, some days don’t fade—they shape.
Practice (today, not someday) • Pause to breathe and pray before I speak. • Trade rumination for one small act of service. • Write three lines of gratitude (including a gift I’ll lovingly keep). • Use meek words with firm boundaries.
Final Reflection Bitter because it hurt. Sweet because love showed up. Both can be true while God stretches my capacity for trust and kindness.
Pocket I’m keeping “Customized by a loving Father.” Not random storms—tailored tutoring.
What I hear now Be still. Do the next right thing. Let Me do the shaping.
Needed a quick “where did this user sign in from?” report without swapping modules. I used AzureADPreview to export a clean CSV (timestamp, IP, country/state/city, app, client, result). All identifiers below are redacted; mailbox shown as [email protected].
Intro
Security asked for a last-30-days sign-in report. I didn’t want to migrate the host that already had AzureADPreview, so I stayed on that and exported the fields they care about. Notes are redacted and portable.
Notes from {Speaker}
Context: Windows PowerShell 5.x (STA) + AzureADPreview.
Avoided Microsoft Graph SDK on this box.
Output: CSV with location + app/client details.
Perspective (direct quotes)
“Use Windows PowerShell (not PS7) so the AzureAD auth control behaves.” “If you change the date range, re-run the query—don’t reuse the old $logs.”
Practice (today, not someday)
Use this redacted snippet; replace only the UPN line if needed.
Sticking with AzureADPreview is fine when you only need sign-in logs—just remember: PowerShell 5.x, re-query after changing dates, and export only the fields the requester needs.
Pocket I’m Keeping
“Query fresh, then shape.” Most delays come from reusing an old $logs object after changing the date window.